Nobody likes damp gear. A DIY dryer solves the problem.
Issue 144: May/June 2022
I sail year-round, and I can endure as much heat and cold as my passions demand. But whether it is summer or winter, I just can’t abide cold, wet feet. There is something about damp socks that chills me through. If my feet are warm, I’m warm.
Sliding hands into wet gloves, feet into squishy sea boots, and arms into cold and wet foul weather gear just stinks—literally and figuratively. Leave those boots or foulies damp for a few days and the bacteria spring to work, creating foul smells and rotting linings. The faster you get them dry, the fresher they stay and the longer they last.
I built my first boot dryer 25 years ago to deal with the constantly damp gloves and snow boots of an energetic child, but I now use it year-round, more often for deck shoes and my drysuit than for boots.
The key to efficient drying is getting air flowing to every extremity of the gear, focusing on places where natural currents are slow. Heated dryers can get the most sodden gloves and boot warm and dry within two hours by directing warm jets into the fingers and toes. Jackets and dry suits require extensions.
A Google search will result in many simple designs; I’ve duplicated my own several times, with minor variations, for my now-grown daughter and friends. You could buy a boot dryer for the cost of materials (unless you can find most of the materials on the might-need pile, as I did), but it would be a flimsy thing that won’t take the beating that this one has.
Light bulbs last 5 to 10 years, according to use, and the fan is rated for 150,000 hours of continuous service. You can even stretch the design if you have a large family or lots of gear; the fan and heater will handle up to 16 ports, and extensions accommodate tall boots or foul weather gear.
The DIY Boot Dryer
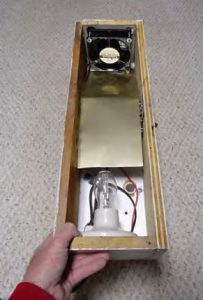
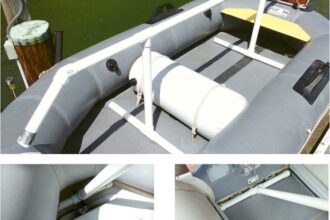
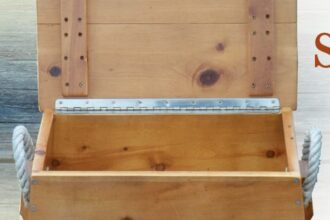
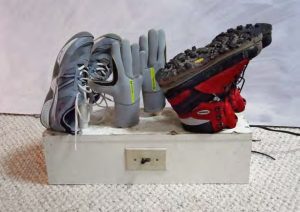
First, build the box. I made mine from 3/4-inch pine scraps, providing room for a fan in one end, a heating lamp on the opposite end, a switch on the side, and riser pipes to hold the gear along the top. Mine is 22 inches long, 7 inches high, and 71/2 inches wide and assembled with deck screws every 6 to 8 inches. You can also glue it if you like, but you must leave the bottom removable for service. If you’re going to have a lot of gear, increase the length.
For the top, use a 1-inch hole saw to create ventilation holes for the risers; I cut six in mine. Cut 3/4-inch PVC pipe into stubs, about 5-6 inches long for gloves and 6-8 inches for boots. Press the pipe stub risers into the holes for a snug fit and seal them with caulk.
Set the top aside and proceed to completing the box’s interior; you’ll attach the top once everything else is installed.
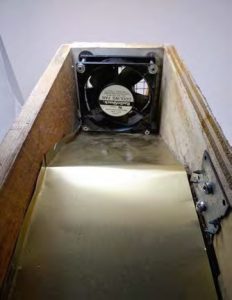
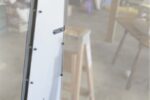
Use a 120-mm, 120-volt muffin fan, or substitute a 12-volt fan for onboard drying. Cut an opening in one end of the box about 33/4 inches diameter to vent the fan. Mount the fan inside the end board with long deck drywall screws. If the fan doesn’t come with a screen, guard the opening with hardware cloth.
Use a 40- to 60-watt incandescent bulb mounted in a ceramic lamp holder (no switch) to provide safe warmth. Don’t use an LED bulb; you need the heat. Mount the lamp on the opposite end of the box from the fan and wire the lamp in parallel with the fan.
For the on-off switch, salvage a power cord and buy a 1-gang electrical wall box with bracket, a single wall switch, and a cover plate. Screw the electrical outlet box to the inside of the heater box along one side, about in the middle. Connect the hot side of the power cord to one side of the switch and the positive leads of the light and fan to the other side. Join the cord neutral to the fan and light neutrals inside the box using nuts (or perhaps a Wago 222-413 connector; they look like miniature line jammers, but each port accepts a separate wire, snapping closed securely against vibration). Provide strain relief where the cord exits the box (a simple strain relief cord connector does the trick).
Cut a sheet of aluminum flashing to fit inside about two-thirds the length of the box. This will direct the air past the lightbulb on the far end of the box so that it will be evenly warmed before it exits the risers. Create an angle in it (like a ski slope) so that its upper end near the light bulb clears the outlet box below and the remainder slopes down to the bottom to the fan end. Attach by bending a flange on each side and stapling or screwing to the side of the box.
Close the box up by attaching the top, and start drying.
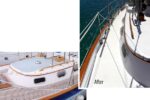
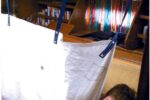
Boots and gloves are easy to dry, but what about big, floppy gear, like a drysuit or foulies? For a drysuit, install a pipe extension (either additional PVC or hose clamped to the riser) and put the suit on upside down, with the air going into the feet. For foul weather gear, put a hanger on the wall, extend a pair of risers using hoses lashed to a clothes hanger pointed into the sleeves, and hang the jacket. I used retired CPAP (sleep aid device) hoses, but anything about 1-inch diameter will do.
 What You Will Need—DF
Following is a parts list for a box of the size I’ve described. Scale up if you’re building bigger.
- 3/4 inch x 10 feet PVC SCH 40 pipe (for the risers), $6.50
- 1 x 8 inches x 10 feet common pine board, $8
- Handful of deck screws, assorted sizes, $2.50
- 8 x 10-inch aluminum flashing, $12
- 1-gang electrical box with bracket, $2
- Single electrical switch, 85 cents
- Wire nuts, etc., 50 cents
- 1/2-inch strain relief cord connector, $2.50
- White ceramic lamp holder without switch, $2
- AC Infinity 120-mm 120-volt muffin fan, $18, or Noctua 120-mm 12-volt muffin fan, $14
- Incandescent lamp, 40-60 watts, $2.50
Good Old Boat Technical Editor Drew Frye draws on his training as a chemical engineer and pastimes of climbing and sailing to solve boat problems. He cruises Chesapeake Bay and the mid-Atlantic coast in his Corsair F-24 trimaran, Fast and Furry-ous, using its shoal draft to venture into less-explored waters. He is most recently author of Rigging Modern Anchors (2018, Seaworthy Publications).
Thank you to Sailrite Enterprises, Inc., for providing free access to back issues of Good Old Boat through intellectual property rights. Sailrite.com