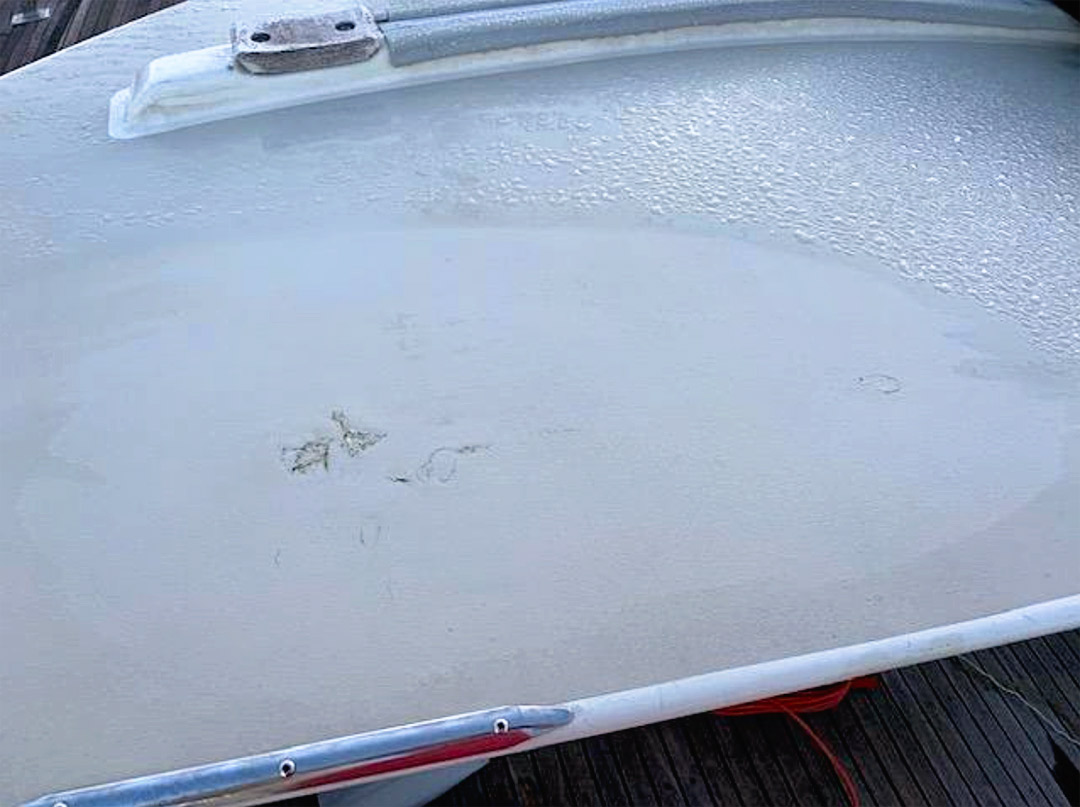
A sailing buddy asked for my help solving a problem on the hard dodger aboard his Taswell 45. Over the years, a series of small cracks had appeared in the top surface that was composed of some kind of vinyl or thick paint. The underside of the dodger was exposed fiberglass matt, painted to match the top. The structure’s thickness indicated a core of some type.
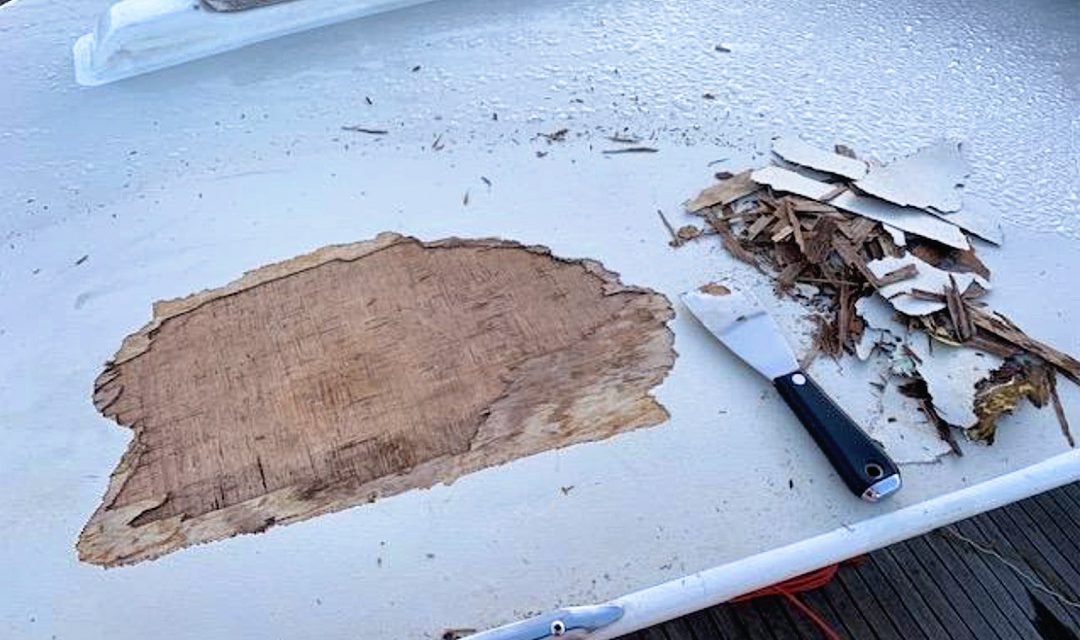
My first thought was to simply peel the top material back at the cracks and fill the voids, then repaint the surface. But poking through the cracks revealed soft material underneath. Tapping the surrounding area found more delamination in a circular pattern. With some hesitation, I started peeling up a small portion of the top surface to reveal a rotted plywood core. Rot extended in all directions; water had been getting into the core for years.
I wanted to minimize damage to the top surface to enable proper fairing once the rotted wood had been removed, but there was no choice but to keep peeling the surface back as far as necessary. I kept the cuts minimal and knew that some of the remaining rotted fibers probably extended under the surface where it was still solidly attached to good plywood. How to ensure that I could stop the rot in these areas?
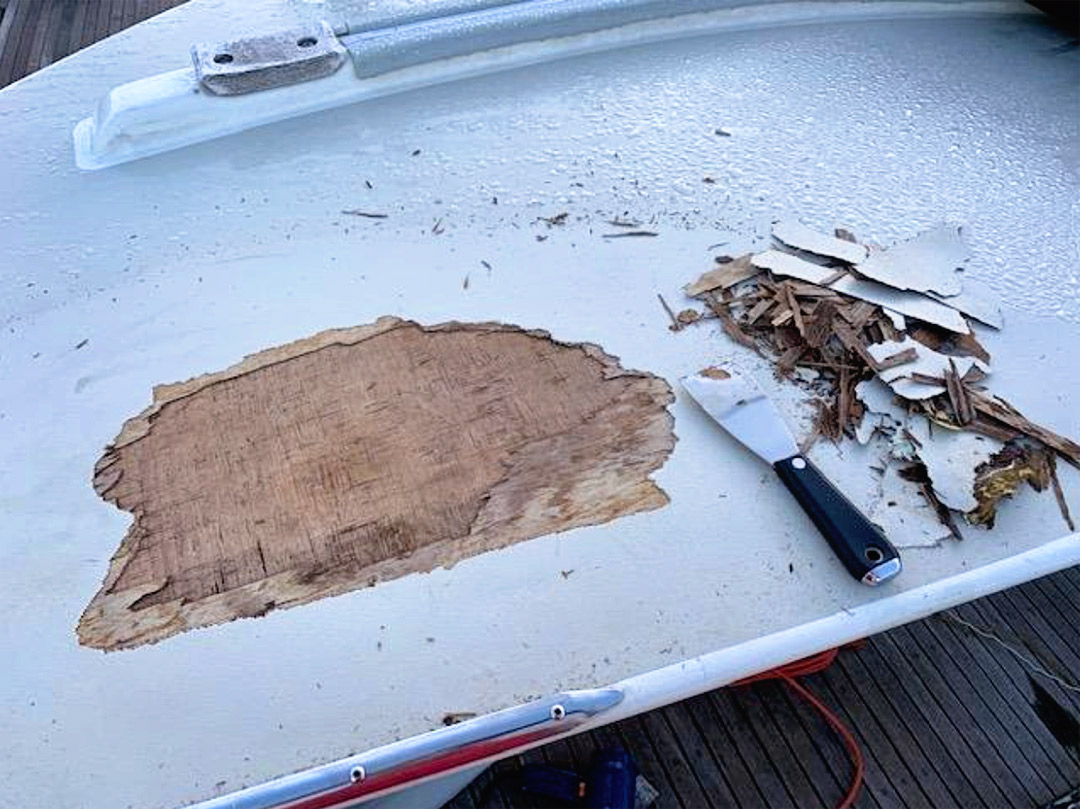
Having used a penetrating epoxy successfully in the past, I purchased a package of “Git”-Rot at the local chandlery. Manufactured by Life Industries under the BoatLife label, I believed it to be the ideal solution to stop the rot in the plywood and strengthen the remaining structure, as the epoxy should follow and encase the damp fibers of the wood. The manufacturer’s instructions indicated that “Git”-Rot would perform on wet wood, but that the epoxy would not displace water saturated into the wood fibers. The dryer the rotted wood, the stronger the results.
So, once I’d removed a majority of the rotted wood, I tented the dodger and applied heat to dry out the remaining wood as much as possible. After a few days of heat, the exposed plywood was still damp but not wet to the touch, a level of moisture that probably extended into the rotted fibers stretching for a few inches under the top surface.
“Git”-Rot comes as a two-part epoxy, a 3:1 mix of Part A resin and Part B, the curing agent, all clearly labeled. The product box, available in three sizes, includes a mixing and application bottle with measuring lines for an accurate mixture. The most commonly available package—16 fluid ounces or 473 milliliters—provided enough epoxy for two applications for this project.
I saturated the exposed wood with the mix using a disposable brush. By the next day, the exposed plywood was solid epoxy, a surface that contoured to the rough plywood. Tapping the top material surrounding the exposed plywood indicated a solid structure underneath. The “Git”-Rot had travelled far enough under the top to saturate the damp plywood and harden. Success!
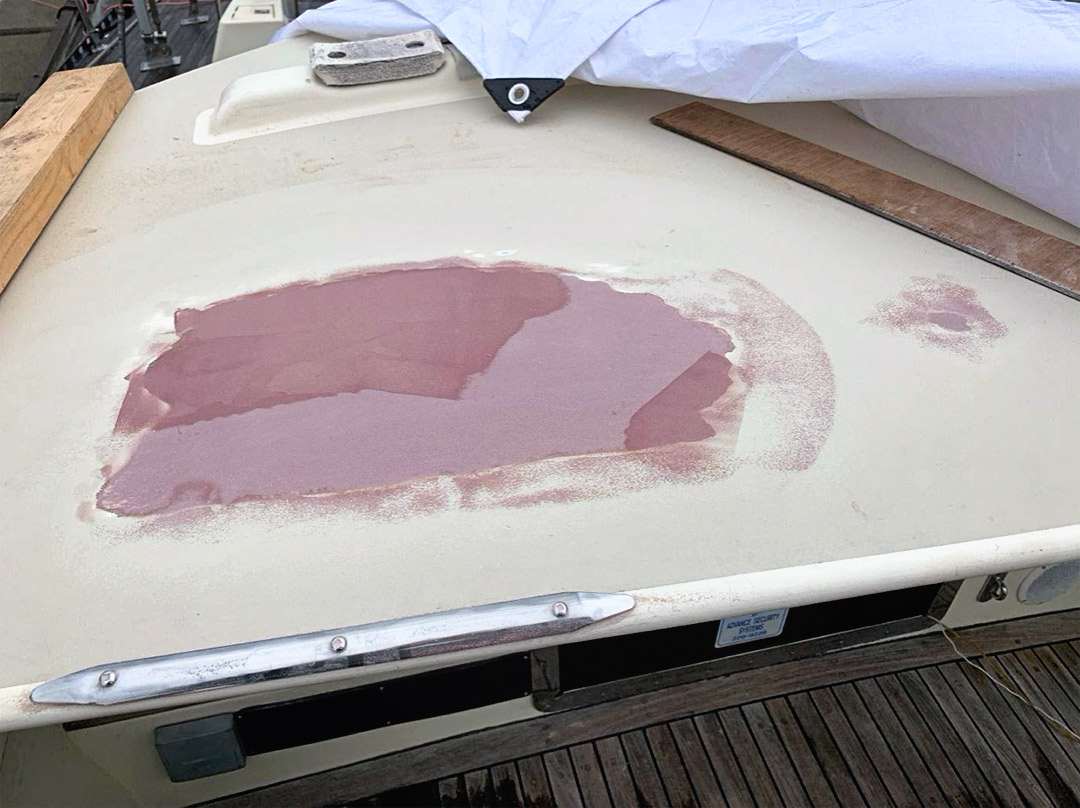
Now I had a hard, very rough epoxy/plywood surface to refinish. I could have used additional “Git”-Rot to fair the exposed epoxy/plywood, but instead I used regular epoxy and fairing compounds (Cold Cure or West System). I applied multiple thin layers to the area, fairing the surface into the existing top. The dodger top was now solid, the fairing blending in nicely to the existing surface. A light sanding of the entire top and application of a matching marine enamel finished the project.
Without a penetrating epoxy, I would have had to peel back additional areas of the top surface and dig out more plywood core to remove all potential rotted fibers, probably down to the fiberglass skin forming the bottom surface. “Git”-Rot saved me considerable time and expense.
