How safe are your chainplates?
Issue 148: Jan/Feb 2023
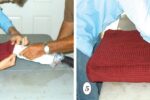
“What’s this? It looks like you have a crack in this chainplate!” my friend John said while dropping into his dinghy.
It was our final afternoon in Panama’s San Blas Islands and we wanted to depart for Portobelo early the next morning. As promised the night before, John was over for coffee, and upon his departure, the horrifying discovery was made.
I hopped into the dinghy, playing along with what I thought was a joke, but came up short. There was certainly something there. I tried to convince both John and myself that it was merely a scratch, but it could not be denied. The top of the forward chainplate was noticeably bent inward, clearly the result of some impact. A small, almost invisible crack ran from the top of the five mounting bolts out to the edge of the chainplate. What was this all about? How could this happen? Where did this crack come from?

Unfolding a Mystery
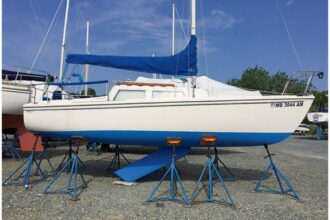
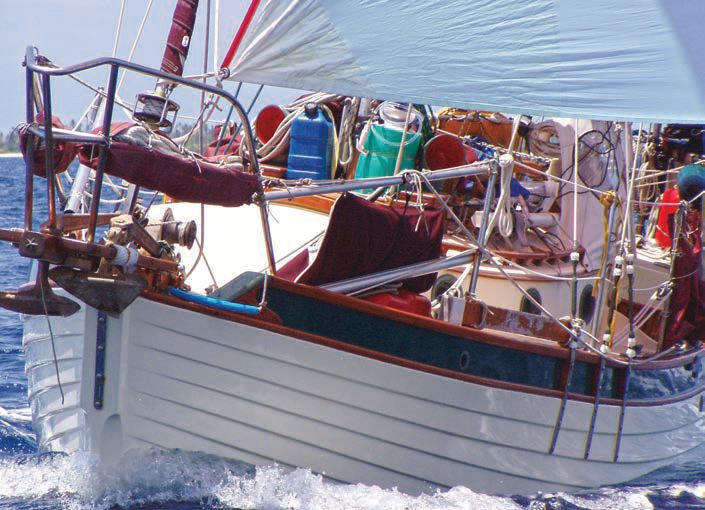
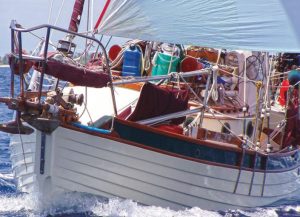
Entr’acte, our Nor’Sea 27, had just spent hurricane season in a Trinidad boatyard; immediately before being launched, she underwent a complete out-of-water survey and passed with flying colors. Between my own inspection and the surveyor’s, there is no way the crack in the chainplate could have been missed. And the only time a collision could have occurred was in a busy anchorage while we were off in the dinghy.
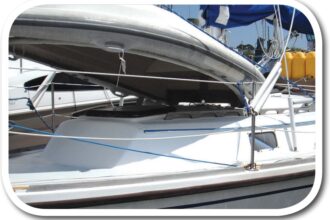
The morning after the survey, we sailed over to Grenada and then on to Panama, blissfully unaware of the demon that had stowed away. A situation like ours could happen anywhere, but here we were in the San Blas Islands. The sun was setting, and if we were leaving in the morning, we would have to work fast. Fortunately, when building and outfitting Entr’acte, we had planned for such a situation. Among our design criteria for the boat was that it have externally mounted chainplates that would be easy to access and change.
designed and built to be interchangeable, should a failure occur.
Entr’acte has three chainplates on each side. Because of the curvature of the hull and deck, each one is slightly different. To avoid carrying the weight of a complete extra set, we had designed the plates in such a way that two plates could replace any of the others in a pinch, depending on how it was mounted. In this case, we chose the closest match, and by mounting it upside down, achieved a perfect and secure bolt match with four of the five bolts. This would get us safely to Colon, where we hoped to have a new chainplate fabricated.
The following afternoon in Portobelo, a close inspection of the damaged plate gave us a real shock. The crack was bad enough, but as I applied a light pressure to the bend, the quarter-inch plate easily straightened out. In doing so, a veritable cavern opened on the back to reveal an absolute horror of rust and corrosive degradation in the stainless steel. This had obviously been brewing for some time. The crack that John saw was not the problem, but in fact, merely a symptom of the real, hidden issue. The impact, whenever it occurred, had simply finished the job.
This discovery made us shudder. Whenever one thinks about a rig inspection or replacement, the focus is usually on the condition of the wires, the terminal end fittings, and perhaps even the turnbuckles. If your inspection also includes the mast tangs as well as the bolts, give yourself a pat on the back for looking up; after all, they do hold up the mast. But what about the other end? When was the last time you actually looked down, and closely, at your chainplates?
Chainplates are important. They do the real grunt work for your rig but they are also the most taken for granted. On some installations they are almost invisible and thus easy to ignore. Because of their physical size, compared to mast tangs, they seem invincible and we expect them to last forever. But don’t be fooled. Chainplates are quite vulnerable to damage and failure. Ignore them at your peril!
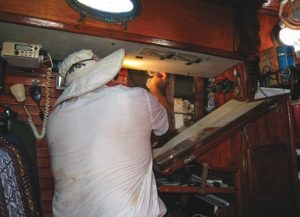
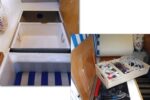
Entr’acte’s interior.
Chainplate Varieties
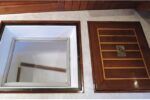
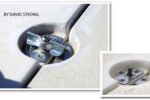
Chainplates come in two basic types, external and internal. External chainplates are simple flat plate stock through-bolted to the outside of the hull. They are easy to fabricate and depending on how the interior is designed, easy to install. We built Entr’acte’s interior with three easily removable panels to access and service the chainplates. Remove three or four screws and pull out a panel for fast, unhindered access to any chainplate. Spares take up little space.
Internal chainplates are more complicated, both in construction and installation. They can be simple flat plate fastened belowdecks or complicated, multipiece designs that are welded together and bolted to some strong, internal structural member that is in turn bonded to the hull. Due to their location, they protrude through the deck or coachroof to lie in wait for unwary feet.
The points where they protrude through the deck are often hard to seal. Inspections can be difficult because the crucial elements are often hidden inside lockers or behind interior cabinetry or trim. Replacement can be a major project that requires the removal of interior pieces to really get at things. Fabricating new ones can be much more expensive, due to the complexity of construction.
Chainplate Material and Corrosion
Chainplates can be made out of almost any metal, from bronze to titanium, but stainless steel is by far the most common. Stainless steel seems like the perfect boat metal. It is basically an alloy made up of nitrogen, aluminum, silicon, sulfur, titanium, nickel, chromium, copper, selenium, niobium, and molybdenum. Mixing these elements in different percentages results in different grades of stainless steel, each serving a different function. These grades are identified by a three-digit number, the most common being 304, 18-8, 316, and 430. Each grade exhibits a different strength, corrosion resistance, and even magnetism. Just because a magnet sticks to stainless does not automatically mean it is prone to rust and is weak or inferior.

surface?
The main contributors to the corrosion resistance of stainless steel are chromium, nickel, and molybdenum. These elements impart a passive film that protects the underlying metal from corrosion attack. The metal thus has the unique ability to self-heal in the presence of oxygen.
Read the last sentence again, slowly, and focus on the key phrase “in the presence of oxygen.”
Stainless only exhibits this superpower of self-healing when oxygen is present. Cut off the oxygen, add salt water, and bad things like rust and corrosion begin to develop in places that can not readily be seen (another key phrase).
How is oxygen cut off? Simply by bolting a flat piece of stainless onto your boat and going sailing, that’s how. The areas exposed to the air (oxygen) are fine, while the back side that lies tight against the hull or bulkhead, well-bedded in some magic goo to prevent leaks, is deprived of oxygen. Through the constant working of the hull, fastenings, and metal over time, small amounts of sea water or salty moisture (condensation) eventually find a way in and become trapped between the bedding compound, the metal, and the hull. Minus oxygen, the deadly corrosion begins and works its way from the back side through the metal to the surface. Flexing and shock-loading accelerates the degradation. A chainplate can appear to be perfectly sound on the outside but internally be quite rotten and ready to fail without warning.
Our failed chainplate looked fine back in the boatyard because the damage had not yet made it to the outward surface. The impact and bend had forced the issue. It was truly ready to fail at any time. Turns out, whoever hit us had done us a huge favor!
What Can You Do?
So, other than being Superman with X-ray vision or clairvoyant, how can you protect yourself from being blindsided by a catastrophic chainplate failure?
 It starts with the material. Chainplates can be made from almost any metal, as I covered above, but there is no perfect “mount it and forget it forever metal” when it comes to boats.
When sourcing new chainplates, insist on quality material and size the plate according to your displacement and usage. There is good metal, bad metal, expensive metal, and cheap metal. Ask your fabricator where they buy their stock. This is one area where it never pays to save a dollar.
After inspecting our original chainplates as well as the failures of others, I believe that besides old age, bad fabrication procedures and poor installations are the biggest contributors to failure.
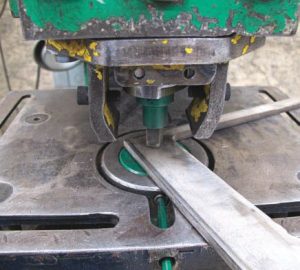
If you decide to make and install your own chainplates, you will quickly discover how difficult it is to drill precisely placed holes into a piece of quarter-inch stainless. Your only choice to obtain accurate results is to use a high-quality drill press or small milling machine. If you insist on square holes for carriage bolts, then a home builder’s only practical choice is to drill a round hole and use a machinist’s broach and press to gently shave the hole square, but all of this takes a lot of time.
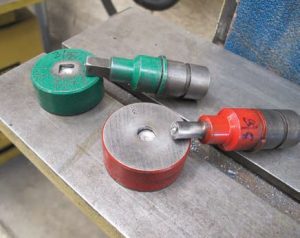
If you are lucky enough to have access to a proper, high-quality, hydraulic punch and dye, it will certainly save time when eight chainplates each need five holes. But be careful. If the punch and dye are old, damaged, or dull, it is possible to overstress the metal and build in a potential failure right from the start.
A professional fabricator, on the other hand, might, depending on the thickness of the material, use a punch far more sophisticated than anything you might have access to. In addition, they will also put the completed plate into a flat press to straighten any deformation and relieve the stresses incurred during the fabrication process. Alternatively, they might also employ a sophisticated water jet or laser cutter, which are incredibly expensive but are less brutal.
Installation is Critical
When doing your own installation, avoid short, sharp bends. The bend becomes a hard spot prone to failure, especially if it occurs at a bolt hole. If the plate must be bent to mate properly to your hull, find a way to shape it into a gentle curve over a longer distance.
New chainplates mean new bolts, washers, and nuts. There simply is no other way. The cost of new fastenings is peanuts compared to the cost of a new mast and rig, but you have to be careful, meticulous, and demanding. Cheap bolts can have casting flaws at the carriage square or under the head which, when tightened, can dig into the metal and damage the plate. The damage will then be hidden under the head and you will never know about it until it fails.
When installing carriage bolts, even in professionally made chainplates, look for and file away burrs and imperfections from the underside of each bolt head and carriage square prior to installation. Woodworkers like to draw the square of a carriage bolt into the wood to lock the head into place. To do this with a chainplate damages the metal and introduces more strain, especially at the corners. A good fit is desirable, but using the bolt to cut its way into the metal is not a good idea. Metal chafe can cause advanced corrosion or weaken the material.
If you are planning to fabricate your own chainplates, make certain to buy flat plate, which is rolled flat and dimensionally accurate, as opposed to gauer bar, which is sheared. The pressure of the shear will give you a chainplate that is flat on its outward face but has a slight hollow on the back.
Provide as much air circulation/oxygen as possible to all surfaces. Some boat manufacturers have tried to completely encapsulate the entire chainplate belowdecks with fiberglass in an effort to prevent moisture contact, but in sealing out the moisture, they also cut off the oxygen.
Inspect and Polish
There is no substitute for proper, regular, and close inspections, but remember, no matter how complete you think your inspection is, you cannot see it all, and the degradation begins in the places you can’t see. A fitting that looked good during your inspection suddenly develops problems weeks or even days later and you find yourself asking, “How did I miss this?” You are not negligent. As a boat ages, these things happen more often, and living on a boat can seem like a never-ending cycle of repairs.
Surveys are indispensable. They serve as an impartial, unbiased eye, but keep in mind that surveyors are human and subject to all the limitations that a boat imparts. Unless they disassemble your boat, problems are just as invisible to surveyors as they are to you. They and you can only count on their experienced eye to spot things that an owner might miss. The only way to be absolutely certain is to actually remove the chainplate from the boat, clean it thoroughly, and examine it under a magnifying glass.
Remember, chainplates are not static. As the boat moves, either under weight or while at anchor or on a mooring, the mast is moving, and as the shrouds work to contain the movement, the chainplates and their mounting bolts are working/cycling as well.
Downwind, the boat rolls and the pull on the rig is steady and even. Upwind in moderate seas, the rig endures more shock loading because of the more severe motion. The hull is flexing, the mast is pumping, the rig is imparting shock loads that all terminate at the chainplates, mounting bolts, and whatever they are attached to. So in addition to succumbing to corrosion, there is also the reality of metal fatigue due to work hardening of the metal over time. It is the wise mariner who makes this thinking part of the inspections.
If you are observant, there are often telltale signs. Surface rust streaming down the metal from no apparent source is a dead giveaway. Rust has its origin someplace, most likely deep inside the metal. If you are purchasing an older used boat and the chainplates are more than 15 years old, figure the cost of replacement into your offer and replace all of them.
Polish, polish, polish! Dried varnish and rust are almost indistinguishable from each other. The cleaner your chainplates are, the more obvious any rust will be.
Conclusion
In the end, Entr’acte’s new chainplates were sourced and mounted. The originals and new spares were stowed away. Now, many ocean miles and 13 years after that fateful hit-and-run, with the boat on her trailer in Arizona, we unloaded her completely to begin a much-needed refit. While sorting and cataloging copious spares, we came upon those good old original chainplates and discovered just how much trouble we had avoided.
Once the old chainplates were properly cleaned up and polished, we discovered that not one of the original six was safe. Each one had serious demons living out of sight. Had we not suffered the mysterious collision that set all of this into motion, something most certainly would have failed somewhere out on the ocean.
Good Old Boat Contributing Editor Ed Zacko, a drummer, and his wife, Ellen, a violinist, met in the orchestra pit of a Broadway musical. They built their Nor’Sea 27, Entr’acte, from a bare hull, and since 1980 have made four transatlantic and one transpacific crossings. After spending a couple of summers in southern Spain, Ed and Ellen shipped themselves and Entr’acte to Phoenix, where they have refitted her while also keeping up a busy concert schedule in the Southwest U.S. They recently completed their latest project, a children’s book, The Adventures of Mike the Moose: The Boys Find the World.
Thank you to Sailrite Enterprises, Inc., for providing free access to back issues of Good Old Boat through intellectual property rights. Sailrite.com