Issue 143: March/April 2022
What to do with rotted wood on a boat? Whether it’s a supporting internal structure or a wood-cored fiberglass sandwich exposed to the elements, either may be remedied with “Git”-Rot, a solution that doesn’t require a total rebuild.

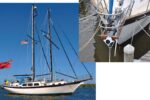
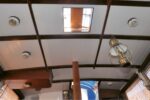
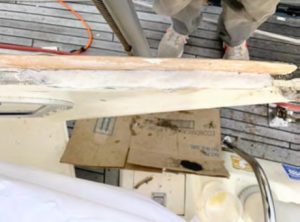
A good example of this product’s usefulness is the hard dodger from a Taswell 45 that I helped repair after it was removed in preparation for an engine repower. The inside bottom edge on the port side was very soft, and the laminate surface was cracking away from the wet plywood core. The thicker fiberglass exterior laminate was undamaged but flexed dangerously when the dodger was lifted from the cabin top. Examination found a completely rotted plywood core for about 20 inches along the bottom edge, extending 6 to 7 inches into the core.
Having used “Git”-Rot before, I believed it would be the ideal solution. The manufacturer’s instructions indicated that “Git”-Rot would perform on wet wood, but that the epoxy would not displace water saturated into the wood fibers. The dryer the rotted wood, the more strength in the results. So, I scraped out as much of the rotted plywood core as I could reach without further delamination, particularly from the exterior skin. Then I placed everything under an improvised tarp with a small heater; after a few days, the core was damp but not dripping wet.
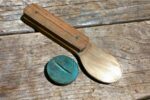
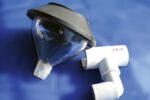
“Git”-Rot comes as a two-part epoxy—a 3:1 mix of Part A resin and Part B curing agent—all clearly labeled. The product box, available in three sizes, includes a mixing and application bottle with measuring lines for accuracy. The most commonly available package (16 fluid ounces) contained enough epoxy for two applications for my project. Mixing smaller batches requires separate mixing containers or the purchase of the 4-ounce package.
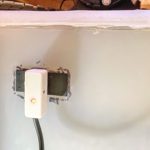
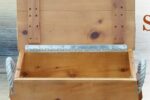
For this repair, the inside skin of the dodger had pretty well disintegrated when the dodger was removed from the deck. I needed to create a dam to hold the epoxy in place while it cured. Clamping a shaped board against the inside of the core, I left a thin space to allow the epoxy to form a replacement surface. Before clamping, I waxed the board and the remaining inside skin to ensure that I could remove the board after the epoxy cured.
After properly mixing the parts, I poured the “Git”-Rot into the cavity created when I had removed the rotted plywood core. The next day, the epoxy was hard and dry, saturating all the wood fiber. Some of it had leaked out of my dam before curing, running down the inside skin. Thanks to the pre-application of wax, it scraped off easily.
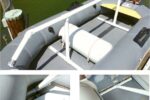
The exterior laminate had reattached to the plywood core, as had the remaining interior laminate. Tapping indicated no voids. Success! It didn’t look pretty, but that wasn’t the goal; the intent was to ensure that the epoxy saturated the disintegrating plywood core and reattached the two laminate skins. To complete the repair, I used standard epoxies or fiberglass resins with filler to fair the surface, then coated everything with a matching paint.
Without “Git”-Rot’s ability to stick to damp wood to create a hard structure, I would have had to remove the inner skin to gain access to all the rotted plywood, fabricate a replacement core, and then glass in a new inner skin—far more work, time, and expense than letting “Git”-Rot create a solid core out of damp plywood.
For more info: boatlife.com/product/git-rot-kit/
Thank you to Sailrite Enterprises, Inc., for providing free access to back issues of Good Old Boat through intellectual property rights. Sailrite.com