Designing a windlass install to fit in a bow locker called on an array of skills.
Issue 138: May/June 2021
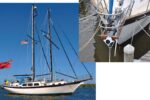
After our first season sailing Fiddler’s Green and weighing the anchor by hand—over and over again—an electric windlass moved way up the project list.
She’s a 1993 Catalina 320 and features an ample rode locker accessed by a large hatch. Inside, a shelf molded into the fiberglass was designed for a particular horizontal windlass and foot switch. Unfortunately, the original owner of Fiddler’s Green was a racing sailor and ordered her sans windlass. Worse, that particular original windlass for which the locker space was designed is no longer sold, and parts are scarce for existing units (knowledge I gained from the active Catalina 320 online owners’ group). Time to research windlasses.
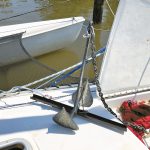
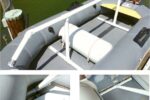
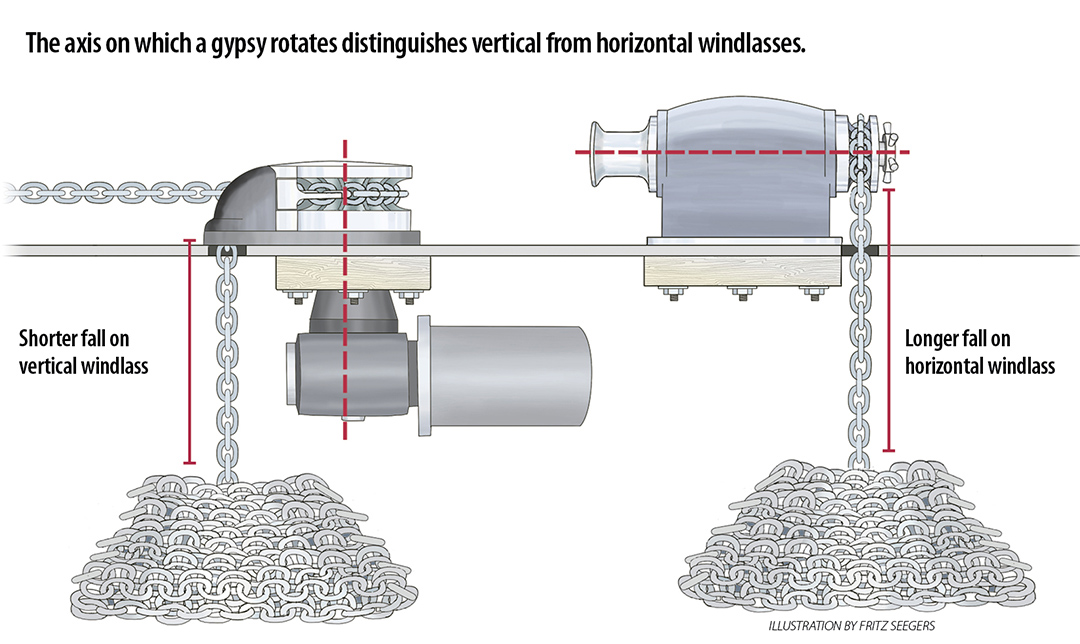
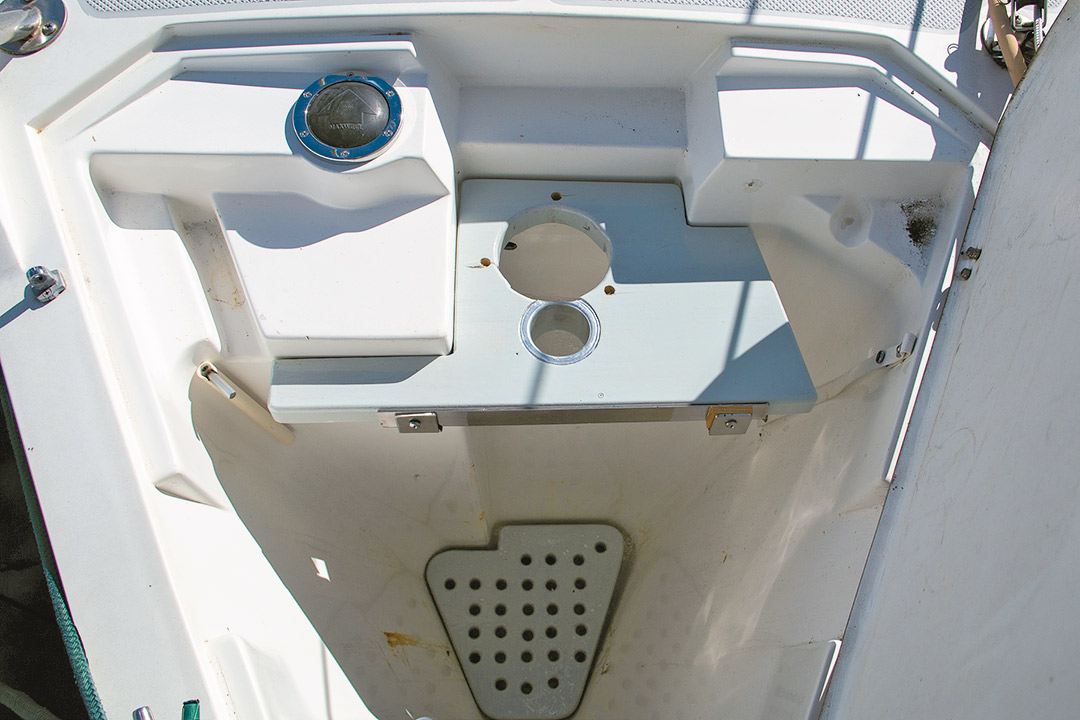
The factory-installed windlass mounted inside the chain locker with no parts protruding above deck. I needed to stay with this configuration, as the hatch covering the chain locker is too thin to support the working loads of a windlass. And, if I installed the unit behind the aft edge of the chain locker hatch, it would protrude into the V-berth, and I wanted to avoid that. Working within the existing molded shape of the chain locker, a horizontal windlass would have been too wide to fit where I needed it to, so I focused on vertical windlass models.
The next step was figuring out what size windlass I needed. Formulas instructed me to multiply the combined weight of my rode and anchor by six. I planned to use 250 feet of 1/2-inch rope (at .25 pounds per foot), 60 feet of 1/4-inch high-test chain (at .75 pounds per foot), and my trusty 37-pound CQR anchor. I figured that with 310 feet of rode, I wouldn’t anchor in more than 60 feet of water, so the windlass would be making a maximum dead lift of 82 pounds (all chain plus anchor), so my working load would be 492 pounds. I rounded up to 500 pounds. Since I wanted to use a combination rope/chain rode, I needed a windlass with a gypsy that would handle both.
I now knew I needed a vertical windlass with a working load rating over 500 pounds and a combination gypsy. Based partly on a recommendation from a marine mechanic friend, I purchased the Maxwell RC6, with a rope/chain gypsy and a working load of 770 pounds.
A major consideration for an electric windlass installation is ensuring the manufacturer-specified “fall” distance is available. The model I chose requires 8 inches of “unobstructed fall from the lowest part of the windlass.” Fortunately, my anchor locker was plenty deep.
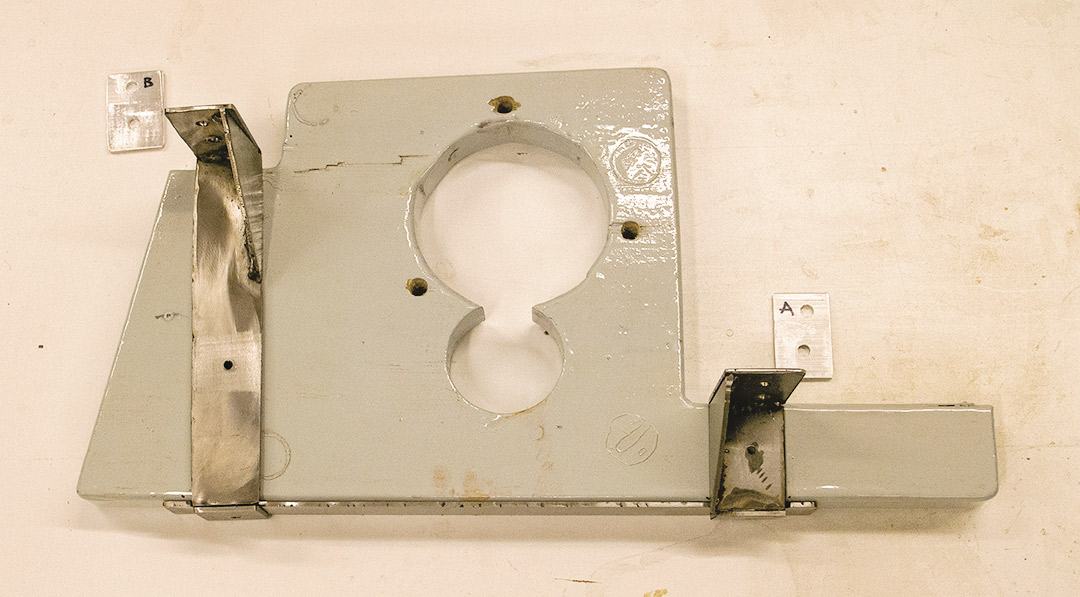
The most complex part of the installation was going to be building a sturdy enough platform inside the chain locker on which to mount the windlass. I decided to work with wood and steel.
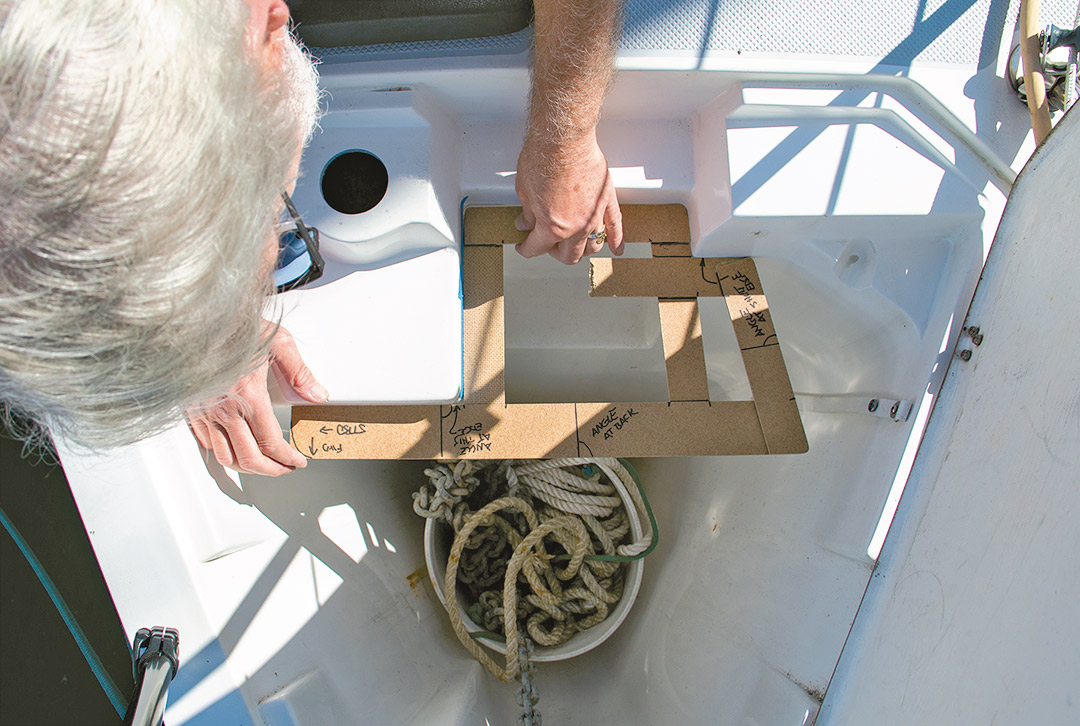
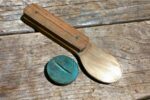
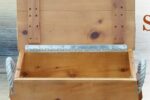
Nothing on a boat is square or plumb, so I made a template of the space where the wood shelf would fit. I measured the angles and marked them on the template. Using the template in my shop made quick work of milling the basic shelf. The windlass included a template for cutting the holes necessary for the motor and the chain to pass through; I used this to cut these holes on the shelf. One concern I had was that the chain, rattling down through the hole in the shelf, would chafe and enlarge the hole over time. Fortunately, I found a galvanized metal collar intended for use on a mooring buoy that fit perfectly, so that problem was solved.
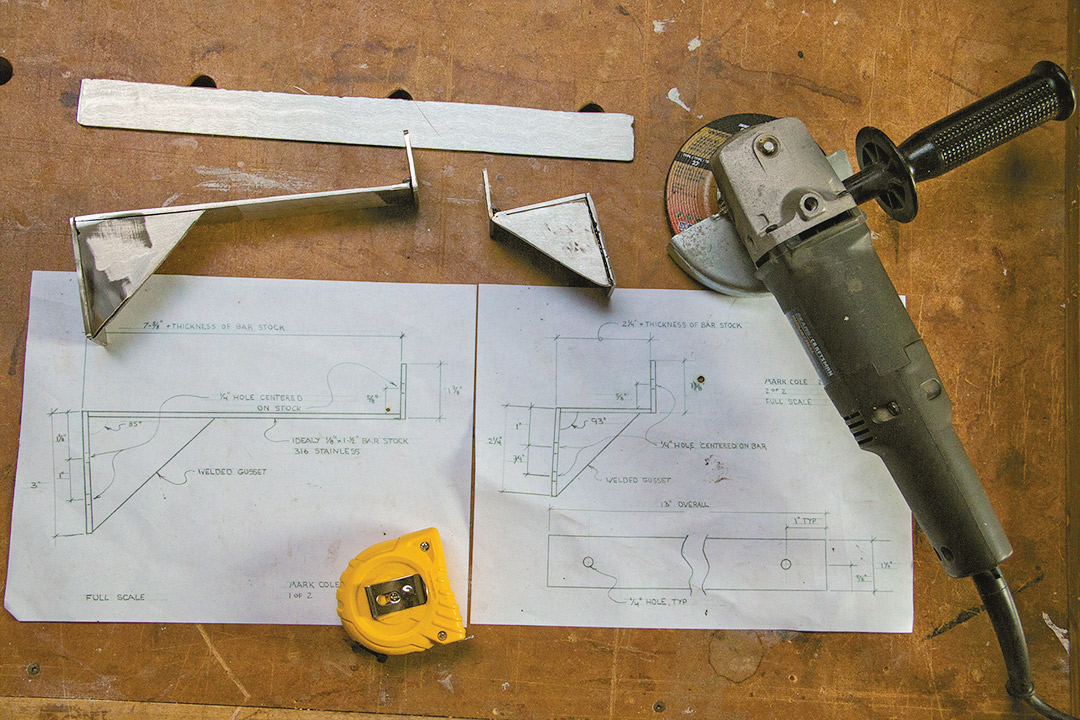
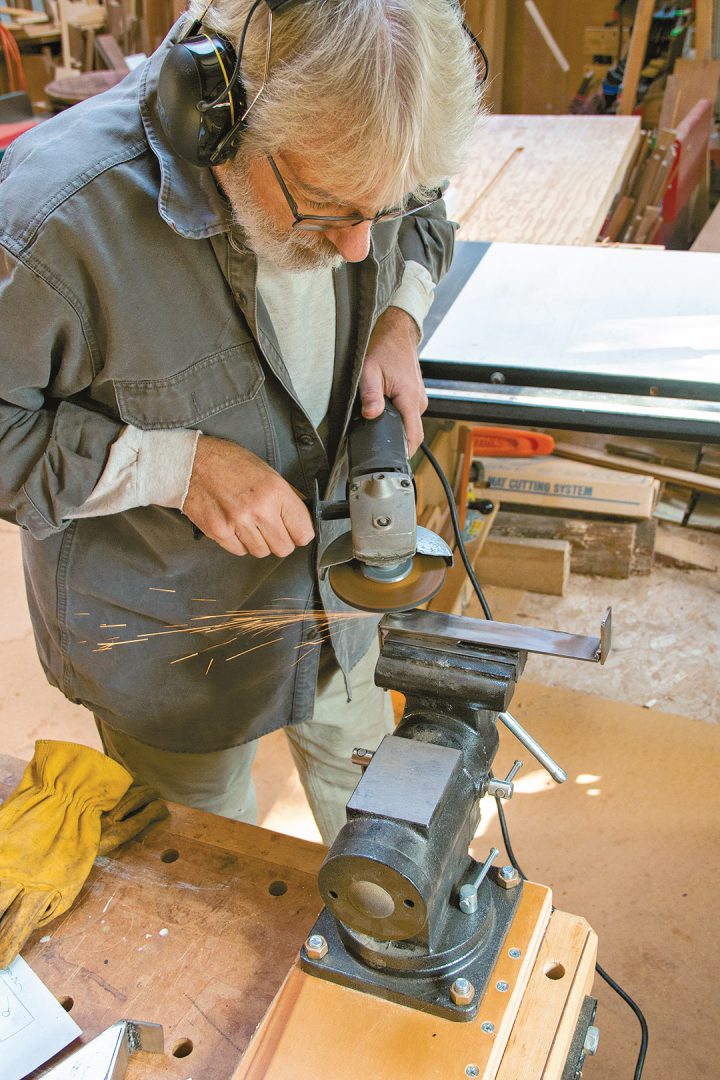
I’m very comfortable with woodworking, but not so much with metal fabrication. Fortunately, I have a friend who has all the metalworking tools needed to make the brackets I designed. He even showed me how to weld stainless steel. Four hours later, the brackets I brought home were pretty rough looking but strong enough to do the job. Besides, once the installation is complete, the only way to see them is to fall headfirst into the chain locker.
After removing a decorative plywood panel in the V-berth, I was able to cut two square holes in the fiberglass liner, allowing me access to the space behind the chain locker. From here, I could reach the back side of the through-bolts that would secure the metal shelf brackets, even allowing me to fit backing plates before tightening down the nuts. It was an easy run to get the power cables up to this space and locate the solenoid and all other wiring connections inside this watertight area.
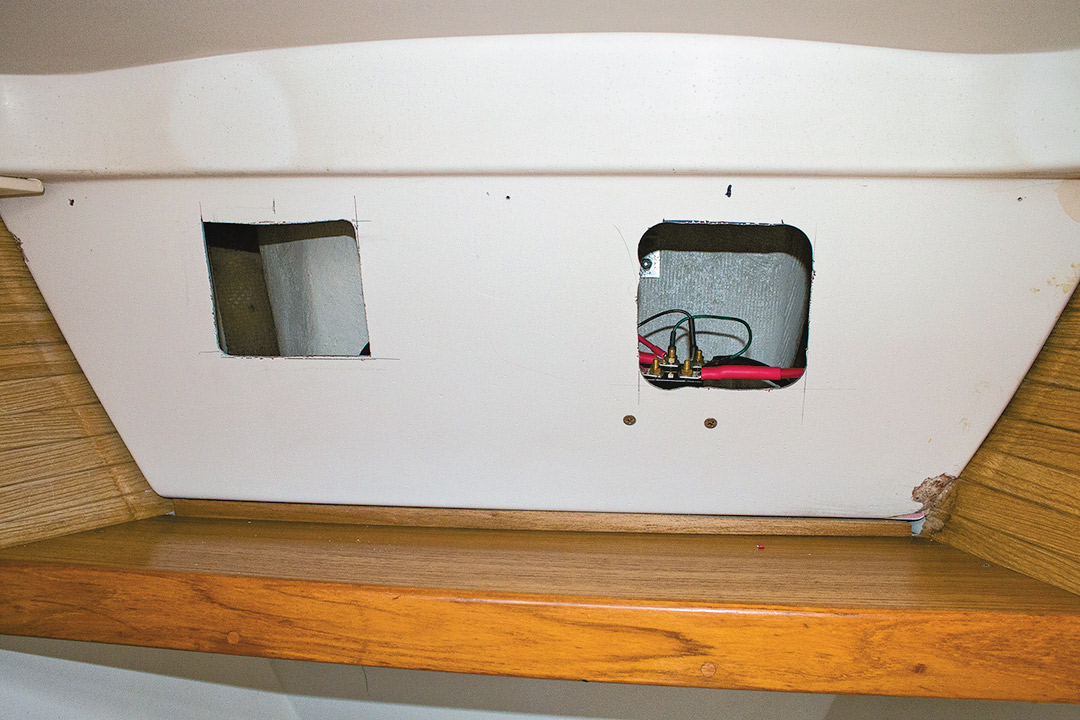
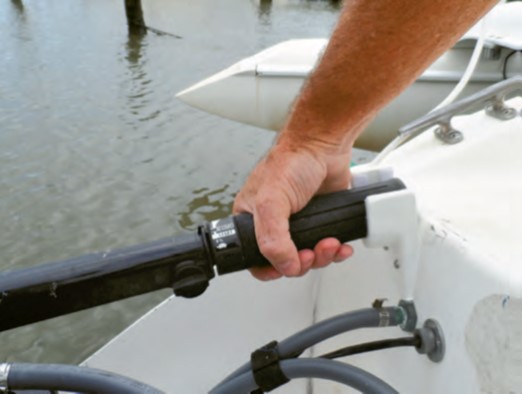
Wiring was straightforward and consisted of running positive and negative cable from buss bars at my house battery bank to a solenoid inches below the foot switch. A 70-amp breaker came with the windlass for wiring into the positive power lead, close to the battery bank. The wiring diagram in the installation manual showed the full deal wired to the solenoid; foot switches for both up and down, plus a remote panel to control the windlass. I only wanted to install one foot switch to raise the anchor, as I planned to use the windlass brake to lower the anchor. I think someone should always be on the bow during anchoring, so I didn’t bother to install the remote panel.
The cable run from battery bank to windlass motor and back was 27 feet, and a cable size selection chart in the manual recommended 6 AWG wire (which I happened to have on hand, helping keep costs down).

With the hard part done, bolting the windlass to the shelf and connecting the cables to the windlass took just a few minutes. I added a Lewmar chain tensioner ($43 at West Marine) to the right of the windlass, to take the strain of the chain and anchor off the gypsy. When the anchor is set, I accomplish this by attaching an anchor bridle to two large cleats on either side of the bow.
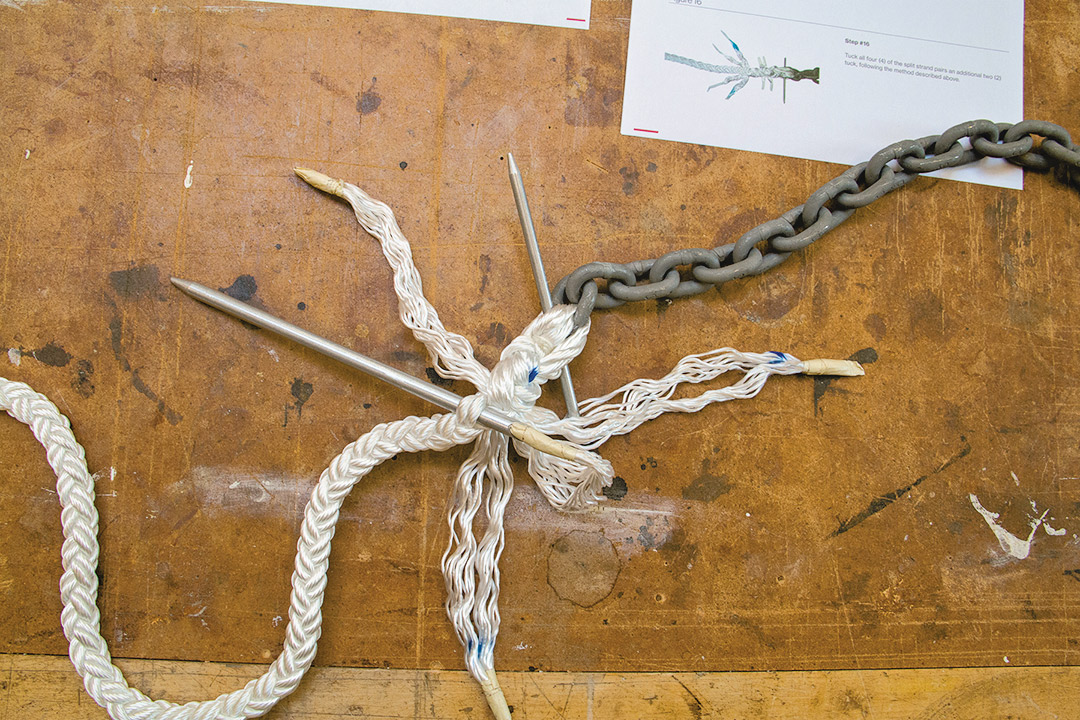
There was one more skill to learn with this project. I’ve done lots of splicing in three-strand and double-braid ropes, but Maxwell recommended eight-plait rope to work best with the gypsy, and it needed to be spliced to my 1/4-inch chain to be able to run through the gypsy. Using instructions I found on the New England Ropes website, I learned to splice 1/2-inch, eight-plait rope to chain. I used paint pens to mark the rope every 25 feet after the chain and loaded it all into the anchor locker.
On the first test, I noticed that the windlass and shelf bounced a bit while raising the anchor. To stiffen my shelf, I made a simple 90-degree bracket to attach above the shelf at the aft end. Problem solved, and my back feels better already!
Mark Cole learned to sail while in the Navy stationed in Japan in the mid-1970s and earned his USCG 100-ton master’s license. He and his wife, Dawne, have been together more than 30 years, and their story of finding Fiddler’s Green, “Love, Carefully,” was in the January/February issue. They cruise the Salish Sea of Washington State and British Columbia.
Thank you to Sailrite Enterprises, Inc., for providing free access to back issues of Good Old Boat through intellectual property rights. Sailrite.com