Fiddler’s Green had overheating problems from the very beginning of our ownership. We got used to checking the temp gauge for the Perkins M30 every 15 minutes or so while motoring, throttling down or shutting down when we had to.
I finally decided to face the problem head-on. The consensus opinion of the Catalina C320 online discussion group was that the mixing elbow was the likely primary culprit, but I looked closely at mine and it was in great shape, clean and no signs of leaking. I instead focused my search for the problem at the other end of the raw-water cooling system.
The through-hull and raw water strainer both checked out fine, so I moved on to the raw-water pump. With the engine running, there was a persistent leak from the back of the pump body, so I ordered a rebuild kit for $110.00. The kit included two new seals and two replacement bearings. I borrowed a gear puller from a friend and found removing, disassembling and rebuilding the pump was straightforward. Better yet, it fixed the leak. And the engine still overheated.
I removed the end caps from the heat exchanger, slid the heat exchanger out, and took it to a local radiator shop to have it pressure tested. They said the passages were clear and that it passed the pressure test, so I reinstalled it, flushed and refilled the coolant, and took Fiddler’s Green out again to see if she still overheated.
The problem was unchanged. And then, as we turned into our fairway and headed for the slip, only about 100 yards away from tying up, the gauge again told us what we didn’t want to know, and we were so close, so we kept going, we didn’t shut down the engine. After we tied the boat up, I went below to check on the engine. I found the bilge underneath it filled with many quarts of hot oil. “I guess I’m going to have to solve this overheating problem once and for all.” I muttered. (My wife remembers hearing something different.)
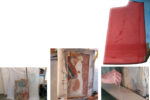
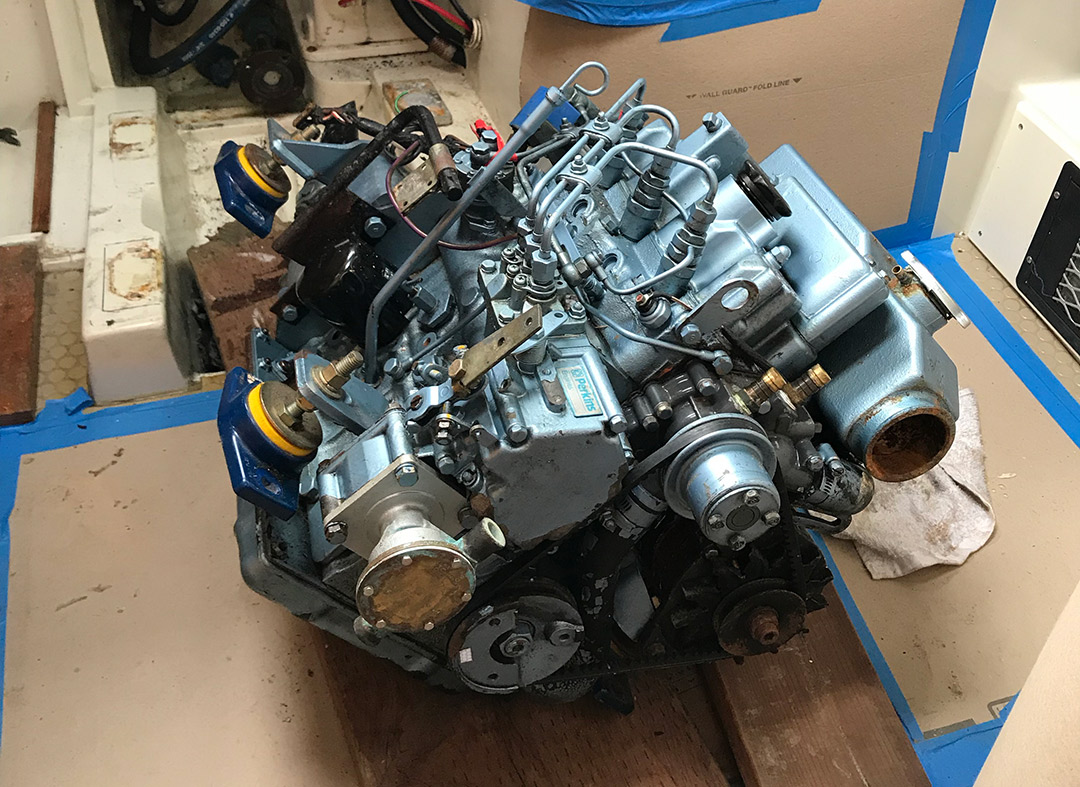
After a little clean up and investigation, I found that a small leak in the oil pan had expanded into a crack because of the increased pressure from overheating. It was easy to see that replacing the pan would mean rigging an elaborate hoist from the boom and running ropes around the engine to lift it out of the boat. I was already imagining one of the ropes slipping out from under the engine and an engine-sized hole in the hull when my friend Kevin climbed aboard. Kevin runs a repair yard.
“No need to hoist the engine.” he said, “We can just slide it forward and lay it on its side in the galley. We do it all the time.” After talking a little more, the project became much more manageable and I had my list of tasks to complete before Kevin came back to help slide the engine forward.
I took photos of all the hoses, wires and cables attached to the engine and then disconnected them all. I unbolted the propeller shaft from the transmission. Kevin suggested removing the bolts that attach the engine mounts to the hull stringers instead of removing the nut that holds the engine to the mount. This is the secret that would allow us to slide the engine forward instead of needing to lift it off of the engine mount bolts. I just needed to trace around all four mounts as they currently sat on the stringers and label the aluminum spacer plates between the mounts and stringer so the engine would bolt back in the exact same place when we slid it back in.
I was surprised by how easily the engine slid out of its engine room and onto the wood skids we had laid on the galley sole. Two guys and a few grunts and it was on it’s side with the oil pan accessible. I had ordered the new pan and the two required gaskets and removing, cleaning and replacing only took me a couple of hours.
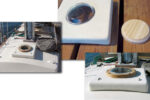
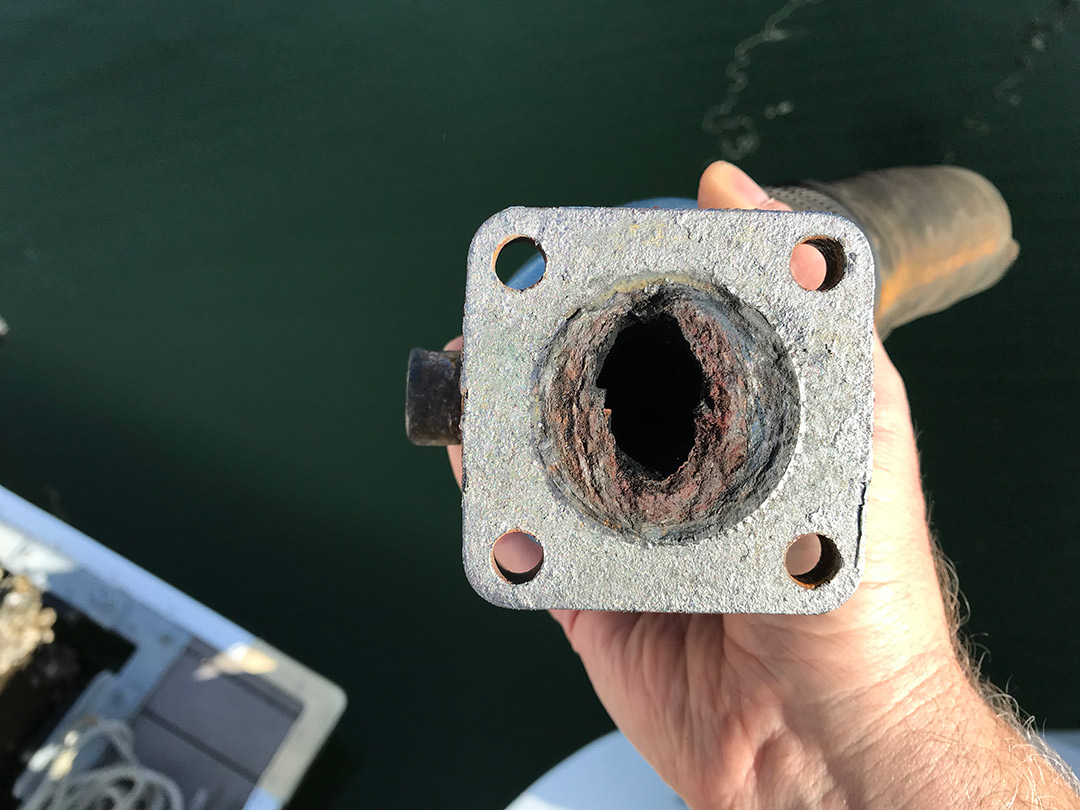
With the engine sitting in the middle of the galley, I realized how simple it would be to remove the rear heat exchanger boot and unbolt the mixing elbow. Once I got the mixing elbow free from the engine block, it was very clear this was the source of my overheating problem! The passage through the mixing elbow was reduced by at least 50%.
I ordered a new stainless steel mixing elbow and new heat exchanger end caps. The only installation issue I had was the smaller size of the exit port on the new mixing elbow. It was sized for 1 ¾-inch I.D. exhaust hose, while the hose fitting on the muffler was 2 inches. Fortunately, Williams Oil Filter Service had the perfect fitting to solve the problem.
The most difficult process in putting the engine back together was installing the rear boot on the heat exchanger. This was one of those tasks that required two sets of hands, one holding the heat exchanger in place at the front and me grunting to get the connections correct at the rear.
The engine was now ready to slide back into place. With Kevin’s help, this was just as easy as sliding it out. After replacing the aluminum spacers under the engine mounts and tapping the mounts back into their exact location, the shaft and transmission lined up perfectly. Thanks to the photos from the start of the project, reattaching the hoses, wires and cables was simple and I obviously didn’t leak any fuel as the engine started up without needing to bleed air from the lines.
The first thing I did after firing the engine up was to check the cooling water spray out of the transom exhaust with a dramatically increased flow. I’ve since motored a few hours straight on a couple of trips and the water temperature gauge is rock solid! After my initial worse-case-scenario fears, I’m pleased to report that the project cost less than one “boat buck” ($795 to be exact). I learned two valuable lessons from this project: 1) It sure is great to have a friend with as much maintenance experience as Kevin, and 2) Advice from the C320 discussion group is usually spot on.