For certain applications, glued-on studs are an alternative to through-bolts.
Issue 147: Nov/Dec 2022
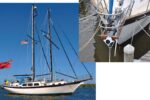
Through-bolts are the gold standard for strength and security when it comes to attaching stuff to our boats, but sometimes, drilling a hole through the hull or the bulkhead into the next cabin just won’t do. Or maybe you just like to avoid pulling down the hull liner for access or creating opportunities for leaks that could lead to core failure.
For projects requiring fastening components that don’t bear rigging loads or are subject to high impact, glued-on studs are a workable solution to avoid the invasive nature of through-bolts. Basically, these studs are 1/4-inch, coarse-thread bolts with big heads adapted for adhesive bonding. I’ve mounted electrical panels, solar panels, air conditioning units (“Air Conditioning: Where the Climate Insists, a Built-In System Pays Dividends,” March/April 2018), and rope hooks using glued-on studs, with nary a failure.
Weld Mount markets a complete system, including a rapid-cure, methyl methacrylate adhesive. I’ve installed hundreds of the 1/4-inch studs in industrial settings, generally to secure conduit and instruments to chemical-process equipment; obviously, you would rather not drill into or weld onto an in-service chemical or refining vessel.
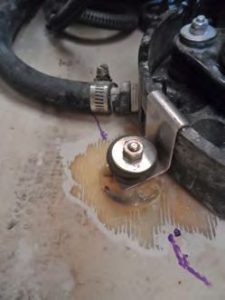
On the boat, I’ve used dozens, mostly mounting electrical gear. I clean the surfaces of all grease, sand with 150-grit paper, apply a 1/4- to 1/2-milliliter lump of glue from the applicator onto the center of the stud base, and press and twist a quarter turn until a little comes out all around the outside. The glue is thick enough to hold the stud in place without support, and depending on the adhesive, within 10 to 20 minutes you can begin installing equipment (it reaches full strength in a few hours).
The only downside to the Weld Mount system is that the studs come in packs of 10, the adhesive is pricey (I like Weld Mount’s AT-2010 for general use, $44 for a 50-ml cartridge, which can bond 150-200 projects, according to the manufacturer), does not keep more than a month even in the fridge, and you need a special gun and motionless mixers. The whole setup will cost about $115 to $120, so if you only need, say, four fasteners, that’s a bit steep. It’s best for commercial users and big jobs.
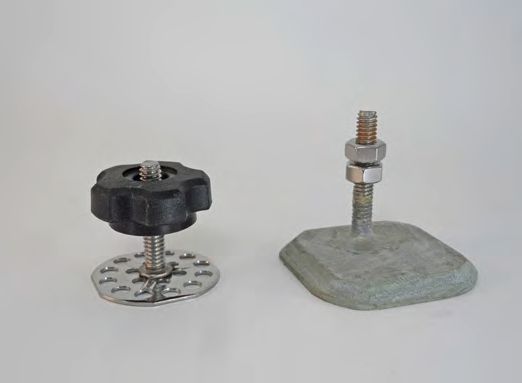
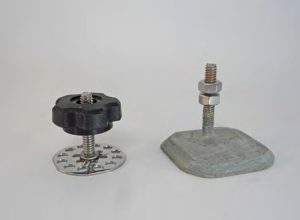
For a smaller DIY job, Sea-Lect Designs offers small quantities of studs; you can buy these as singles and in fourpacks. They come in one size/ thread, 1/4-20 x 11/4-inch long. They don’t require a special adhesive, so the studs can be attached with thickened epoxy or covered with a fiberglass circle for a smoother finish.
However, epoxy is slow-curing so the stud must be held in place, and thickened five-minute epoxy is relatively weak. The best DIY choice is Devcon Plastic Welder, which is just rebadged Plexus MA310. Very similar to the Weld Mount adhesive system, it is fast-curing, pre-thickened, bonds well to stainless, and is stronger than epoxy. Properly mounted, these studs will pull out a chunk of fiberglass skin before failing.
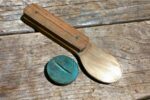
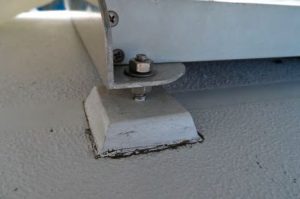
Another possibility is to make your own stud using a threaded fiberglass pad. Cut a piece of 1/2-inch precast fiberglass, such as Garolite, bevel the edges, tap for a 1/4-inch thread, and epoxy in a section of 1/4-inch stainless bolt (degrease the bolt first, as it will carry machining fluid residue). Without the holes of the Sea-Lect Design studs or the high-viscosity adhesive of the Weld Mount system, these tend to slide around as though on skates, so use tape or clamps to stabilize them until the epoxy kicks. Painted to match whatever surface you’re bonding to, these will look like part of the boat.
If you weld, you can make your own studs with larger bases and greater bond area, and even increase the stud diameter.
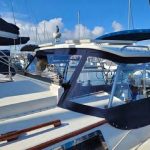
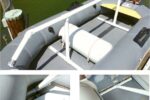
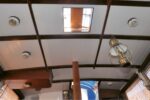
Finally, an alignment tip: Sometimes it is simplest to hold the equipment in place and install the studs through the mounting holes while the glue is still wet. For our AC unit, we placed the unit and then positioned the hold- downs with the glue-on studs around the perimeter of the pan. When the epoxy kicked, we tightened the nuts and had perfect alignment with no measuring. When mounting solar panels, we let the studs hang from the frames and gently placed the panels and frames on the hardtop. A nice feature of mounting equipment like solar panels on studs is that you can adjust the heights for a stress-free fit.
I don’t recommend these solutions for equipment that bears rigging loads or is subject to high impact. The skin of a cored hull can pull off if the load exceeds the skin-core bond strength of about 500 pounds per square inch (the stainless stud bases are about 1.5 square inches), and Weld Mount rates its 1/4-inch studs at 500 pounds.
But if you have an application where they can work, you might want to try them. I’m happy when I don’t have to drill through a bulkhead or a deck, and I’ve never had a failure.
Good Old Boat Technical Editor Drew Frye draws on his training as a chemical engineer and pastimes of climbing and sailing to solve boat problems. He cruises Chesapeake Bay and the mid-Atlantic coast in his Corsair F-24 trimaran, Fast and Furry-ous, using its shoal draft to venture into less-explored waters. He is most recently author of Rigging Modern Anchors (2018, Seaworthy Publications).
Thank you to Sailrite Enterprises, Inc., for providing free access to back issues of Good Old Boat through intellectual property rights. Sailrite.com