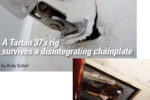
Fabricating a spray hood changes the companionway game.
Issue 139: July/Aug 2021
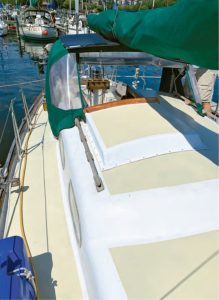
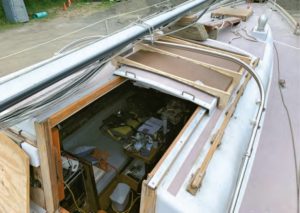
Our 1965 Alberg 35 has been a wonderful boat to us, but there are a few places where she could stand to be a little more watertight. The companionway was one of them. We didn’t take water over the companionway slider too often, but when we did, it had the annoying habit of dripping below and generally getting the boat wet where we wanted it dry.
Also, the dodger had to be unsnapped from the forward end of the companionway slide to open it, and then reattached to a second set of snaps when the slide was open. The reverse was required to close up the slide when conditions would get snotty.
A spray hood over the companionway slider would solve both problems, so I set out to build one.
I decided that the easiest way to build the spray hood was to lay up fiberglass in a female mold. One advantage of having the female mold was that it could be placed on the boat for some test fitting to ensure the edges would line up where desired, and that various curves, angles, and dimensions were what they needed to be. Of course, before I could lay fiberglass in a mold, I needed a mold.
Fortunately, there were no significant compound curves in this project, so I was able to use thin dry-erase board to make the mold. I planned to control the shape by fashioning ribs to hold the board to the desired shape.
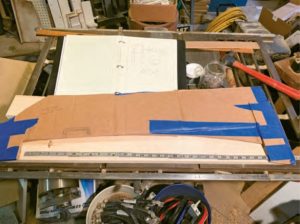
First, I made patterns for the ribs using cardboard. Because the edge of the cardboard wasn’t very smooth, I used a batten as a ruler to trace a clean line onto 1 x 4 lumber. I cut the wood to shape using a bandsaw and then smoothed it with sandpaper.
Once satisfied this first rib for the mold was perfect, I used it as a pattern for two more. These two were easier, as I was able to trace the pattern, make rough cuts using the bandsaw, and then use a laminate router riding on my first template piece to smooth the edges.
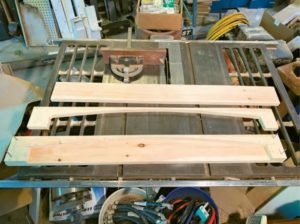
After all three ribs were made, I turned them upside down and glued the dry-erase board to them using Gorilla wood glue. This formed the basis of my female mold.
Once the glue was dry, I attached strips of 1-inch lumber to the bottom of the ribs to define both the sides and the height of the spray hood. These “side rails” also protruded past the forward end of the spray hood, and I cut these ends at an angle to create a sloped surface on which to attach the dry-erase board, creating a template for the raked forward end of the finished spray hood. After this, I glued dry-erase board to the sides and front of the mold.
Next, I filleted the inside corners of the mold using automotive body putty. Then, I applied two coats of automotive paste wax to the entire interior surface before beginning to lay in fiberglass; this would hopefully ensure that the mold would release the fiberglass once it had hardened.
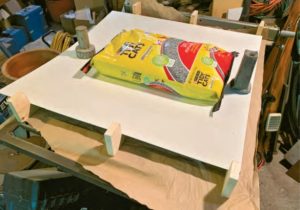
The deck is painted, so I didn’t feel it was necessary to start with a layer of gelcoat. Because it would cure without leaving an amine blush, I used MAS low-viscosity epoxy resin with MAS medium hardener. I layered in mat and roving and let it tack up and harden before applying another layer. Since I was usually doing this work in the evenings, I typically put down a single layer and let it cure overnight.
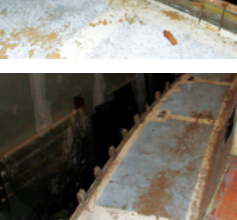
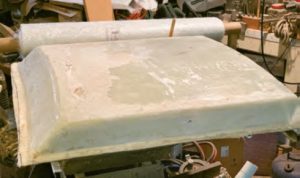
After laying in enough layers of mat and roving to build up the thickness to about one-quarter of an inch, I popped the hatch from its mold—though it wasn’t as easy as that sounds. Turns out I missed a spot with the wax, and the epoxy glued itself tenaciously there, forcing me to destroy the mold as I peeled it from the fiberglass in pieces. Then I used a sanding disc to remove the remaining pieces of the mold now laminated to the hatch cover.
It was exciting to finally see my very rough and unfinished spray hood. What came next was probably the most tedious part of the build, at least for me—filling and fairing. Each evening after work, I would search for voids, sand them out, and fill them with thickened epoxy. I’d let them cure overnight, sand some more the next day, and then flip the shell over and do the other side. Because the epoxy would tend to droop on the vertical surfaces, I had to fair them separately with the shell oriented differently. So, gravity and my work schedule conspired to slow me down—that, and I kept noticing more pinholes here and there that would demand another round of filling, fairing, and sanding, which would add another day or two.
I also took another trip to the boat to dry fit the cover and to trim the flanges to make everything even and presentable.
Once the dry fit was successful and the surface smooth, it was time to paint. I started with a couple coats of white Rustoleum enamel (the same paint I used on the main deck) and followed that with two coats of an almond color of the same paint with non-skid particles mixed in.
Next, I drilled countersunk screw holes around the perimeter flange where the hood would be attached to the deck. I fastened it with #10, 3/4-inch stainless steel screws every 4 inches, sealing it with TotalBoat Seal.
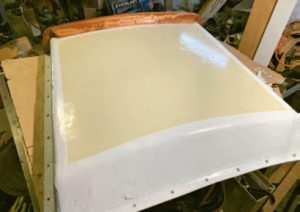
A fellow woodworker fashioned a piece of teak for me to serve as trim for the aft end of the hood and also provide a location where the dodger canvas could be secured. The teak also serves as a stiffener along the aft edge of the sea hood.
After several weeks of work, I installed the finished product over the companionway sliding hatch. It looks great and the spray hood is even stiff enough to stand on, though it does flex slightly when I do so. The best compliment I received was from the skipper next door who did not even notice the change to my boat. I guess I was successful at matching her lines and not harming her aesthetics.
Tom Alley has been a ham radio operator (NT2S) for over four decades. He and his family sail a 1965 Alberg 35 sloop, Tomfoolery, and are active racers and cruisers with the Finger Lakes Yacht Club in Watkins Glen, New York. When he’s not sailing, thinking about sailing, or tinkering with his boat, Tom is either scuba diving, hanging out with fellow amateur radio operators, or (as a last resort) working as an engineer to support his sailing addiction and, if there’s any money left over, send his kids to college.
Thank you to Sailrite Enterprises, Inc., for providing free access to back issues of Good Old Boat through intellectual property rights. Sailrite.com