A DIY cutting board that works in the marina, underway or at anchor
Issue 153: Nov/Dec 2023
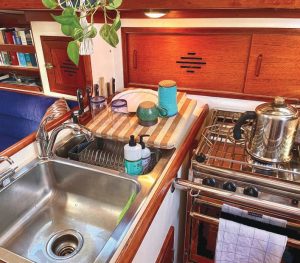
I love it when a piece of boat gear has multiple uses. One favorite example is an angled cutting board I spotted in the galley of a wooden sailboat named Viking O. It approximated the boat’s angle of heel for improved functionality under sail and doubled as a dish drying rack when positioned to drain over the galley sink edge. Lastly, it sat flat atop the sink, providing additional counter space when the sink was not needed. More than just a cutting board, it’s a versatile galley multitool.
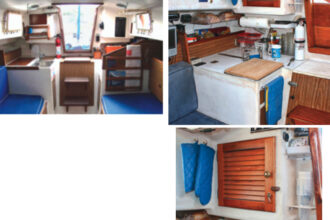
The dimensions of the sink and adjacent countertops are different aboard our 36-foot Morris Justine, Sundance, but the design of the cutting board was easy to modify. So I set out to build one for myself.
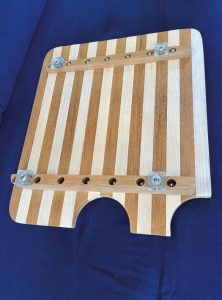
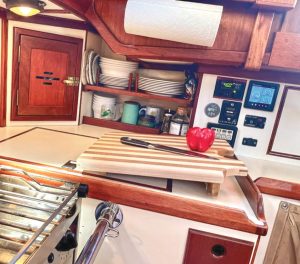
The teak rails bolted across the bottom of the board are where the magic happens. One rail is 1.5 inches wide. The other rail is 3 inches wide. This difference in width provides the helpful angle for dish draining at anchor and vegetable cutting under sail. There is no way to calculate the ideal angle because boats are always tipping this way and that (even at anchor, far too often!), so I winged it and just chose an angle that felt right.
Set athwartships on a countertop, the board provides an excellent work surface in the heeling galley, thanks to its standing angle. When the boat is brought around to the other tack, the cook simply rotates the board 180 degrees to approximate the new angle of heel.
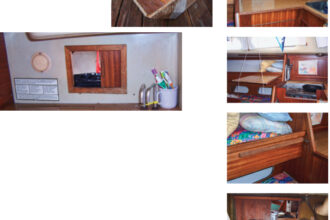
Our board has been in use for a few months and spends the majority of its time atop the sink, where my wife and I appreciate the additional counter space it provides. The bottom rails are sized to fit into the sink like a snug plug, keeping the board securely in place.
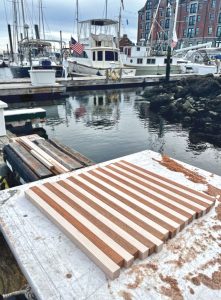
I started construction by ripping teak and maple boards down to 1inch by 1inch square baluster planks. I needed eight of each to match the 16inch width of the galley sink apron, but I cut a few extras to have spares on hand. Next, I cut all the planks to match the length of the sink apron, 18.5 inches. I finished construction without needing the spares, but I quickly used them all in other projects. This dimension of hardwood has proven to be exceptionally handy stock to have lying in wait.
If this cutting board has any chance of staying flat, it needs to start out its life flat. The clamps I used to hold the planks together during glueup also had a tendency to induce a curl in the board. To prevent that, I clamped the board flat to the bench. Scraps of shrinkwrap plastic on both the clamping bench and clamp pads ensured that the board didn’t end up glued to the bench or clamps. A trial run with the clamps to work out an effective plan for the workbench before adding glue was helpful. After an overnight clamp, I removed the excess glue on my new creation using a palm sander fit with 80-grit paper.
Store-bought cutting boards tend to warp and split with the passage of time, and I was determined to prevent both issues on my galley multitool. The angle rails that I bolted to the bottom of the board worked like frames and helped prevent both problems. For additional reinforcement, I added endgrain splines. I used a table saw to cut a dado in the ends of the board to accommodate the splines. (A dado blade on a router table could have also cut this slot just as nicely.) I glued battens of teak in place, cut to match the width of the slot, and then sanded flush. I used West System 105 Epoxy Resin for glue on both the planks and the splines.
A favorite coffee cup helped me define the radius for the corners. I traced the curve of the lip of the inverted cup onto the corners with a pencil on both the top and bottom of the board. Switching to a belt sander, I then carefully rounded down the square corners of the board to the pencil line.
sailing on a starboard or port tack.
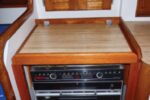
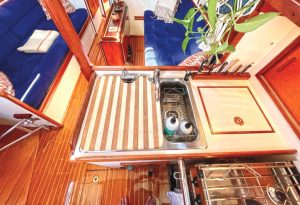
Back at the sink in the galley, a pair of pesky faucets sat on the sink apron where I envisioned my board would sometimes rest. Either the faucets had to go, or I needed to create cutouts for them in my board. I opted for the cutouts. A hole saw in a drill did this job easily. The cuts went through the teak endgrain splines, exposing the construction detail in an interesting way.
Aligning the board with the sink apron was tricky. The rails are shorter than the width of the board and disappear into the sink to allow the board to lie flat. Once down in the now dark hole, those rails have a new job: They must hug the walls of the sink snugly to keep the board from sliding around. But the fit can’t be too snug or the board will be difficult to remove from the sink. The rails also do the important cosmetic work of centering the board on the sink apron.
Confidence in my measurements and my bolting plan was low and I didn’t want to drill holes in the wrong place on the new cutting board, so I made a simple plywood mockup of the top and used it to test fit. Once I had the rails mounted where they needed to be on the plywood, I transferred the hole pattern to the cutting board.
I bolted the rails in place with 10 x 24 316 stainless bolts in every other plank. I countersunk the bolt heads into the top working surface of the board and covered them with matching bungs. I considered using teak bungs in the maple planks for a contrasting look, but after some impromptu focus group polling, I decided that was too busy and ended up sticking to my original plan of using like materials. The nuts and washers on the other end of the bolts were countersunk into the rails, with no metal protruding from the bottom edge. Since the holes on the bottom of the rails are out of sight, I refrained from adding bungs to cover the nuts. I also thought it would be helpful for these holes to be allowed to breathe and drain should the top bungs ever develop a leak.
The last step was to add feet to the bottom of the rails for a secure countertop grip. I wanted nonmarking pads with great nonskid properties, built with nothing that would rust. I ordered several samples for inspection and testing. To avoid rust, the embedded metal washer in the rubber foot had to be not just stainless, but good quality stainless. Despite the manufacturer’s claims, I didn’t trust the quality of the stainless until I could see it with my own eyes.
I set up a test station where I rinsed the different candidates with salt water several times a day over two weeks. My dish of wet rubber feet proved to be something of a countertop curiosity during this time — some would even say an eyesore — but I’m glad I did the testing because several candidates failed badly. In the end, I used four clear rubber feet with highquality embedded stainless washers made by Hilitchi and purchased from Amazon. Each is screwed to the bottom of the rails with a 1inch #10 stainless steel screw. We carry two sets of spare rubber feet aboard.
I opted to round the top edge of the board with a router bit for a pleasing finish that matches the other cabinetry in the galley. Minor hand sanding on the bottom edge of the board produced a more subtle radius for a cleaner fit to the sink apron. I left all surfaces unfinished and plan to give the board a good sanding for cleanup from time to time.
My contraption is large and can get in the way at times in our small galley. Fortunately, it tucks away nicely under the stove when we don’t need it. In practice, though, we rarely put it there and instead just move it around the galley and keep it in use. When we sail offshore with potential storm conditions, we stow the board in its safe spot under the stove to make sure it can’t fly around the cabin.
Speaking of sailing, I’ve found one more unexpected function for my galley multitool: It’s a heeling gauge. When the vegetables start rolling off the high edge of the board, it’s time to put in a reef.
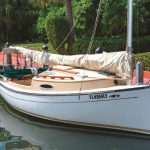
Christopher Birch is the founder of Birch Marine Inc. in Boston. He and his wife are now cruising full time aboard their 36-foot Morris Justine, Sundance. Follow their voyage at www.EagleSevenSailing.com
Thank you to Sailrite Enterprises, Inc., for providing free access to back issues of Good Old Boat through intellectual property rights. Sailrite.com