Replacing leaky toerails with beautiful bulwarks was an intensive but rewarding job.
Issue 142: Jan/Feb 2022
Despite her many attributes, our 1979 Cheoy Lee 41, Avocet, for a time was living up to the epithet “Cheoy Leaky,” and when my husband, Chris, and I realized that the toerail was a significant source for many of those leaks, we knew we had to come up with a solution. We put a Band-Aid on by applying a bead of Teak Decking Systems caulking on the seam where the toerail met the deck and hull. That mitigated the problem for a couple of years until we had the time, money, and plan to convert our leaky toerails to lovely bulwarks.
Back in the 1970s when Avocet was built, the Cheoy Lee Shipyard in Hong Kong was known for its strong fiberglass construction. To make the hull-to-deck joint on which the toerail would reside, Cheoy Lee glassed in a shelf where the deck would sit in and on the hull. As the deck was dropped into place, builders applied a generous amount of sealant in the joint, then fiberglassed the two pieces from the inside.
Externally, the joint was not glassed over—a labor-intensive and expensive additional step. The quicker, tried-and-true approach was to construct a toerail and through-bolt it on top of the joint; on Avocet, the 41-foot-long, 1¼-inch by 4-inch toerail was bent into place and drilled every 12 inches down through the wood, the deck, and the hull shelf before finally being bolted in place.
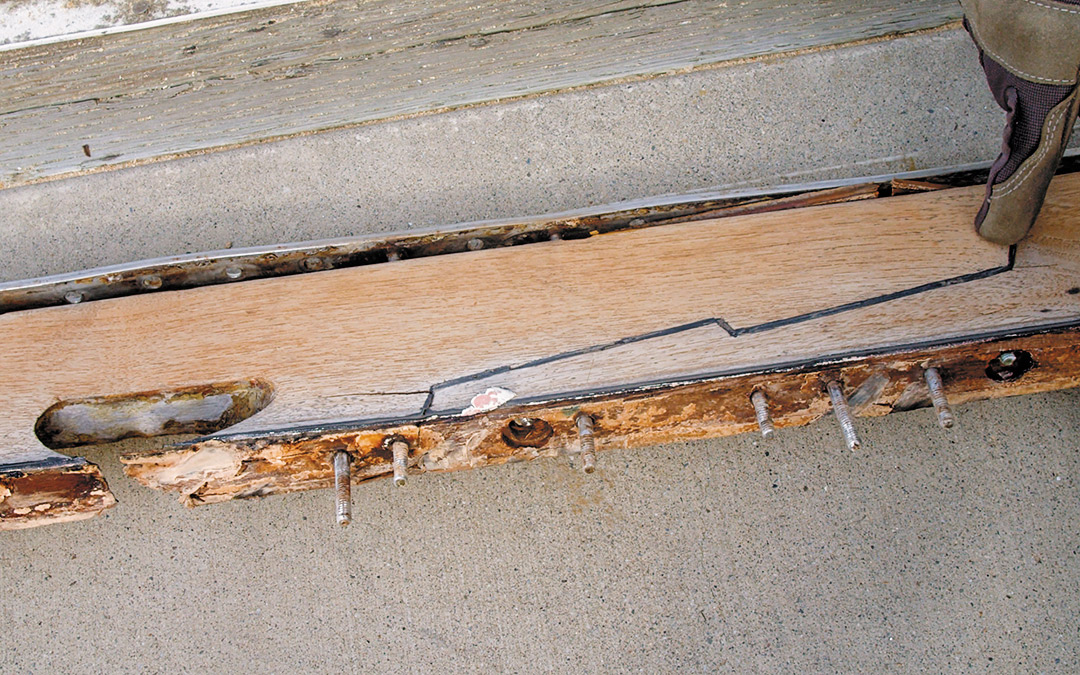
And in that final step—bolting—lay the rub. Cheoy Lee was also known for using poor-quality stainless steel, and the galvanically corroded stainless bolts and bronze nuts that connected the toerail to the deck compromised the otherwise solid structural integrity, in addition to being prone to leaking. When we removed what was left of 180-plus bolts, many of them crumbled in our hands, making it clear where the water had found voids to creep below.
Faced with the choice of repairing the damage and installing a new toerail or considering a completely new option, we opted for the latter and began looking into designing and installing a bulwark.
The Design
What’s the difference between a toerail and a bulwark? In the most basic way explained to us by various boat designers, a toerail is a piece of wood, aluminum, or fiberglass that usually does not exceed more than 3 inches tall and is bolted every few inches through the deck. Anything bigger, which typically is bolted to the stanchions for support, is called a bulwark.
Because whatever we chose would be integral to the hull-to-deck joint, we considered sailor and author John Kretschmer’s advice on the matter, noting that the ideal hull-to-deck joint for a bluewater boat “does not rely on bolts, screws, rivets, or adhesive for strength or watertightness. The joint is heavily glassed on the inside, the entire way around the boat, and solid stainless steel rods [are used] for mounting stanchions [that] are recessed into the bulwark thus eliminating potential leaks so common when stanchion bases are through-bolted.”
Choosing the bulwark option would give us that sought-for seamless hull-to-deck joint, which would reinforce the interior glass as well as reconcile the damage and voids left by the old bolt holes. Unlike a toerail, we could drill far fewer holes to fasten the bulwark bases and stanchions, further limiting potential for leaks—and we wouldn’t use the dissimilar metals (stainless steel bolts and bronze nuts) as the builder had, so corrosion would be much less likely.
Inspired by a blog called Far Reach Voyages, in which the boat owners created and installed bulwarks on their Cape Dory 36 using a Lyle Hess Bristol Channel Cutter blueprint, we developed our design to incorporate a 6-inch-tall wooden bulwark that would sit about 1½ inches off the deck.
Chris concluded that the best way to mount the bulwark was by fastening it to a series of stainless steel L-brackets installed along the deck. Using this design, we could keep our existing stanchion bases by incorporating them into the L-brackets, making the brackets’ horizontal surface just slightly larger than the stanchion bases. When the time came to bolt the brackets to the deck, these bolts would first go through the stanchion bases, which would sit directly on top of the brackets’ horizontal surface. This would mechanically join each bracket and stanchion base without requiring us to weld them together, which would have been costly.
After running our bulwark plan by boatwrights, engineers, and local fabricators, we concluded that our design idea was sound, and we got to work. We planned to make the toerail-to-bulwark conversion part of a series of projects that included repainting the topsides and deck.
The Prep
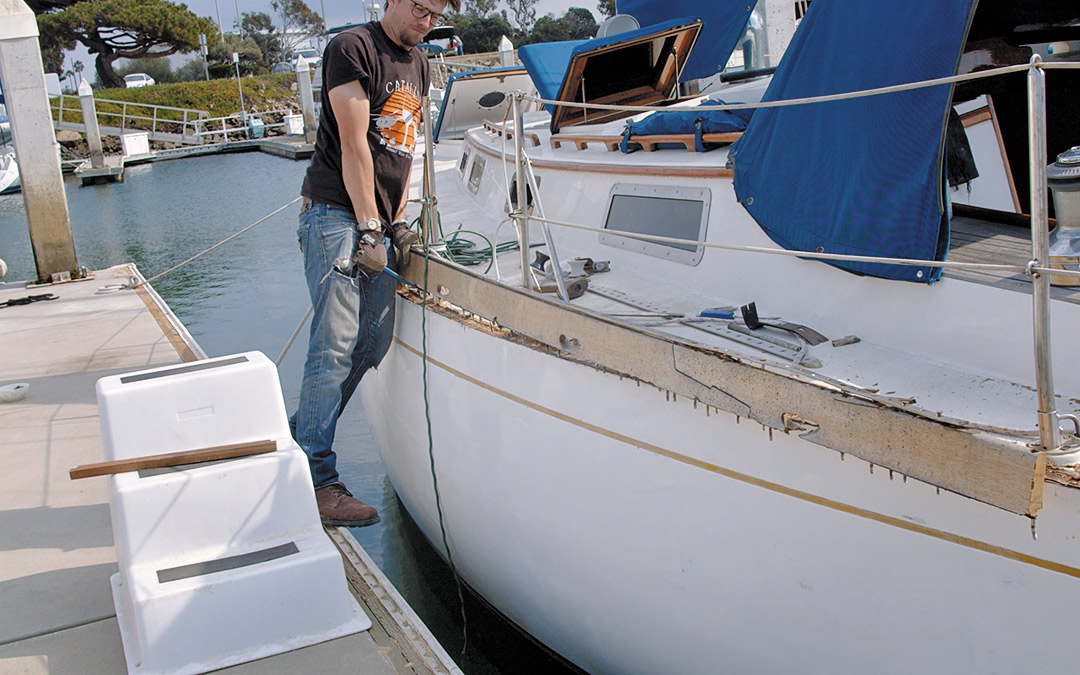
We did as much prep work in our slip as we could before our haulout. We removed the toerail by drilling out what was left of the corroded through bolts. We used a crowbar to pry the teak up from the hull-to-deck joint, though in some places where it had been sealed with 5200, we Sawzalled the pieces out.
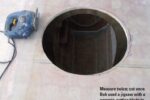
We used an angle grinder with a flap disk to remove any remaining old caulking. Once the joint was clean(ish), Chris measured 3 inches down from the deck and marked a dot every few feet. Using a 15-foot batten we found in the boatyard, he laid the batten along the dots and then then hot-glued it to the hull. This would act as a guiding edge for the router, which he fitted with a 1/2-inch-wide straight bit.
With it, he removed a 3-inch-wide, ¼-inch-deep band of fiberglass along the outer edge of the deck and top edge of the hull. This created a bed for the two layers of 6-inch 1708 fiberglass cloth we would lay in to seal the exterior edges of the hull-to-deck joint beneath.
We did one last round of sanding with 60-grit before rounding the sharp edge where the deck met the hull, using a ½-inch roundover bit in the router. This would allow the glass to adhere better, as fiberglass does not like to conform to hard bends. Since we had anticipated laying up two layers of glass, we rounded this edge deeply enough for the glass to be inlaid with room on top for fairing compound.
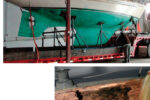
With the surface prepped, we were finally ready to glass. Using a nifty worktable we had set up, I cut the glass and wet it out using a fin roller and squeegee before passing it off to Chris. This method preserved our epoxy supply and increased our efficiency. We started with the smaller area of the transom, then expanded our work to the starboard and then port sides.
Chris first applied a thin layer of US Composites medium epoxy hardener to the working surface. Working in 6-foot sections gave him just enough time to lay the fiberglass and work each piece into the edge with a fin roller to remove all the air bubbles, then be ready for the next layer as soon as I was done wetting it out. We continued this method for all 88 feet over the course of two days, taking three hours per side.
Twenty-four hours after the glass had set, we lightly sanded using 80-grit on the orbital sander to remove the amine blush and any high spots before we began applying fairing compound. Using US Composites fairing filler and epoxy, we applied three rounds of fairing compound, sanding with our Flexisander long board with 80-grit between each application to ensure a smooth surface. Then, we rolled on a two-part epoxy barrier coat that we used on not only the bottom but the topsides as well, since as a cruising boat, the entire hull is subjected to being constantly wet and rolling in the swell.
We used the barrier coat as blister protection as well as for its ultra-high-build primer characteristics that filled the small cracks, low spots, pinholes, and things we couldn’t see with the naked eye while fairing. This showed us where we needed to sand, fill, and fair more before continuing on to the Awlgrip primer for the topsides paint job.
Slowly, Avocet began to look a bit less derelict, with the grey barrier paint hiding her once-fairing-compound-pink hull-to-deck joint and various splotches revealing hull imperfections. Chris rolled the Awlgrip primer, and two days later, Avocet was completely off-white and only had to be sanded one more time before being ready for the final topcoat.
The Supports
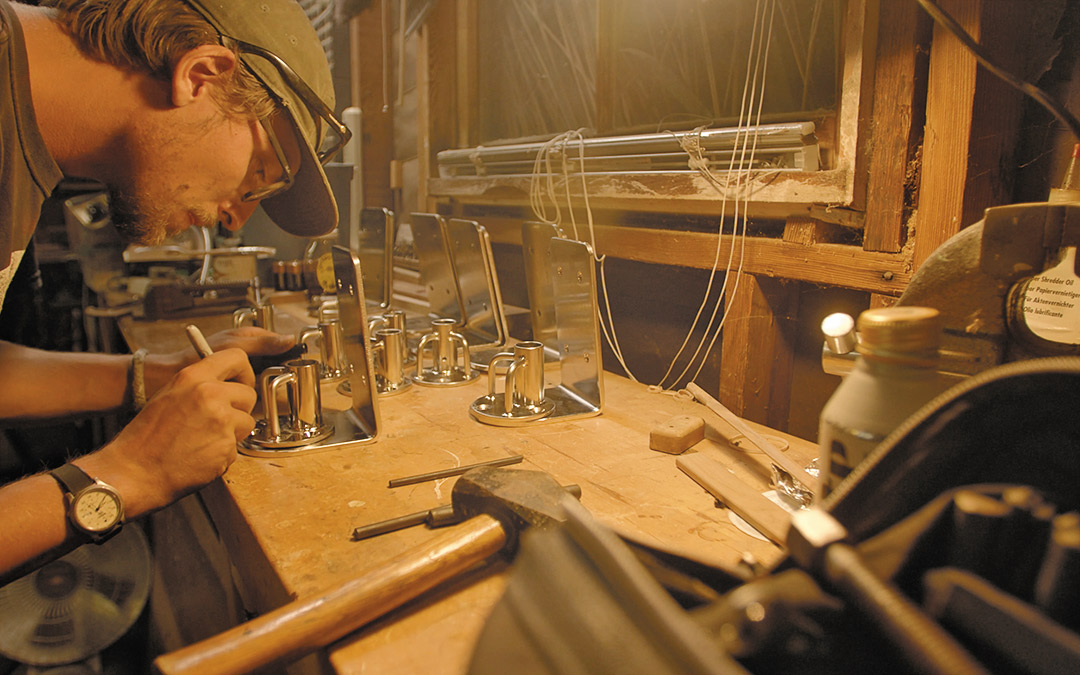
First, though, we had to prepare for the installation of the bulwark supports. We had purchased nine 24-by-4-by-¼-inch-thick 316L stainless steel bars, which we then cut in half (it was cheaper to buy them at twice the length than to buy them at the actual length needed). After cutting them into 12-inch sections, Chris used an angle grinder with a 150-grit floppy disk to remove the matte finish left over from being cold-rolled in the manufacturing process.
Next, we had to measure the degree for each L-bracket to be bent. Each was slightly different due to the deck’s curvature. To obtain precise measurements, we used two straight pieces of timber about 16 inches long, placed one on the deck and one along the hull, and then measured the bisecting point. This measurement would ensure that the bulwark would be following the sheer line of the hull itself.
Then, we sent the measurements and the bases to a Southern California fabricator, Garhauer Marine, where a hydraulic press bent all 16 bases quickly and effortlessly. This sounds so much easier than it actually was, since dialing in the degrees on a 1/4-inch piece of stainless steel all comes down to the skill of the operator. Luckily, Doug Garhauer had over one million “hits” with this press, so we knew our metal was in experienced hands.
While Garhauer had the L-brackets, Chris used a brass L-bracket template made from a prototype to recess the bulwark bases down into the deck. This way, they would sit flush when mounted with the stanchion base on top, giving a more “factory” appearance. Chris placed the template at every stanchion base location as a guide and used a router to cut the 1/4-inch-deep pockets into the deck. Once this process of cutting holes in our so carefully faired deck was finished, we could complete the topside painting.
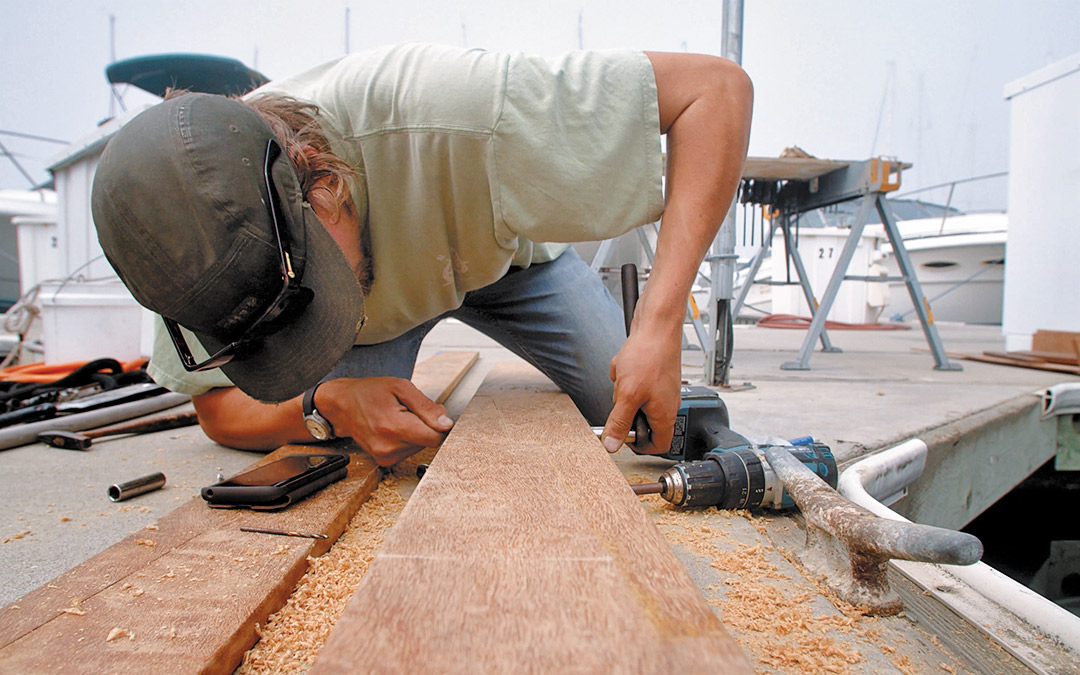
With the custom-shaped bases in hand, the next step was drilling out the holes to attach the stanchion bases. This also sounds easier than it was; for one thing, the stanchion bases had different hole patterns, so we would need to custom drill each one. Doug Garhauer had educated Chris on the proper technique for drilling through hard and thick material such as our stainless steel. It all comes down to using the proper tools—but not everyone can keep a drill press onboard! With Doug’s advice and our wonderful friend letting us borrow his drill press, Chris was able to drill the bases, as well as the four holes in each vertical where the bulwark boards would attach.
Finally, it was time to attach the L-brackets and stanchions to the deck. We placed the stanchion bases on top of the bracket bases with a healthy amount of butyl tape between them, then placed more butyl tape on the bottom of the brackets to seal the area between the deck and the base. We through-bolted the bases using 2½-inch-long 316 stainless steel 5/16 machine screws. Finally, we added a bead of Sikaflex to entirely fill the remaining 1/8-inch gap between the bases and the recessed deck edge.
The Bulwarks
The wood we used to construct our bulwarks was a hot topic aboard for weeks. We wanted to use teak again, but our wallets did not agree, so we researched alternative rot-resistant hardwoods. There were many great options like white oak, purple heart, black acacia, and mahogany, but we finally settled on cumaru, also known as Brazilian teak.
We ordered 100 feet of 20-foot-long, 6 x 1-inch boards from Advantage Lumber. On this part of the project, COVID became a factor when the supplier ran out of 6-inch boards, and we had to opt for 51/2-inch. At this point, we had already completed the L-bracket fabrication and drilling; this would mean that the verticals of the L-brackets would stand slightly proud of the tops of the bulwark boards. Not ideal, but it had taken months already just to get the 51/2-inch boards, so we decided to live with it.
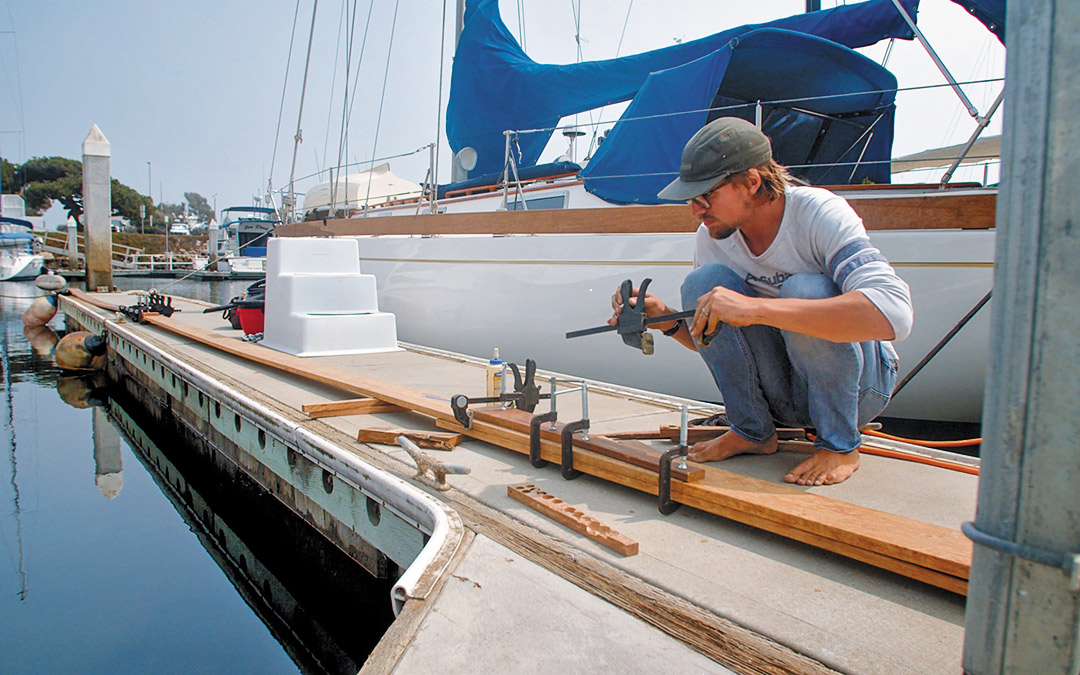
While waiting for the wood to arrive, Chris studied scarf joints to choose the best method to join three sections of wood into a single 42-foot board. He settled on a mechanically fastened, plated scarf joint that would be 32 inches long. Hours went into mathematical equations sketched out on his signature yellow legal pad to ensure the cuts would be precise, since we only had one shot at getting this right, or else we would have to order new wood—and who knew how long that would take to be delivered? Once he transferred the sketches to the wood, Chris used an accurate combo square, circular saw, Japanese hand saw, sharp chisels, assorted drill bits, 316 stainless hardware, and marine glue to construct the bulwark plank.
With the help of our friends, we carefully maneuvered the heavy, long, and bendy plank to the L-brackets, where I was quick to secure them with C-clamps. With the bulwark now dry-fitted into place, we stood back and admired how nicely this project had come together. We were thrilled to learn that we would not have to steam the wood to conform to the boat’s shape, which was ultimately a relief despite our elaborate plan to create a steam bag using a thick plastic bag and a turkey fryer for steam.
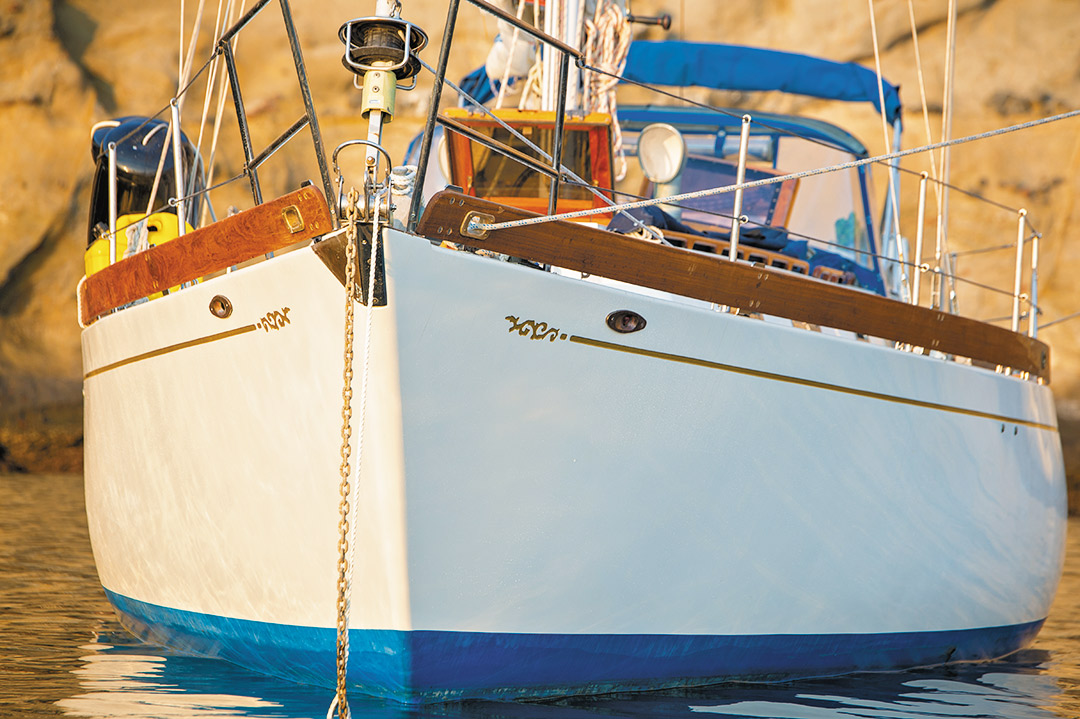
Sixty-four 316 stainless steel fasteners later, we had bulwarks! The wood completed Avocet’s newly improved look, adding a hint of timeless design to her somewhat more modern construct, as well as an admiring nod to one of Chris’ favorite designers, Lyle Hess.
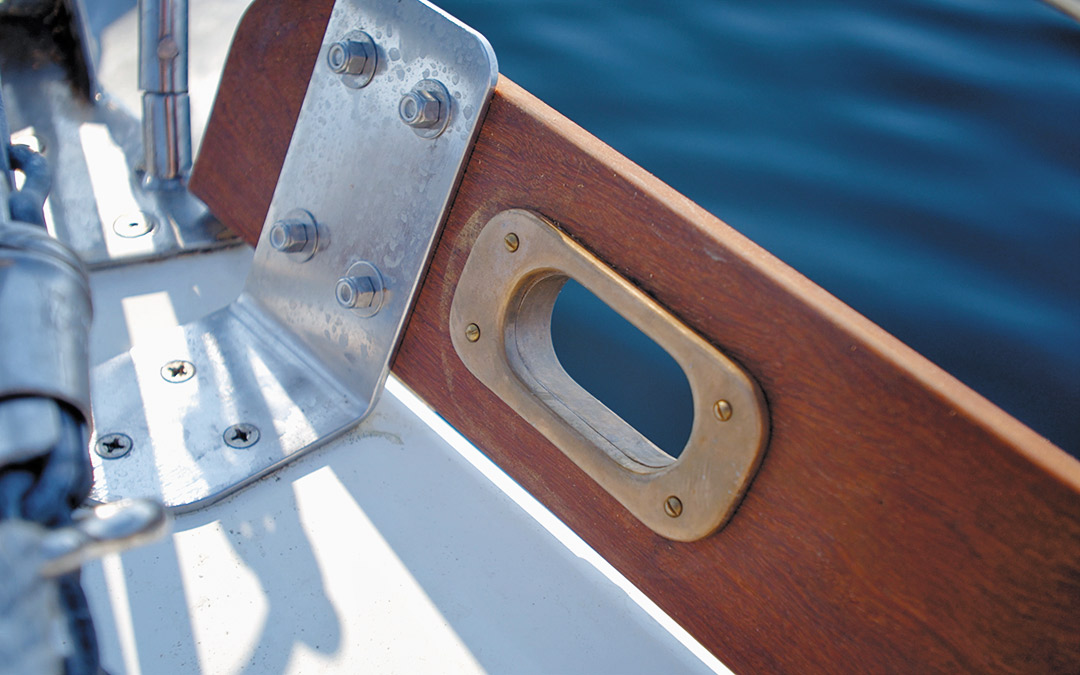
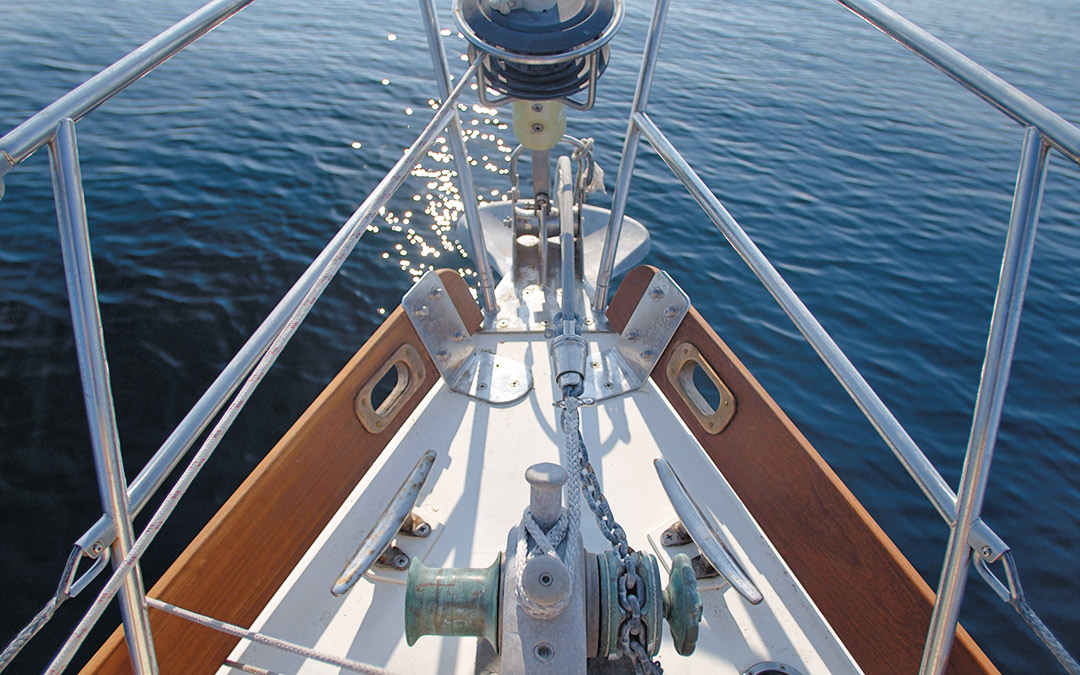
The final pieces were the hawse holes that would replace our prior fairleads, which we felt did not do the overall hull design justice. After Chris sanded, polished, and inset them into the bulwarks, the cast-bronze additions sparkled, beautifully complementing the wood and the boat’s overall look.
When the last hawse hole was in place, we broke free of the docklines that had seemingly weighed us down like shackles and made a mad dash to the Channel Islands so we could enjoy our boat the way she was intended. The water splashed on deck, washing overboard immediately under the bulwark through the slim gap. It was perfect. The bulwark’s height made it easy to safely store jerry cans, fenders, lines, and even the dinghy without the deck looking cluttered.
This conversion was a long, complicated process, but overall, we are pleased with the outcome and hope that it can inspire others who might be interested in making such a change.
Chris and Marissa Neely have been living aboard and upgrading their 1979 Cheoy Lee 41, Avocet, since 2018. Primarily they sail in and around Southern California’s Channel Islands. Follow them at svavocet.com, on other social platforms at @svavocet, and on their YouTube channel called Sailing Avocet.
Thank you to Sailrite Enterprises, Inc., for providing free access to back issues of Good Old Boat through intellectual property rights. Sailrite.com