New lip seals cure a dripping engine-cooling pump
Issue 125: March/April 2019
The raw-water pump is an integral part of the cooling system of any marine diesel engine. If it should fail, the engine will quickly overheat and could suffer significant damage. While most engines are equipped with an overheat alarm, a couple of visual inspections can give advanced warning that overheating due to the failure of the pump is imminent.
A common mode of failure is a damaged impeller. It’s good practice, therefore, to glance overboard periodically when the engine is running to make sure water is exiting with the exhaust. Replacing the raw-water pump’s impeller is very often one of the first engine-maintenance tasks a boat owner learns to master.
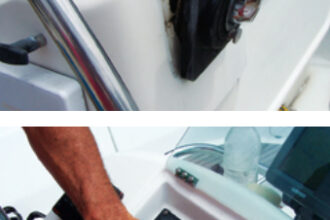
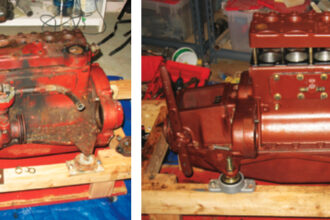
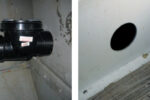
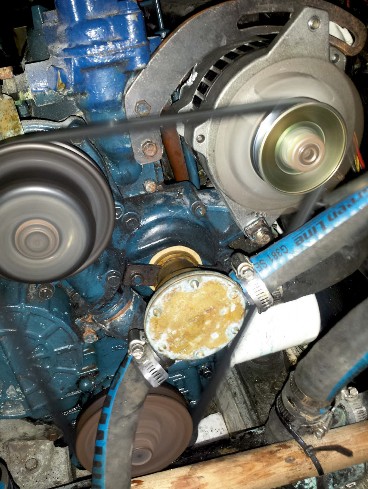
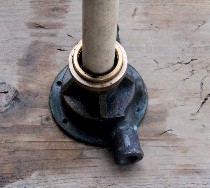
It’s also important to inspect the raw-water pump itself when the engine is running. Most raw-water pumps have a small weep hole on the body. Water dripping from this hole is a sign an internal seal has failed. I saw this happening on the 27-horsepower Kubota auxiliary in our 1979 Dufour 35, MonArk. It was a slow but continuous drip, and rust had formed on the parts of the engine where the drips were landing. The repair in this case was to replace a failed seal inside the pump.
At this point, many owners might remove the pump and take it to a shop to be rebuilt, but when the only problem is a bad seal, this is a straight- forward repair any boat owner with a mechanical aptitude can tackle. I have done it several times. MonArk’s Jabsco pump is very similar to most pumps found on diesel auxiliaries, so the steps I took in repairing it will be widely applicable. A word of warning, though: on MonArk it’s possible to reinstall the pump upside down, which would reverse the flow direction, so it’s a good idea to take photographs or make a sketch of the pump before taking it off the engine.
Taking apart the pump
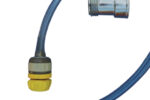
Before starting to work on the pump, first close the raw-water intake seacock, then detach the inlet and outlet hoses from the pump and remove the bolts attaching the pump to the engine. (If the pump is belt-driven, as opposed to engine-driven, the process will be a little different.)
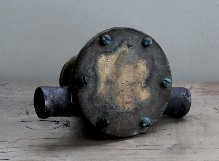
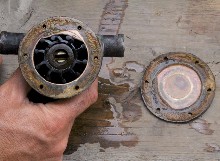
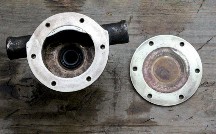
To get to the impeller, remove the faceplate. So as not to strip the heads of the bronze machine screws that typically secure the faceplate to the pump, go slowly and keep the screw- driver straight.
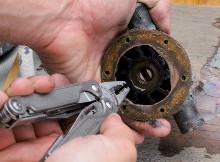
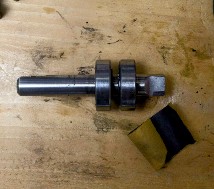
With the faceplate removed, extract the impeller. Most professional sources recommend an impeller puller, but very few of us have one of these on board. I find pulling on the thickest part of the impeller blades with needle-nose pliers works best. Again, go slowly, and pull on each blade alternately to ensure the impeller comes out evenly.
Inspect the impeller for wear or damage, and discard it if it shows signs of cracking, its diameter is reduced, or pieces are missing.
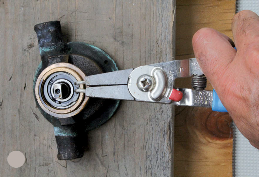
The shaft and bearings, which are at the back of the pump, can be taken out by removing a circlip (also called a snap ring or retaining ring). This is most easily done with special circlip pliers. Check the circlip for deformation or cracks.
After removing the circlip, move to the front of the pump and gently tap out the shaft with a piece of wooden dowel.
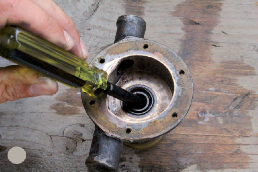
Between the mechanical and water seals is an O-ring, which I prefer to remove before removing the seals them- selves. Pry it out with a screwdriver or needle-nose pliers.
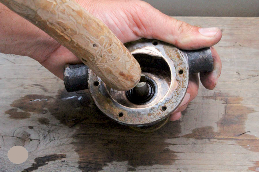
An effective way to remove the seals themselves is to drive them out gently with a blunt instrument, such as a straight socket driver without a socket on it. Pulling or prying out the seals, as is often recommended, rarely works and risks scoring the inside of the pump housing.
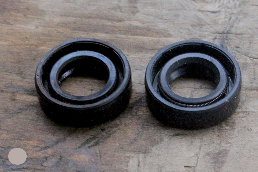
Remove the mechanical or oil seal on the engine side of the pump first, as it is far easier to extract the water seal with the mechanical seal out of the way.
After removing the seals, examine them for the mechanism of failure. It can be hard to tell sometimes, as even a small deformation in the shape can lead to leaking. In most cases, the garter spring will have rusted out or broken, allowing the rubber lip to move more than it should.
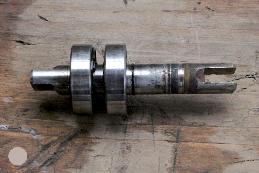
Something else to examine is the pump shaft. Scoring or pitting can cause the water or mechanical seal to fail. On our shaft, there was a thin rust-colored scaly buildup, which I removed with 800-grit sandpaper (I don’t recommend using anything coarser). The shaft underneath was clean and smooth and didn’t need to be replaced.
Next, spin the bearings. They should spin freely and silently. Sounds of grating or knocking indicate the bearings likely need to be replaced, a project that is beyond the scope of this article.
Rebuilding the pump
If the bearings and shaft are in good condition, the pump can be put back together. First, make sure all the mating surfaces are clean and smooth. For example, the faceplate and mating surface of the pump often have bits of gasket stuck to them and a scaly salt buildup. Use a sharp blade to cut or scrape off the gasket, while taking care not to score the housing or the faceplate. Clean off any buildup and remaining gasket material with 800-grit sandpaper.
Inserting new mechanical and water seals can be a bit tricky. To make them fit more easily into the pump, some people recommend placing them in a freezer overnight so they contract. I haven’t found this necessary. Instead, rub a small amount of dish soap around the outside of the seal and tap the seal fully into place using an appropriately sized piece of wooden dowel. Make sure the spring faces out in both cases.
After the seals are in place, insert a new O-ring between them. It is loose at this point, but will go over the shaft as the shaft is inserted into the pump.
When inserting the pump shaft, take care not to damage the seals or the O-ring. It helps to rub a small amount of oil on the shaft before inserting it into the pump. It also helps to rotate the shaft while inserting it. Taking care not to trap the O-ring, push the shaft in until the circlip slot is visible, then reinsert the circlip.
When the shaft is in place and secured, put the impeller back into the housing. Folding the impeller’s blades to clear the constriction in the housing makes this easier. The direction in which they are folded isn’t too important as they will self-correct without suffering damage. I use an entire tube of impeller lubricant to coat the impeller and the inside of the pump housing prior to insertion, but any lubricant meant for rubber will do the job.
A new gasket will come with the purchase of a new impeller. (When reusing an impeller, trace the shape on a piece of gasket paper and cut it out.) Reattach the faceplate and tighten the machine screws, taking care not to over-torque the screws or strip their heads. There are torque specifications, but I’ve found that a quarter turn past when I start to really feel resistance has been enough to compress the gasket and make a good seal without risking stripping the threads.
The pump is now ready to go back on the engine. All in all, the job takes about 45 minutes.
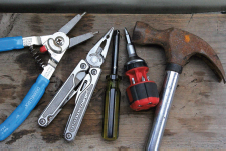
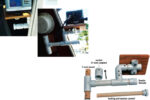
Useful tools: Circlip pliers, needle-nose pliers or impeller puller, socket driver or other blunt instrument, screwdriver, hammer, various diameters of wooden dowel
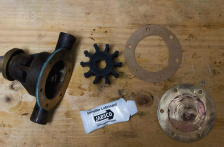
Parts: New impeller, gasket, mechanical lip seal, water- side lip seal, impeller lubricant
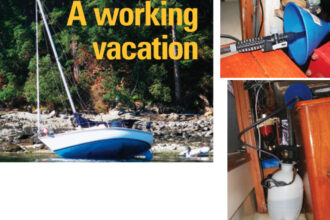
Robin Urquhart and his wife, Fiona McGlynn, recently crossed the Pacific in their Dufour 35, MonArk. After that voyage, and their earlier passage from British Columbia to Mexico, they can attest to the verity of the old adage that cruising is really about fixing boats in exotic places. Robin is an editor at Waterbornemag.com, a website aimed at inspiring and supporting a new generation of water people.
Thank you to Sailrite Enterprises, Inc., for providing free access to back issues of Good Old Boat through intellectual property rights. Sailrite.com