Hot-melt glue solves a sticky situation when rebedding deck hardware.
Issue 146: Sept/Oct 2022
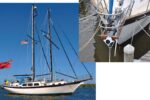
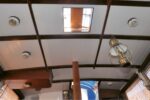
Recently, we wanted to replace the Dorades on our 1979 Gulfstar 37 with lower-profile solar vents. An easy enough job, you’d think, but you know how it is with good old boats and project creep.
What started as a simple task turned into something much more involved—in short, recoring areas of wet balsa core in the deck around both Dorades, and then, after pulling down the headliner, deciding to replace much of the 43-year-old hardware that attached key items including winches, line clutch and turning block, the spray hood integrated with the traveler support, and several cleats.
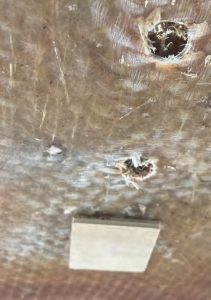
In the process, I discovered a neat way to make this potentially messy job easier. After enlarging the fastener holes and raking out as much core material as possible, it’s common practice to “pot” these holes with epoxy mixed with silica or a particulate of choice. But one sticky part of this process is consistently annoying: preventing the epoxy from draining out of the hole in the overhead until it cures.
An obvious option is tape of one sort or another, but the fiberglass behind the headliner in our boat is comprised of coarse roving and resin that makes taping the holes just about futile. Even if we could get tape to adhere, epoxy has the maddening ability to sneak out of most efforts to restrain it. This is exacerbated by the resin warming as it cures, lowering viscosity just when you think you’ve checked it for the final time necessary. Most often, it happens after you’ve packed up and gone home for the night, so when you return, you’ll find a fully cured puddle on the cabin sole, table, or in your tool bag.
How to deal with the gravity of the situation?
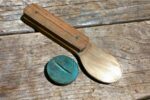
As a cabinetmaker, I’ve used hot-melt glue that’s quick to bond and just tough enough to hold parts in place for marking out spile points and scribed edges. I thought I could use this glue to attach small plywood squares over the holes to act as dams until the epoxy cured.
I gave it a try on the overhead and found that applying a thick bead around the holes was easy and quick. I also added a little smear to the face of each plywood square, which would prevent the epoxy from sticking to them.
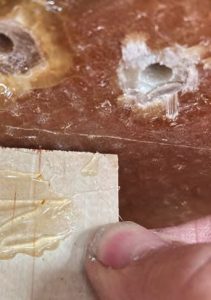
The squares held so well that I was able to inject the filled epoxy from above using a syringe, which forced in more of the epoxy and forced out more air than any other pouring-in method I’ve tried. None of the blocks fell off, and there was almost no bubble-induced settling of the resin mix in the holes.
When it came time to remove them, I tapped them off with a moderately sharp putty knife and a mallet. (Note that hot-melt glue comes in craft-store grade and a tougher construction grade; you’ll want the latter for this application. The clearer the glue stick, the weaker the bond. Go for the yellowish, less transparent stuff.)
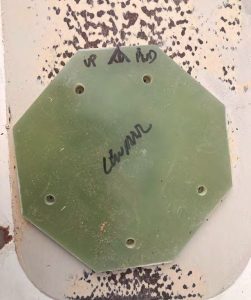
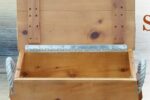
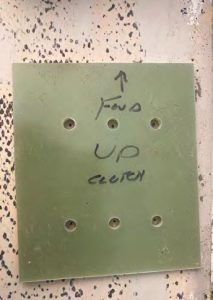
Next, I made new backing plates out of 1/4-inch G-10 for the two winches, line clutch, cleats, and turning block. I had taken all the hardware home and laid it out on the G-10 to accurately mark the holes for the fasteners. Then I drilled them out on my drill press.
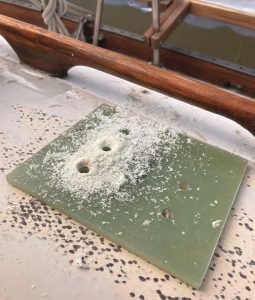
Back at the boat, the next challenge was locating the new bolt holes within the epoxy plugs. On deck, I marked the centers of the filled holes and hot-glued the new backing plates to the deck for each piece of hardware, so that the holes in the backing plates lined up over the epoxy-filled holes in the deck. This way, I could precisely drill the new holes through the deck.
I would brag that it all went together perfectly, but I found that a few of the holes in the backing plates needed to be enlarged by a 1/16 inch to accommodate minor alignment issues from drilling through the thick, curved cabin top. (You could use a round file to slightly enlarge the holes in the G-10 as needed, but best practice would be to redrill them oversize on a drill press with the material securely clamped, because the drill is sure to grab in the G-10 and twist it. Ask me how I know.)
drilling.
Now I just need a few days without rain to install the companionway spray hood and new traveler, apply a fresh non-skid surface on the areas of the deck where I recored, regasket the hatches, and undoubtedly something else I haven’t thought of yet. You know how it goes.
Bob Taylor began sailing as a young teen in a home-built, 8-foot pram kit from Butler Boats. Despite a long and interesting career as an architectural woodworker, he still enjoys working on his own house, boats, and guitars. He and his partner, Laura, sail their Gulfstar 37, Juniata Lily, out of Worton Creek, Maryland.
Thank you to Sailrite Enterprises, Inc., for providing free access to back issues of Good Old Boat through intellectual property rights. Sailrite.com