Installing a new motor in a dead solar vent was far more satisfying than the alternative.
Issue 142: Jan/Feb 2022
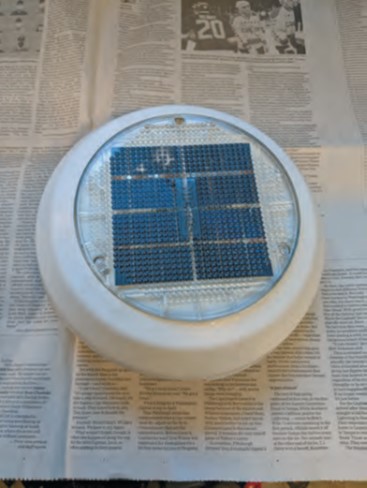
Shortly after buying my 1975 Tanzer 26 in 2011, I installed two 4-inch Nicro solar vents, one above the saloon, the other above the V-berth. Recently, one of the vents died. Since I bought the vents between 2012 and 2014, I naturally assumed that fixing the broken one would just be a matter of replacing its battery.
Each vent had a single NiMH C-size 2800 mAh battery that produced 1.2 volts. I decided to replace both of them with EBL 5000 mAh batteries that produced the same voltage. Increasing the mAh is an added benefit, because the fan will run longer on a given charge. Plus, a two-pack of them from Amazon was only $8.99. So far, so good.
But after replacing the battery, the vent’s fan still wouldn’t run.
Testing with a multimeter showed that the solar panel was putting out a solid 1.4 volts. This led me to conclude that the motor had died, meaning the whole vent needed replacing.
Imagine my dismay to learn that the new vents cost $160 to $170. Worse still, since my Nicro vents were made, the company had been purchased, and the new vents no longer fit my existing base plate. And, there’s no replacement motor. So, unless I wanted to shell out the cash for a new vent and base plate, I was stuck.
Or was I?
Searching various sailing online chat boards, I found a cryptic note about replacing the motor with one from another manufacturer, which gave me hope. Following that lead, I purchased a small DC motor from a company for $15 (it has since gone out of business due to the pandemic). I ordered the motor with wires already attached, which turned out to be a good choice since space inside the Nicro motor housing is quite tight.
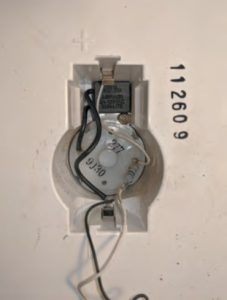
To reincarnate the solar vent, I first removed the three screws in the top to detach the entire vent unit from the base plate. I brought the unit home, where I could work on it without worrying about losing small parts (hint of experience here). After removing the solar panel and battery, I slid the battery contacts out and removed the motor retaining screw. Next, I removed the switch cover and retaining ring from the bottom and pulled the switch and the motor out of the housing.
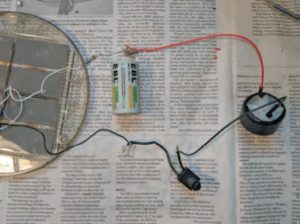
With all the components removed, I used a soldering tool to detach the wires from the old motor and battery contacts. The next step was to cut the ends of the old wires off and strip about ¼-inch of the coverings back from the new ends. Now it was time to resolder all the connections.
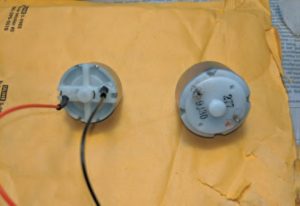
The white wire from the solar panel was connected to a one-way diode, then to the motor; another wire ran from there to the battery contact. I didn’t want to disturb the prewired motor connections, so I soldered the white wire and diode directly to the battery contact, along with the red motor wire. The black wire from the solar panel runs to the switch, and another black wire runs from the switch to the other battery contact. That wire was a bit too short after trimming the end, so I added 2 inches of additional wire to make sure it would reach the contact, and I heat-shrunk the connection.
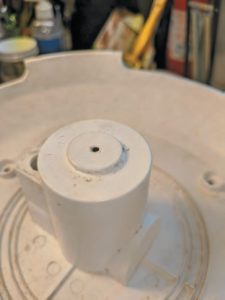
The original motor was 1-3/8-inches in diameter, with a ½-inch-long shaft. Corresponding measurements on the new motor were 1¼-inches and 3/8 inches, respectively. Because of the shorter shaft on the new motor, I had to use a hack saw to remove the 1/16-inch spacer stub from the bottom of the plastic housing. This left a ¼-inch opening for the shaft instead of one that was 1/16-inch, but better accommodated the shorter shaft of the new motor.
Next, it was time to reassemble. To fit the new (smaller-in-diameter) motor snugly inside the cylinder in which it was to be housed, I had to wrap about 10 turns of electrical tape around it. Since the old motor was 1 inch long and the new one only ¾ inches, the original set screw (on a post) was now of no use.

No problem: I drilled a small hole in the side of the cylinder and inserted the set screw horizontally. It bites into the wrapping tape and holds the motor securely without touching the motor itself. While I had to coil and bend extra wire into the cavity between the motor and the battery, there was still plenty of space owing to the new motor’s shorter length. Finally, it was time to install that new battery.
There was one final matter to attend to: replacing the fan blade on the shaft and reinstalling the vent. My old fan blade had an enlarged shaft hole from years of use and was somewhat loose on the new motor shaft. These vents were sold with two blades—one for exhaust, one for intake—so I switched the old exhaust fan for the alternate, which fit snugly on the new motor shaft. (Most people use an intake on one fan and an exhaust on the second, to facilitate air flow through the cabin.)
I fastened the vent back in place with its three screws and—voilá—I had a working solar vent. The new motor definitely runs at a slower rpm than the original, which means it moves less air. But I’d rather spend the few hours and $25 it took me to restore this solar vent than spend the money to buy a new one I didn’t really need.
Bradley Stevens, a retired marine science professor at the University of Maryland Eastern Shore, first learned to capsize a Sunfish in a farm pond at the age of 11, then moved up to capsizing larger boats. Following a midlife crisis, he sank a small fortune into refurbishing a Catalina 22 before selling at a complete loss. He has spent the last 10 years throwing boat bucks into his “almost free” current boat, a 1975 Tanzer 26, which he hasn’t managed to capsize yet. He sails on the Chesapeake Bay.
Thank you to Sailrite Enterprises, Inc., for providing free access to back issues of Good Old Boat through intellectual property rights. Sailrite.com