For in-the-field sail repairs, adhesives can get you out of a sticky situation.
Issue 147: Nov/Dec 2022
When I was a young sailmaker in the ’80s, our loft purchased a German-made sewing machine that had an air cooler to keep the needle from heating up enough to melt thread and a robust pulling system to grunt huge sails along in precise time with the needle.
Soon after purchasing the machine, we built a 900-pound Kevlar genoa for a 120-foot sloop. After a few seasons’ use in the Mediterranean, it required a few tweaks. The local sail loft in Antibes was “tres petit,” so in a grassy area, several sailmakers pushed and pulled as I worked stiff Kevlar sailcloth through a pathetic little sewing machine. Needles shattered. I cursed like a sailor.
It was a good example of the reality that once sails are out of the sail loft, repairs in the field mostly involve binding materials together in imperfect conditions. While fundamental to sail repair, sewing is also often impractical. Anyone who has hand sewn a broadseam back together, or machine sewn a patch into the middle of a sail bunched up across the entire foredeck, knows the colorful vocabulary associated with such thankless tasks.
So, what are the alternatives for in-the-field DIY repairs? Sail repair tape seems obvious, but it’s limited. It bonds well to clean surfaces, but the pressure-sensitive adhesive remains liquid and slides under load. It’s also lightweight, often just over 3 ounces—about one-half the weight of sailcloth for a mainsail on your average 30-footer. It’s not intended for structural repairs.
A better choice for do-it-yourself sail repairs is the use of adhesives that when applied to sailcloth layers can create temporary and permanent structural repairs.
I’ve used two different adhesive types for field repairs to sails. Polyurethane sealants, such as 3M 4200 Fast Cure and Sikaflex 291, are flexible, waterproof, and very strong. This is the best choice for permanent patches on tears in medium- to heavy-weight sails. Cyanoacrylate (commonly sold under the trademark Super Glue) is good for smaller, get-you-home patches. It’s strong, but the bonds will degrade with flexing.
And when I say get you home, I really mean it. A good example was a cruising couple in Tanzania preparing for the rigorous passage to South Africa who contacted us with a problem. Their Dacron headsail was failing in a region without a sailmaker to make repairs. We worked up a plan with available resources: a few tubes of Sikaflex and Dacron pieces poached from a dinghy sail. Repairs held for the 1,500 nautical miles to South Africa, where they ordered a new sail.
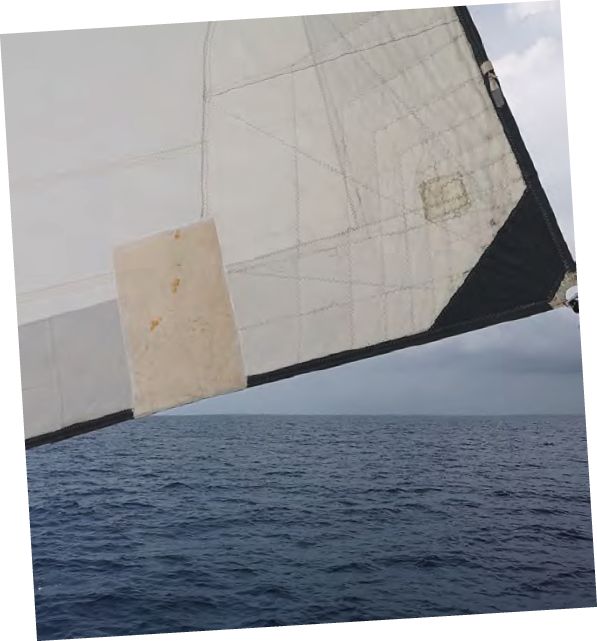
When sewing, seam strength correlates to the number of stitches per inch. With adhesive repairs, the key to strength is the amount of bonded surface area. Since higher sail loads require greater surface area to adhere a patch to, start your repair by assessing the tear. Sail load paths radiate out from the corners and then tend to parallel the nearest edge (luff, leach, foot). A tear parallel to the load path, such as parallel and near to the leech, is a low-load tear. A tear perpendicular to the leech is a high-load tear, as it crosses the load path.
The next step is to size and make the patch, preferably from material the same weight as the sail or similar.
On a low-load patch, size the patch to be 1 to 2 inches wider than the tear on all four sides. A high-load patch should be 3 to 6 inches wider per side than the tear. For example, a 20-inch-long tear that is perpendicular to the leech (so, high-load) will have a patch that is 26 inches long by 6 inches wide on a smaller sail, and maybe 12 inches wide on a larger sail.
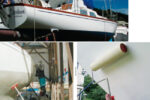
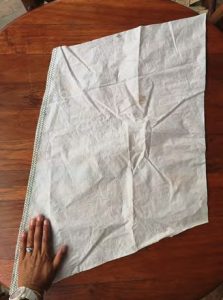
To prepare the damaged area, lay out the sail on a flat surface so the tear is flat. Apply layers of blue tape (duct tape will do) to cover the tear and keep the sides from shifting. Then carefully flip the sail so the taped area is on the bottom. Measure and cut your patch.
To adhere the patch:
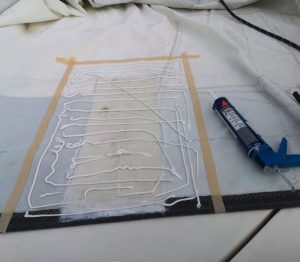
1. Clean and dry the patch area with acetone or rubbing alcohol.
2. For a clean finish, set the patch in place and apply blue tape around the perimeter to protect the area beyond the patch.
3. Remove the patch, then spread a relatively thin coating of the best adhesive for your repair to the sail and the patch surfaces (polyurethane sealant is the best for patching tears).
4. Place the patch on the sail, mating the coated surfaces and pressing them together.
5. Lay plastic over the top and set flat weights (such as books) over the patch to ensure surface bonding, then let it cure as per adhesive instructions.
6. Once cured, remove the tape applied on both sides of the sail.
tight. Done properly, an adhesive patch can last for miles and years and is a much easier in-the-field option than sewing.
If the tear is big and high load, consider applying a patch to both sides of the sail. And finally, if the patch is in an area of sail where lazy jacks or rigging snag on the edge, apply sail repair tape over the edge.
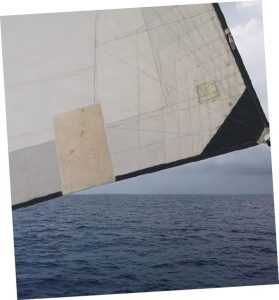
The genoa on Totem, our Stevens 47, has just such a patch in place now. The tear happened in South Africa, seven years ago. The repair took about one hour, plus cure time. There was no cursing.
Jamie Gifford is a sailmaker/ designer, rigger, and recovered racing sailor. Since 2008, he and his wife, Behan, and their children cruise their Stevens 47, Totem, full-time, including a circumnavigation.
Thank you to Sailrite Enterprises, Inc., for providing free access to back issues of Good Old Boat through intellectual property rights. Sailrite.com