The ins and outs of replacing your stainless lifelines with synthetic.
Issue 148: Jan/Feb 2023
Ultra High Molecular Weight Polyethylene, abbreviated UHMWPE and best known by the trade names Dyneema and Spectra, is amazing stuff. Boasting extremely
high strength, low friction, high UV resistance, and ease of splicing, it sounds perfect for many boat applications. Indeed, it is.
I first used Dyneema for shroud tensioners, where compact size and low stretch are vital. Then a low-stretch anchor bridle (it is permanently rigged, so UV resistance was important), then mainsail outhaul tackle and floating jib leads (low friction reduced effort). I have an adjustable bobstay that would be difficult to fabricate with anything else, since it requires immense strength, ultra-low stretch, low friction to run through a low-friction ring cascade tackle, and UV resistance. There are also places I don’t like Dyneema. I tried it for a traveler tackle—it was like jibing against a brick wall. The grip was poor, it didn’t take knots well, and it was considerably less cut-resistant than steel cable. Although inviting for DIY projects, there are some ins and outs.
First off, does UHMWPE line have what it takes for lifelines?
The Rules
The World Sailing Offshore Special Regulations (US Sailing and most racing groups follow this standard) say that Dyneema lifelines may be used inshore on monohulls and both inshore and offshore on multihulls. The reason for the limitation on monohulls is that racers hang rail meat on the lifelines, greatly accelerating chafe in stanchion holes, and there have been a number of failures resulting in crew overboard situations. A spinnaker guy on the maxiyacht Comanche burned through a Dyneema lifeline during a rough jibe. Multihulls, on the other hand, don’t hang people on the rail, sheets and sails don’t bear on lifelines, and they have no history of lifeline failure.
How does this relate to the average sailor and cruiser? We don’t hang rail meat and we don’t jibe big kites in blow. But we do hang fenders from lifelines (bad practice anyway), and we lean against them in the cockpit on some boats. We’re not governed by World Sailing rules, but they do represent experience.
Dyneema is subject to damage by UV and chafe. Research by DSM and Colligo Marine on UV damage suggests a 50% strength loss in 10 years. Chafe is extremely variable, but as a rule, if a line has lost 10% of its fibers to chafe, strength is reduced 20%. Stainless cable is not affected by UV, but white vinyl-covered cable is subject to corrosion under the coating; water penetrates through cracks in the cover or the ends, and stainless is quite vulnerable to corrosion by sea water in the absence of oxygen.
Experience tells us that failures start at about 15 years and become common past 25 years, depending on use and climate. Bare stainless is not subject to corrosion, but it still loses strength to metal fatigue if leaned on and flexed, losing as much as 30-50% strength in 10 years of hard use, but less if not leaned on.
Dyneema is minimally affected by fatigue. Thus, Dyneema lifelines of World Sailing minimum diameters are believed to be safe for about four to eight years based on UV
and latitude, with chafe further reducing life expectancy. The end lashings are recommended to be replaced every few years, so you can double the life of your Dyneema lifelines by taking them off each winter. Additionally, when they are replaced in the spring, they can be end-for- ended, distributing wear. World Sailing Rules rely on visual inspection only, with no set replacement interval. I’ve seen old Dyneema rigging with minimal chafe snap like a gunshot, so I would not ignore time.
Proper Size
World Sailing gives minimum sizes for Dyneema lifelines, but there is no reason not to go bigger. I sail year-round, so I go oversize for a longer life. I also like a lifeline fat enough for some grip, like the plastic covered lifelines of old. Instead of the super-slender 4 mm permitted on a 24-foot boat, I use 5-6 mm, because I like the feel and it is typically the largest size that will pass spliced eyes through the stanchion holes (varies with the boat). Since these are twice the required strength, experience says I can expect 10 to 15 years of safe use. You can go even larger, perhaps for the top line alone, but you will have to splice them in place (easy enough), you will not be able to end-for-end them, and the chafe guards will need to be thin. Measure the holes. One of the nicest things about Dyneema lifelines, compared to naked stainless steel, is the feel on the hands, and the fatter the rope, the more comfortable.
Tested Products
I’ve tested name brands and bargain price Amazon winch cable. I’ve tested covered and bare line, on a chafe machine and in service. The 12-plait winch cable met the claimed strength rating, and it chafed faster than Amsteel in similar applications. Perhaps there is a place for discount UHMWPE rope in non-critical applications, but I would recommend Colligo, Samson, Marlow, or New England ropes for lifelines.
What about special covered lifeline ropes (WR2 by New England Ropes or Lifeline by Marlow) versus single-braid (Amsteel by Samson, Colligo Dux, or STS by New England Ropes)? Because the end splices are core dependent, only the core is counted toward strength and thus World Sailing counts the core diameter. Common sense tells us that a larger single-braid line will be much stronger and thus safer. But chafe testing revealed that the braid on these special lines is five times more abrasion-resistant than plain single braid, and covered lines tested stronger after chafe machine wear simulation than a single braid line of the same overall diameter. Thus, the jury is still out. If I leaned on the lines, I would either fit sturdy chafe guards or use covered rope for the cockpit portion of the lifelines.
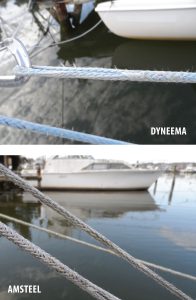
Something else to consider is visibility in the dark. Gray Amsteel looks cool, according to the latest fashion, but it is nearly invisible compared to the white vinyl-coated lines of old. Bare stainless is also hard to see. Amsteel is available in yellow, so you decide whether fashion or safety carries more weight. Marlow makes a lifeline with a reflective thread, but I’ve yet to find U.S. distribution.
Stanchion Preparation
We know that the Achilles heel of Dyneema is chafe. Against smooth steel it does very well, but when sawn back and forth across an abrasive surface or sharp burr, it cuts
more quickly than polyester double-braid. Insufficient stanchion preparation is a common, hidden, and thus perhaps the most serious Dyneema lifeline installation blunder. The worst offenders have been raceboats that used bare steel lines with rail meat during spring training, creating a nice sharp burr, and then switched to Dyneema for the racing season.
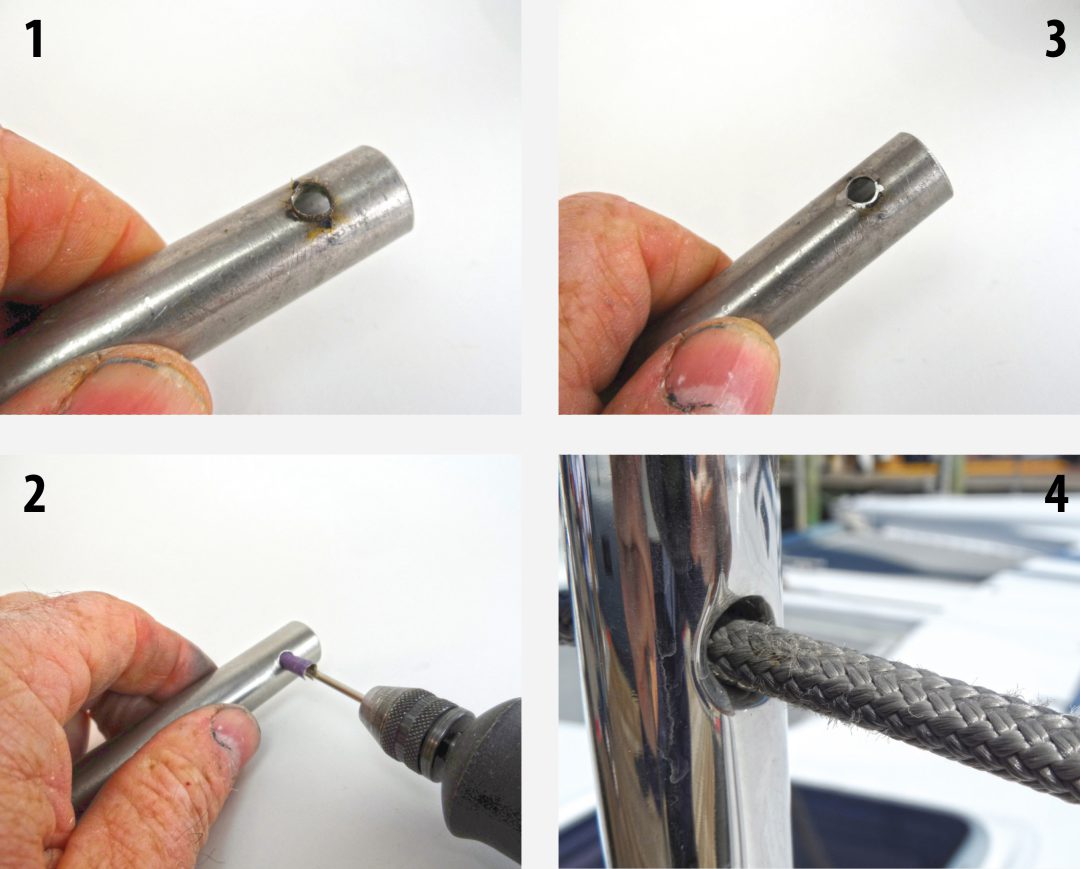
Unsurprisingly, the lines were sliced as the boats bounced through waves, dropping the crew hanging over the lower line in the water. If there is a ferrule that can be replaced, replace it. If a new ferrule can be fitted, do it. Otherwise, polish every hole until it shines, starting with a cone grinding wheel on a Dremel, working down to 440-grit sandpaper. A fine or medium stainless wire brush in a drill can help. A split mandrel on a variable-speed Dremel tool, run at low to moderate speed, is the best trick I know for smoothing the inner burr, which is hard to reach. They take ½-inch squares of whatever sandpaper you have.
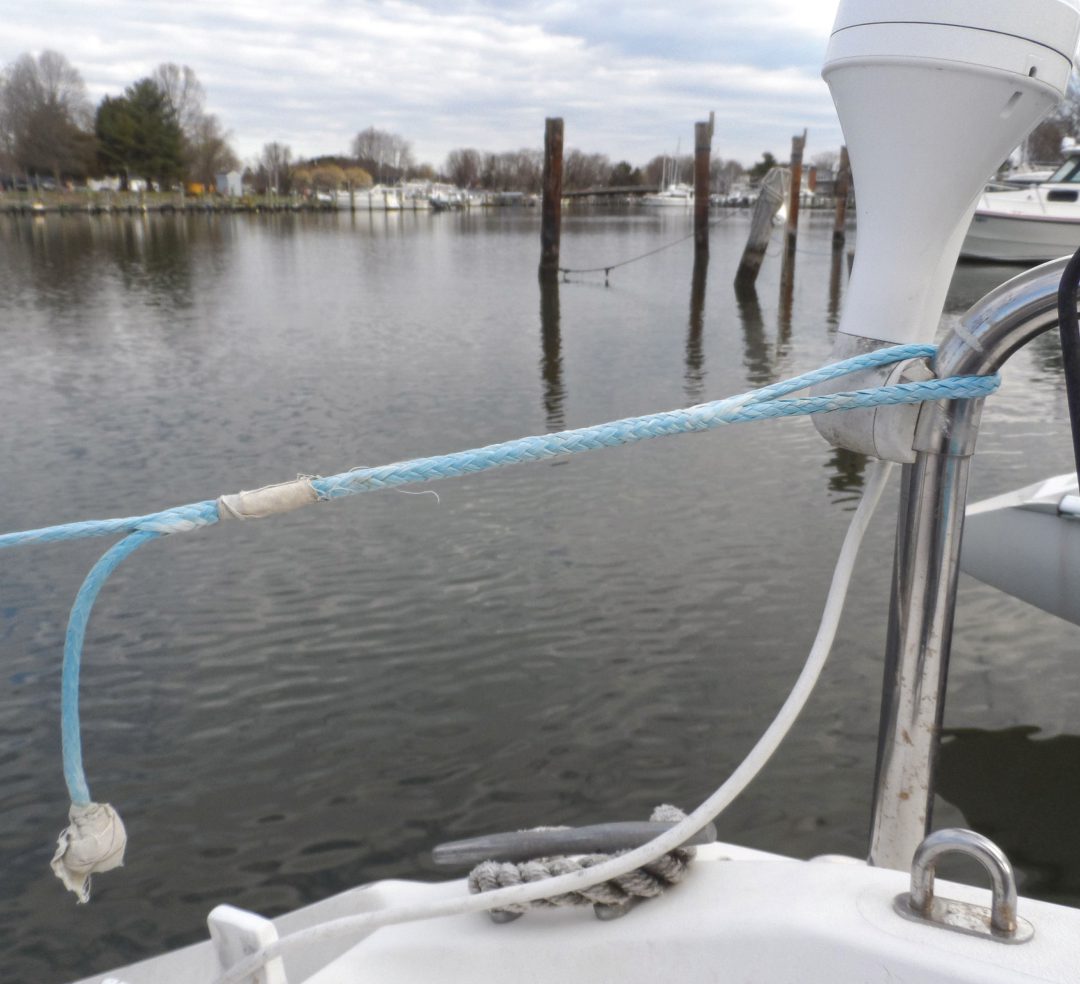
Chafe Covers
These can be floating or spliced in place. Although covers spliced in place look slick, they are difficult to position and shift as you adjust lifeline tension, you cannot inspect the rope under the cover, and you can’t end-for-end the line. Floating covers seem to work out better. I’ve seen everything from split vinyl or airline tubing to a little wrap of Sunbrella, and they all seem to work. Leather makes
an interesting traditional contrast with high-tech line. I’m not a fan of heat-shrink tubing; it does not wear well, cannot be moved aside for inspection or to accommodate stretch, and installation requires using a bit too much heat near a heat-sensitive rope (using boiling water can circumvent this problem—it’s hot enough to shrink the tape, without being hot enough to damage Dyneema).
Splicing the Eyes
A Brummel lock looks cool, but it is actually 5–10% weaker than a stitched bury splice. The purpose of the lock in a hollow braid splice is to
prevent slipping at very low load. In fact, nearly the entire load is carried by the finger lock in just the first few inches of the splice, near the tail. Large industrial cables are always locked with stitching.
Follow Samson’s lock- stitching instructions, using either whipping twine, cord, or a few strands pulled from the same rope. The needle should be dulled on the end so that it cannot cut a strand. In practice, a lock-stitched bury splice is easier to adjust to length (just leave the tail hanging out until it is right). Matching thread makes a slick job, but contrasting thread makes it much easier to pick the lock out and remake the splice, for example, if you made the line too long after stretching.
Because the greatest strain on the splice occurs right at the tip of the tail bury, taper the strands over several
inches. Buries as long as 72 diameters (13 inches for ³/₁₆-inch Amsteel) have long been considered the gold standard, but repeated testing suggests that 40 diameters (8 inches for ³/₁₆-inch Amsteel) is enough with an effective lockstitch. I only use the shorter taper if there is a specific space problem, and apply an extra half-dozen lock stitches.
I much prefer a length of stainless rigging wire to a fid. Cut a 30-inch length of wire, fold sharply in half (perhaps a very light pinch with pliers), and bend the last inch of the cut ends over and tape them together (this prevents the end from accidentally pulling inside the rope). Insert the wire fid at the exit mark and work it out at the entry mark (the reverse direction of the fid). Taper the end of the rope as described by Samson, and then pinch just six of the strands tightly in the bend of the wire, with about ¾ inch folded over. Squeeze closed with your fingers. Working from the exit to the entry mark, bunch the cover up and pull the wire until the end begins to slide inside the rope. It’s basically identical to using a fid, except you are pulling instead of pushing. There is less friction, it goes faster, there is no risk of the tape coming off inside the rope, and it works well from ³/₈ inch to ⁷/₆₄ inch.
When measuring, remember that each splice will shorten the rope by ½ inch or so, because the inserted tail bunches up the rope. There are rules of thumb, but since this varies slightly with each brand of rope, the best practice is to measure the shortening caused by your first splice, after carefully smoothing the cover and giving it a good pull. Dyneema fiber does not creep under lifeline tension, but it does stretch the first few months, as the splices settle and the braid consolidates. Allow space in the lashings for post-construction stretch of 1 inch per splice plus 2% of length.
Pre-stretched Dyneema is available as Colligo Dux and from New England Ropes as STS HSR Heat Set Dyneema. They are slightly stronger for a given diameter and the stretch of the line is negligible (the splices will still need to settle in).
It’s handier to make the bury splice on your lap, or have a pro do it, and then girth hitch (cow hitch) the eye around a railing termination than to make the splice in place, although the latter is not difficult. A girth hitch weakens the termination about 10-15% (testing by Samson), or nearly the same as a Brummel lock, which is also acceptable. In practice, lifelines will fail due to stanchion chafe, not splicing subtleties.
Thimbles
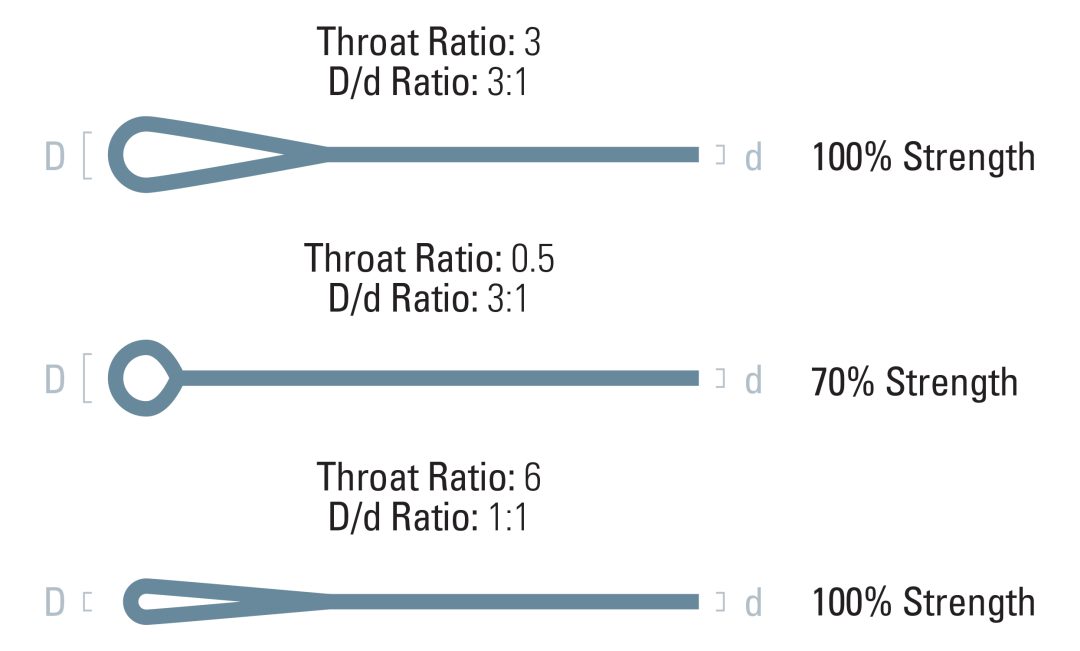
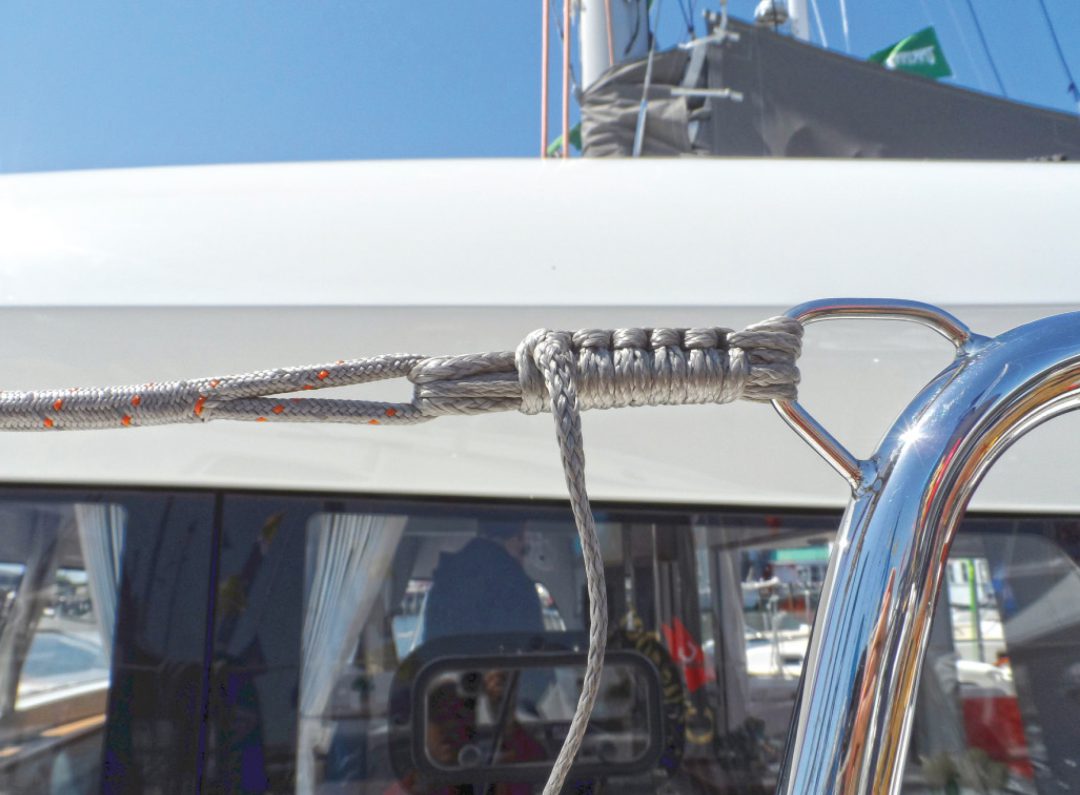
Each end of the lifeline requires a 6- to 8-pass lashing, and often a thimble or low-friction ring is installed. But is it needed? According to DSM, the makers of Dyneema, an
eye is full strength as long as the ratio of the rope diameter to attachment (lashing) is 1:1 or greater. The lashing will be as large as the rope, and there will be no movement, so strictly speaking, no thimble is needed for the lashing or any smooth attachment that is equal or larger than the line.
In fact, a thimble or low-friction ring that creates a throat angle of more than 3:1 actually weakens the line. The primary purpose of low-fric- tion rings, thimbles, and deadeyes in standing rigging is to facilitate tensioning, but lifelines use very little pre-tension; pull hard and all you will do is bend the stanchions inward. If the eye will be clipped by a carabiner, for example, at a lifeline gate, then a thimble or ring is useful for smooth clipping.
Gate Fittings and Whoopie Slings
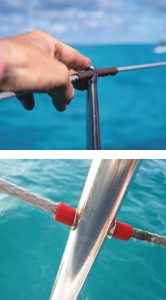
Many boats can profit from additional lifeline gates, if for no other purpose than to facilitate stepping ashore with a line while docking. I like gates fore and aft on both sides, but that’s a lot of hardware. Or you can make an adjustable gate with a carabiner and a whoopie sling. A whoopie sling is an eye splice with an elongated eye, a tail that is left hanging well out at the bury exit, no lock stitching, and a stopper knot at the end of the tail to prevent it from slipping back inside. To tighten, pull on the tail while sliding the cover toward the eye. To slacken, pull back on the cover at the throat. They are very difficult to release if there is any tension on the line, and will hold full tension without slipping. I find a loose wrap of athletic tape around the throat makes them easier to work. Because a whoopie sling weakens the line about 30%, upsize the gate line accordingly.
The lifeline must be secured to the stanchion at each side of the gate to prevent it from becoming dangerously slack when the gate is open, creating a hazard. The simplest way is to splice a low-friction ring to the end of the lifeline, which is pulled tight against the stanchion. Note that the lifeline system is much weaker while a gate is open, and unless a diagonal brace is provided for the gate stanchion, it will bend if any real load is applied to the lifeline. A wide or braced stanchion base is not enough.
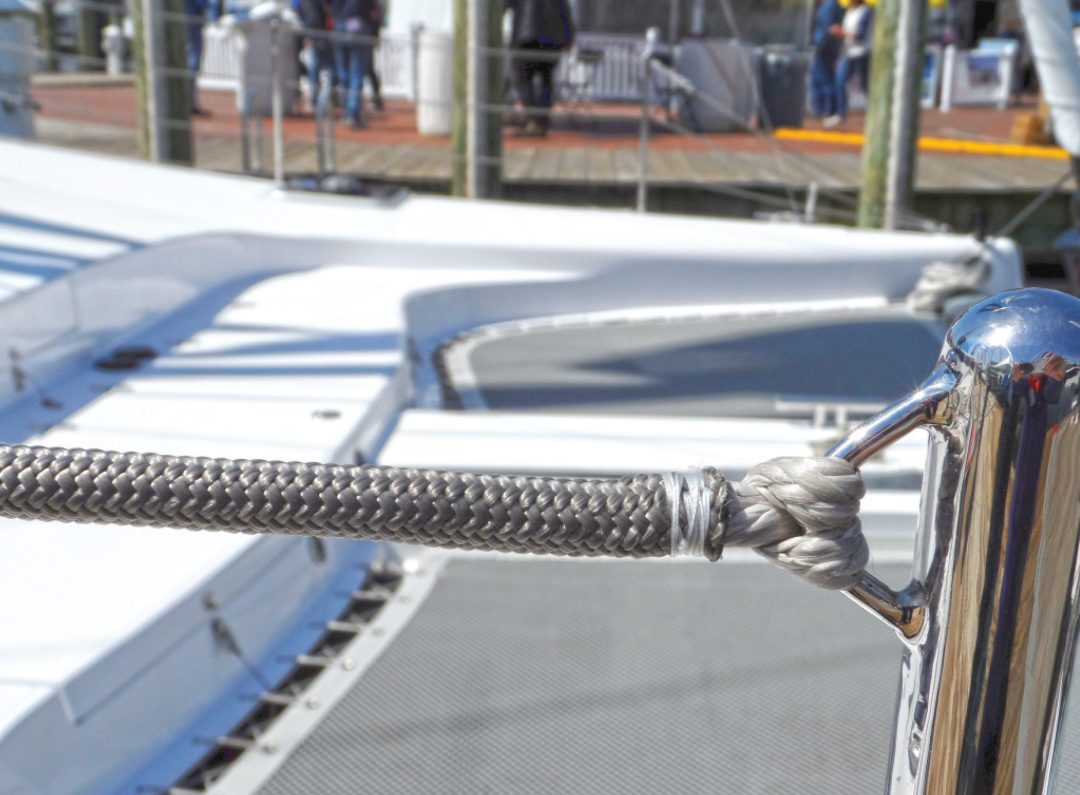
Lashing
The lifeline will stretch several inches after splicing as the splice and braid settle in. This can be reduced by pre-stretching the line after splicing by pulling hard (1,000 pounds) with a winch for a few minutes and then installing with minimal handling (flexing will cause the braid to loosen and the rope to shorten again). For ³/₁₆-inch Amsteel, ⁷/₆₄- or ¹/₈-inch Dyneema is the usual lashing material. Since it does not hold knots for beans, splice an eye in one end. The lashing should be replaced every four to six years because the small line will degrade more quickly than the larger main line.
The combined strength of the passes must equal twice the breaking strength of the lifeline to allow for inefficient load distribution within the lashing and knots. Tie the lashing off with a string of at least six half hitches (10 is better) and the end should be secured with tape or a seizing, to prevent the hitches from loosening, which they will. Testing has determined that five hitches will creep very slowly at high load, but not under impact loading. Standing rigging lashings require 10 hitches to prevent creep. In all cases, secure the tail with a whipping or tape, because Dyneema does not snug up well and the string of hitches will gradually loosen.

World Sailing says the lashing cannot exceed 4 inches (excess length is considered a vulnerability), so start at about 6 inches to allow for construction stretch as the splices and braid settle in (less if pre-stretched). The upper lifeline should be snug enough that it deflects no more than 2 inches under an 8-pound load, and the middle line can deflect twice that amount. Over-tensioning will just bend the stanchions inboard.
Some recommend going around the railing rather than relying on the welded bail because of the possibility of weld failure. However, I have not read a documented case of such failure, and neither US Sailing nor World Sailing require this.
High Lifelines
Many cruisers add a high lifeline while offshore on long passages. Jacklines and tethers are good, but chest-high lifelines can feel pretty nice. These are easily rigged on boats with outside shrouds by fixing polyester or polyester-covered Dyneema to a bow stanchion base, fixing it to the shroud with a clove hitch at the desired height, and lashing to the lifelines wherever they cross. A wrap of tape just below the clove hitch will keep it from sliding down.
The Bitter End
It’s hard to go wrong with the bomb- proof durability and reliability of bare stainless lifelines. Some find Dyneema more comfortable to the hand. It saves weight, but except for the most weight-obsessed racers, this is a small factor. It can be considerably cheaper as a DIY installation, but if professionally installed there is little difference. I’ve used both, stainless on my PDQ cruising catamaran and Dyneema on my lightweight F-24 trimaran. I wasn’t attracted to Dyneema for the weight saving, but rather for the comfort and the convenience of DIY fabricating a few custom-fit lifeline sections. Pick and choose your applications, and whichever material you chose, pay attention to the details.
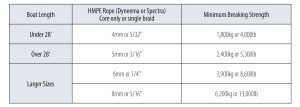
Sizes from World Sailing Special Offshore Regulation, 3.14, Table 8
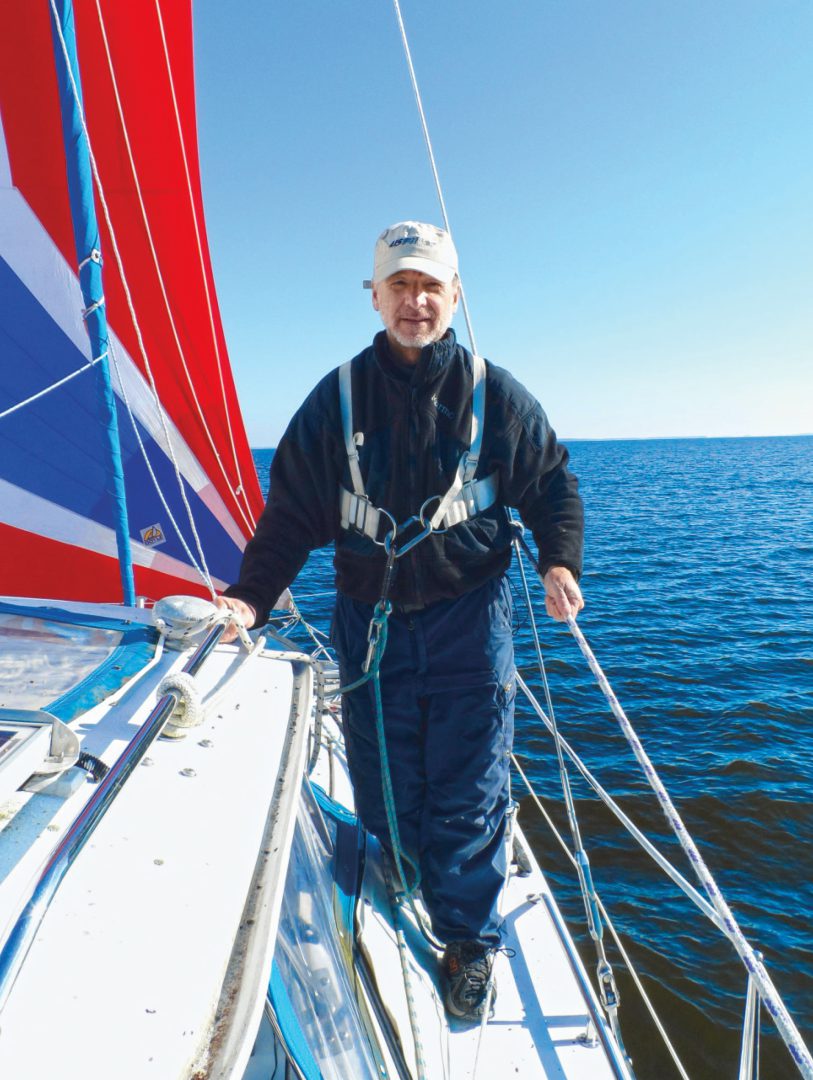
Good Old Boat Technical Editor Drew Frye draws on his training as a chemical engineer and pastimes of climbing and sailing to solve boat problems. He cruises Chesapeake Bay and the mid- Atlantic coast in his Corsair F-24 trimaran, Fast and Furry-ous, using its shoal draft to venture into less-explored waters. He is most recently author of Rigging Modern Anchors (2018, Seaworthy Publications).
Thank you to Sailrite Enterprises, Inc., for providing free access to back issues of Good Old Boat through intellectual property rights. Sailrite.com