Upgrading the boat’s water system with PEX pipe helped cure the blech-water blues.
Issue 139: July/Aug 2021
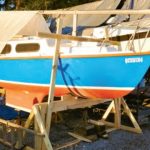
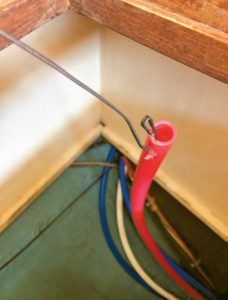
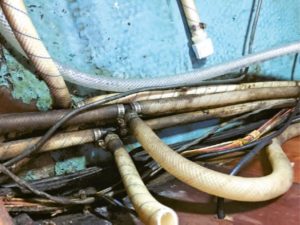
The freshwater delivery system on our 1987 Sabre 38 MkI needed help. Not only were there several hose clamps that appeared to be beyond their useful life, the standard flexible braided hoses looked tired and dirty. And, our water quality was suspect; the taste was just not acceptable. When we began buying drinking water in single-use plastic containers, I knew it was time to solve the problem. There was no reason we couldn’t enjoy great-tasting water right out of our tanks.

I have never found the time-honored system of flexible hoses, barbed fittings, and hose clamps to be elegant or even all that trustworthy. Functional at best. My background is in residential construction, and in the last 10 years, PEX pipe has made significant inroads as the residential piping system of choice, for good reasons. I had heard that newer production boats were using PEX systems in lieu of the traditional approach with good results. The answer seemed obvious.
PEX is a lightweight, flexible pipe manufactured from medium- or high-density polyethylene with cross-linked polymer bonds. It has been safely used for drinking water systems in Europe since the 1960s. The U.S. and Canada currently allow its use without any restrictions for residential and commercial drinking water supply systems.
PEX has some distinct advantages over the traditional braided hoses used to route fresh water around a boat. It also retains some of the positive aspects of traditional marine hose. A semi-rigid pipe, it’s durable and tough and can be bent to conform to the many irregular passages and tapering hull forms found in a typical boat. It expands and contracts without any deformation. It can withstand a wide temperature range (up to 180°F) without any degradation.
To be fair, there are detractors. Some people are concerned about harmful molecules that comprise the pipe matrix leaching into the water. Some people report a distinctive taste to the water delivered through some brands of PEX pipe. I can only say that the traditional marine hose in our boat seemed to deliver water rather like Chateau Garden Hose, and I’ve never experienced the same with PEX-delivered drinking water.
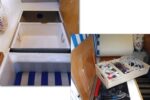
Our boat has a simple plumbing layout. Two 45-gallon water storage tanks reside under the port and starboard settees in the main cabin. The head, portside between the main cabin and the V-berth, has a lavatory basin and shower. The galley has only a sink faucet. The head and galley sinks also have a manual foot pump.
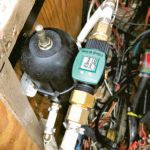
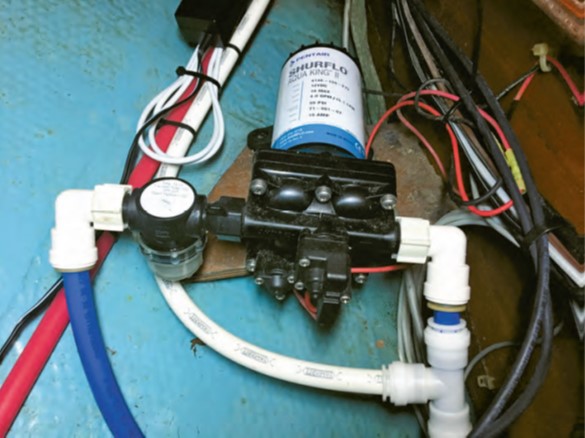
Hot water is supplied from a 12-gallon electric water heater in a compartment beneath the starboard quarter berth deck. A heat exchanger loop in the water heater is connected to the engine’s freshwater coolant system, allowing for hot water while underway. The pump that pressurizes the system is in another compartment below the quarter berth deck.
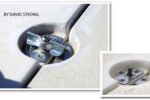
Beyond replacing all of the pipe in the original system, I added a high-quality filter and canister to the cold-water side of the galley faucet to enhance water purity. Also, I wanted to add a cockpit shower and a waterline terminating under the V-berth for a future watermaker.
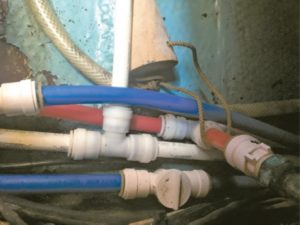
Half-inch PEX pipe is easily sourced. Any home improvement store sells 25-, 50-, or 100-foot rolls. The pipe can also be bought color-coded, red for hot and blue for cold. This is a nice touch and makes it easy to keep your runs separate and identifiable.
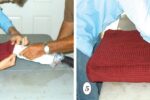
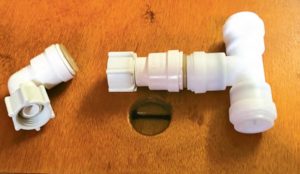
When it comes to connecting pipe to fittings, there are two approaches, and they depend on the type of fitting you choose. First are fittings that attach to the hose with a crimping ring using a specialized crimping tool. Crimping the hose to the fitting is somewhat like swaging a lifeline or standing rigging. The fitting, whether an elbow, tee, or coupling, is pushed into the end of the PEX pipe, over which a crimp ring is slipped. The tool then compresses the ring to form a watertight joint that should last indefinitely, if done correctly. Plumbing contractors prefer this method because the fittings are less expensive and the mechanical joint is simple. While crimping tools used to be pretty expensive, they are now in the $50-$60 range, making this method viable for a small project like a boat re-pipe.
The second approach relies on a “push-to-fit” fitting that does not require crimp rings or a special tool. Essentially, this fitting type has a circular row of metal teeth that grip the pipe when inserted. A series of O-rings makes the joint watertight. Though more complex and expensive than crimped fittings, perhaps the biggest advantage of push-to-fit fittings is that they can be removed (using a simple tool) without cutting or damaging the PEX pipe. That means when using this type of fitting, repositioning or changing the fitting or pipe is relatively easy. And, these fittings have also proven to be very reliable over time.
In addition to being easy to use and reusable, the push-to-fit fittings can be installed in tight spaces where a standard PEX crimping tool with 12- to 16-inch handles could not be used. This is because making a proper crimped joint requires that the tool be applied at right angles to the pipe. Can you imagine trying to use a crimping tool inside your vanity cabinet or behind the boat water heater? Impossible in many cases.
I also sought to use all-plastic fittings, as I felt they would endure the salty environment with more fortitude than brass or copper fittings. For all of these reasons, I chose push-to-fit fittings. For cost savings and convenience, I purchased most of them online, though they are also widely available at hardware stores.
Once I sourced all of the materials, the actual re-piping of my boat was straight-forward without too many surprises or backtracking. To begin, I removed all the hose clamps and fittings from the old hose by simply cutting the hose. Because PEX is semi-rigid, it often feeds well between bulkheads and under cabin soles without the need of a mouse line. But where I did need a mouse line, I used two methods.
In some cases, I attached my new PEX pipe to one end of the old hose with electrician’s tape and pulled the new pipe through while removing the old hose. When the old hose was uncooperative in this role, I employed electrician’s fish tape to first fish a route through. Then I drilled a small hole in one end of the PEX pipe and attached the fish tape using its hooked end. It was easy to pull the pipe through as I reeled in the tape.
I roughed in the whole system, pulling new pipe that was cut long to allow some flexibility when the connections were made. I did the longest runs first. If I made a mistake, the longer pieces could then be used in a location that needed a shorter pipe, reducing waste.
When I needed to cut PEX to length, I did so easily with a pipe cutting tool, hacksaw, or razor knife. I preferred the single-stroke pipe cutting tool. It is quick and accurate and leaves a clean edge—an important factor, since any burrs or sharp edges could damage the O-rings once inside the fitting.
After the rough-in was nearly complete, I started making up joints, working from the two storage tanks back to the pressure pump with blue pipe. I added a simple in-line water strainer at the outflow of each tank. Ahead of the point where the two tank lines met and were tee’d into the inlet line going to the pressure pump, I added shut-off valves. The original system had them, and in the absence of a tank monitor, it seems smart to only drain one tank at a time.
The output from the pressure pump came immediately to a tee, where one leg went sternward to the new cockpit shower fixture. The other leg first went to the water heater, then the galley sink, head shower, and lavatory faucet. This was done using tees to branch up to a fixture while continuing on to the last fixture, the lavatory faucet.
The hot-water output began at the water heater and then followed essentially the same path as the cold-water pressure lines, using the same trunk-and-branch methodology.
When using the press-to-fit fittings, the key to a watertight joint is to make certain the pipe is fully seated. The full seat depth for any brand of fitting is a known measurement, so a good approach is to first measure that distance up from the end of the pipe, mark the pipe with a sharpie, and then insert. If the mark is visible after insertion, the pipe is not pushed in far enough.
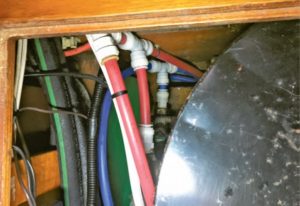
While PEX pipe is very flexible, shorter sections are much more resistant to flex. If forced to flex, it’s possible for lateral stress to cause fitting connections to fail. Instead of forcing too much flex from shorter lengths, a better practice is to use additional fittings at tight bends to keep the pipe and fittings in proper alignment.
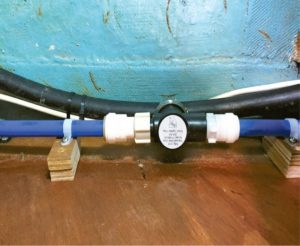
For the most part, PEX pipe will lay down and stay put without restraints. On many of the runs, I used the original factory holes in bulkheads and compartments that then gave the pipe runs some rigidity. In some places, I used a stand-off block and plastic cable clamp to keep the pipe and connectors rigid.
When all the fittings were attached, it was time to pressure-test the system. I turned on the water pressure pump and checked each fitting connection carefully. I did find a couple connections that were leaking. In one case, I had not fully seated the pipe into the fitting. It was behind the water heater in a very tight working space and it was difficult to see my mark. Another joint in that same area was apparently under lateral forces great enough to tweak the pipe and fitting out of alignment and cause a leak. In that case, I removed a section of pipe and used a longer piece to relieve the strain. As with any plumbing system, periodic leak checks are essential for a dry boat and water conservation.
To date, we have been very pleased with results. The new PEX system, along with the addition of the high-quality filter under the galley sink, has made our tank water taste as good or even better than any bottled water. We no longer buy drinking water, but instead happily drink from our own system, which gets filled from various sources as we move around. When filling our tanks, for redundancy I use an additional in-line filter that attaches to our hose end.
David Popken is a retired homebuilder living at the edge of Galveston Bay in Texas with his wife, Kris. His sailing career has spanned nearly four decades and is still going strong. Now fully vaccinated, Dave and Kris are back to enjoying restaurant dinners with old friends and looking forward to a long summer cruise to Maine.
Thank you to Sailrite Enterprises, Inc., for providing free access to back issues of Good Old Boat through intellectual property rights. Sailrite.com