A trio of Pearson 36-1 owners compares notes on their boats, refits, and wide-ranging sailing.
Issue 137: March/April 2021
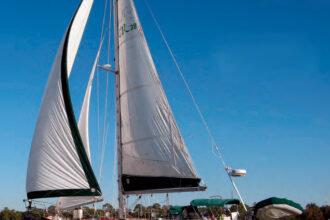
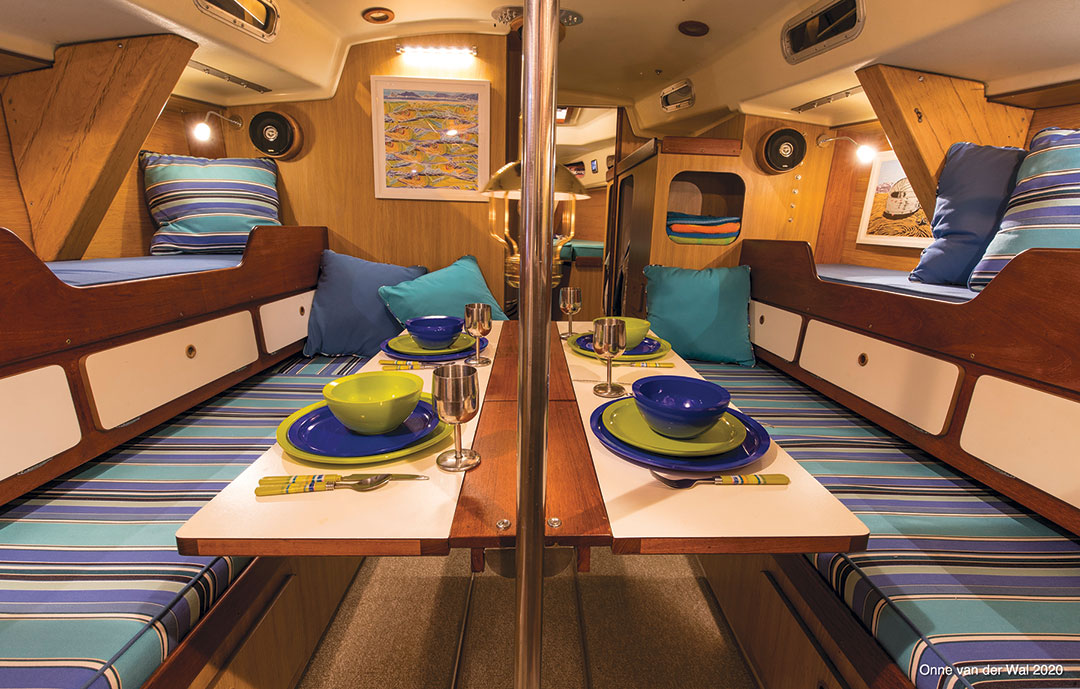
In 1972, Pearson Yachts began producing the P36-1, designed by William Shaw. Conceived as weekend racer/cruisers, with limited fuel and water storage, 104 came off the line. Their hulls are overbuilt by today’s standards, their masts are keel-stepped, and their keels are attached with bronze J-bolts cast in lead. Pearson 36-1s came from the factory with Edson steering systems, proper seacocks, and a layout that can sleep seven crew. Stowage space is limited when compared to modern designs, but their classic lines are among the most beautiful, and they are fast.
I spent 12 years renovating P36-1 hull #58 and named her Skylark. I am personally acquainted with her every screw, nut, and bolt. When I moved my boat to The Netherlands, I first had to import her into the European Union, which required that Skylark undergo a comprehensive post-construction survey. The surveyor assigns the imported vessel a seaworthiness category; Skylark is now rated Recreational Craft Directive Category A—warranted to have been built to navigate the open ocean in winds above Force 8 and waves higher than 4 meters. Pearson 36-1s are built tough.
Over the years, and thanks to the internet, I’ve come to know other Pearson 36-1 owners and to watch a few refit their 50-year-old sisterships via blogs and YouTube. I’ve been fascinated to see other approaches to refitting and upgrading these boats. I’ve also been gratified to learn that I’m not the only P36-1 fan. And I began to wonder: What is it about these P36-1s that cause people to put so much time, money, and effort into them?
I talked with the high-profile owners of two of Skylark’s sisterships to learn more.
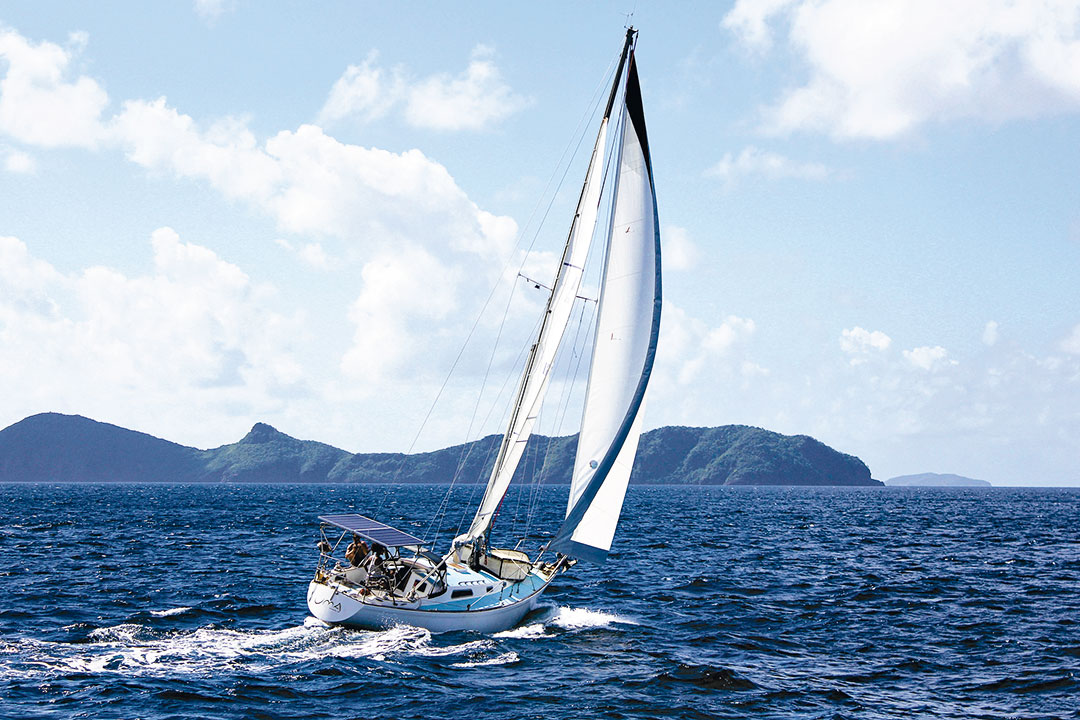
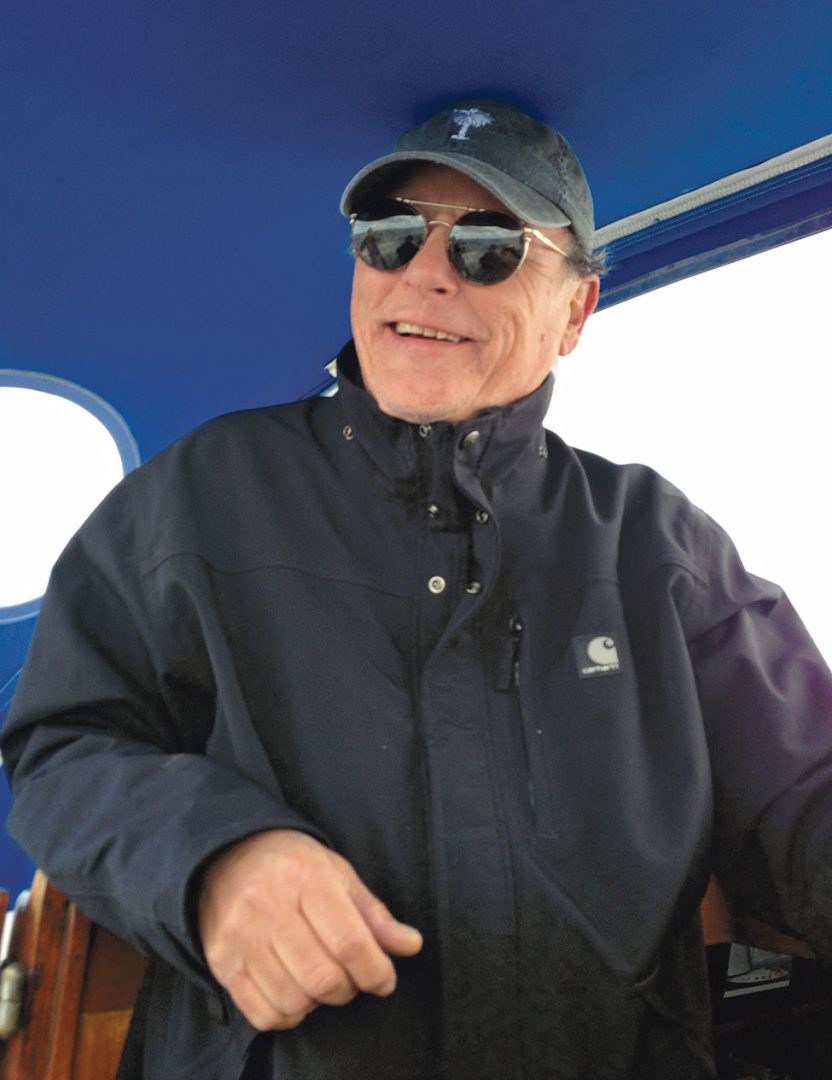
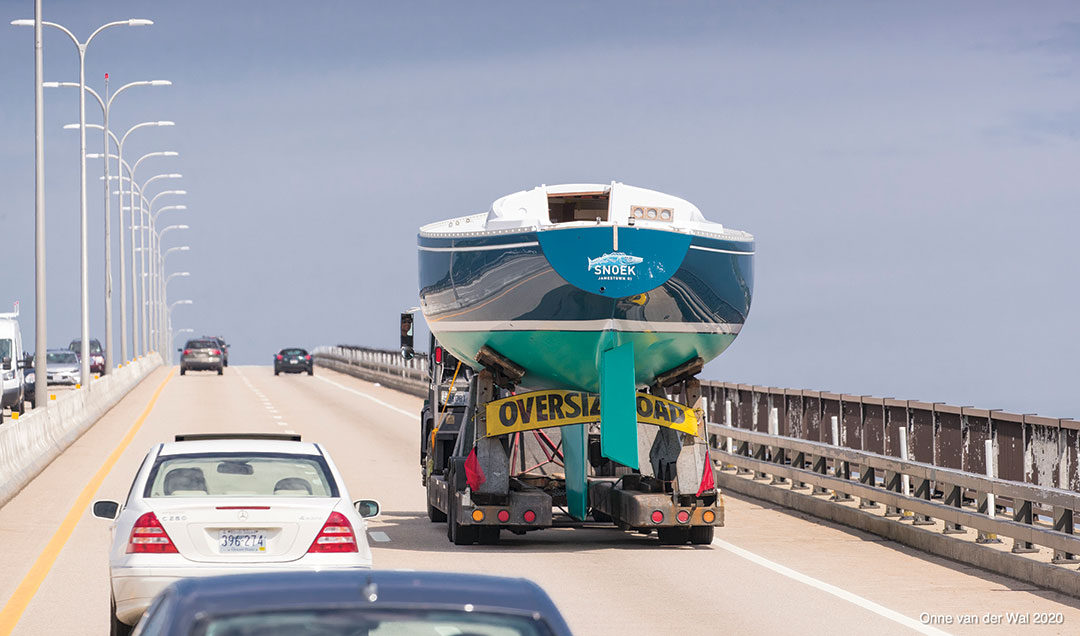
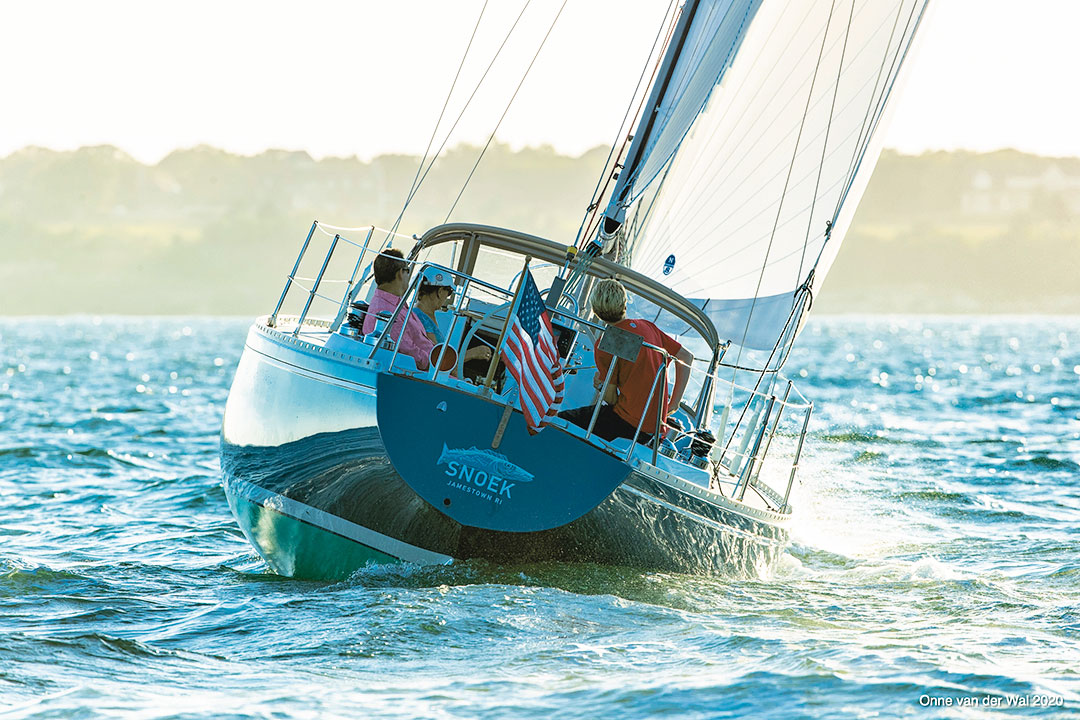
Onne van der Wal (OvdW), of Newport, Rhode Island, was once a professional sailor, notably crewing aboard Flyer, winner of the 1981-82 Whitbread. But the photos he captured during that race were so sought after by the world sailing press that he hung up his sea boots and bought more camera equipment. Today, he is an award-winning nautical photographer and sails Snoek, the 1972 Pearson 36-1 he lovingly refit.
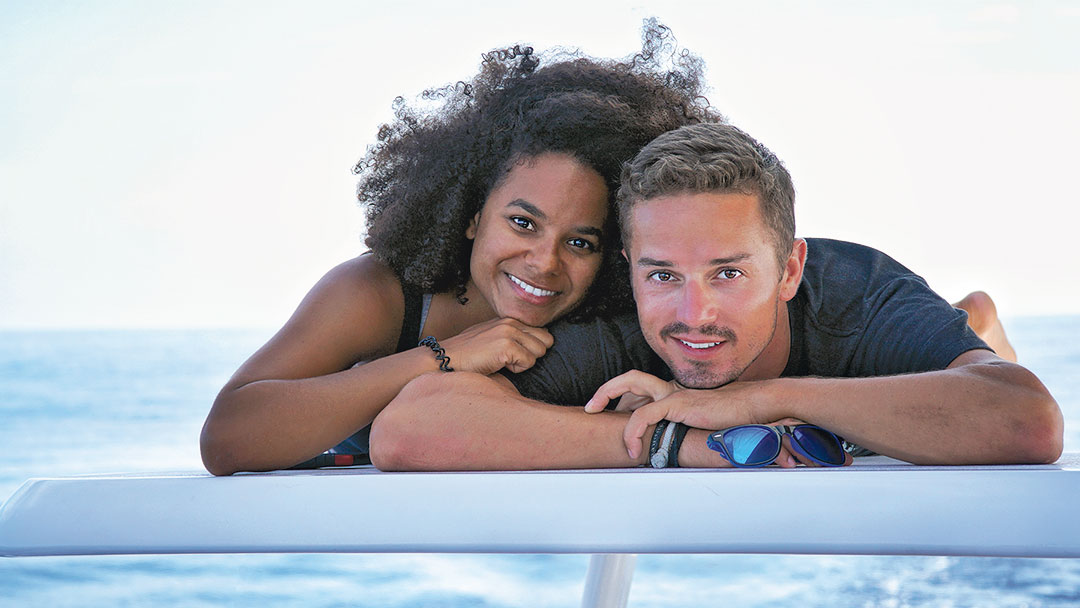
Dan Deckert and Kika Mevs, of Sailing Uma, (DD&KM) are architects by trade and refit their 1972 Pearson 36-1, Uma, while over 320,000 YouTube viewers followed along. To date, the couple has sailed over 20,000 miles and visited 25 countries along the way.
And me (GDB)? The opposite of Onne, I was a photographer before I was a sailor. Since 1978, when I began shooting the B-52s, I’ve shot over 300 album covers for bands like The Ramones, The Go-Gos, and REM, over 30 of which have turned gold or platinum. After buying and refitting Skylark, I sailed her across the Atlantic and am currently exploring Northern Europe.
GDB: Before buying this boat, I renovated and owned a Pearson 26 for 25 years; I loved its speed and strength. When I had a growing family, I knew I needed a bigger boat, and my wife wanted a hot shower. I had always had my eye on a Pearson 36. I found two on eBay in 2007, one had an Atomic Four and the other had a Yanmar with 100 hours on it. I had the boat with the Yanmar surveyed and the surveyor recommended that I not buy the boat. But all the problems he listed—untestable antique electronics, leaking chainplates—were all tasks that I knew I could handle, so I bought Skylark without even seeing her. Why the Pearson 36-1 for you?
OvdW: I asked a friend of mine, who was a designer and a naval architect and who I swim with—I do a lot of open-water swimming—about boats and he straightaway said, “Go look at a Pearson 36.” I looked at one on Long Island, one in Bristol, one in Newport, one somewhere else, and the one in Newport, hanging on a mooring literally 10 minutes from my office, was the one that I bought. The prices are all the same on these older boats. Anything that was built in the 1970s or early 1980s, you can buy them for $10,000 to $20,000. Once I saw the boat—I loved the lines—I started looking at people’s reports, the sailing ability of the boat. (Years ago, I actually met Bill Shaw, who designed the boat, when I did work for Pearson, back when they were still in business.) When I first saw the Newport boat, she looked really tired. I found the owner and said I want to go for a sail.
It was a beautiful day, it was light air, the wind was about 7 to 8 knots, and we sailed up Narragansett Bay.
I said to the owner, “I want to buy the boat, what do you want for it?” I made him a lowball offer and we haggled for a couple of minutes before he stuck out is hand, “Deal.” So while we were sailing, we struck the deal.
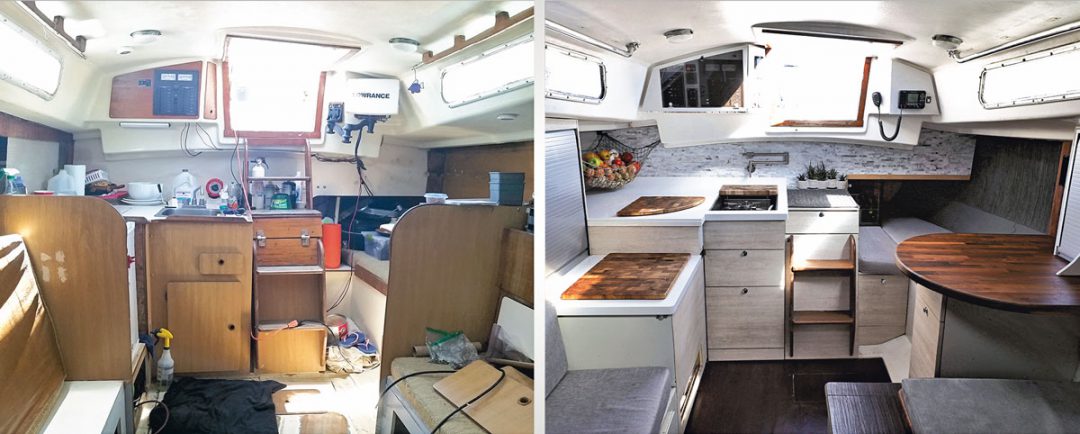
DD&KM: For us, it was a lot to do with the layout. We knew that we wanted to live on the boat…we wanted the head to be separate, we wanted a wheel, not a tiller. So it was the layout and also the price. Our boat was originally listed at $21,000 and over the course of two months they dropped the price to $16,000 and then to $11,000. We didn’t know about Pearsons before then, we just knew that we liked that boat, and that we couldn’t afford it; we had the listing bookmarked and we’d looked at it every couple of days to keep ourselves motivated, and every time we looked at it, we saw the price go down, down. We put in an offer for $8,000 and then they found out that the motor didn’t work. They tried fixing it, but they couldn’t, and they were like, “You guys can back out of the deal.” We wound up offering $3,000 and they accepted. Definitely price and layout.
GDB: Did you have your boat surveyed before you bought her?
OvdW: Yes, I did. Because I work in the marine industry, I have a lot of good contacts and I said to a buddy of mine, “Can you just have a look at it?” I just wanted to know that the core was good, that the hull was good, that the keel-to-hull joint was good, that the deck-to-hull joint was good. It was the big picture that I needed. After he surveyed the hull, he told me that everything was solid, but said, “I haven’t looked at the engine, the lighting…”
I said, “Don’t worry about that, it probably all has to come out.” So that was it.
DD&KM: We did. When they accepted our $3,000 offer, we put “pending survey” on the contract. We paid a surveyor $700 to be told that the boat needs a refit. Yeah, it’s a $3,000 boat, of course we need to replace the wiring, plumbing, and standing rigging. I think it’s probably worthwhile to watch some YouTube videos, read some books on how to fix an old sailboat, and save the cost of a survey. Surveys seem to be more for insurance companies and banks than for boatowners.
GDB: Significantly, my surveyor reported that the chainplates were all leaking and this had caused the hull liner to warp. The Treadmaster deck covering was failing its bond and there had been a collision of some kind on the port side of the hull. What were the problems or defects uncovered in your survey?
OvdW: Small areas of soft deck core beneath two or three of the stanchion bases. The rest was good. He said, “Structurally, she’s a very nice boat.” One of the chainplates was leaking a little bit, but all I did was lift that little plate and put some caulking in there and squeeze it down.
GDB: Did you have a budget for your boat’s renovation?
DD&KM: We didn’t have a budget, because we didn’t have money. After shipping the boat to Florida, we were broke. We flew to Haiti to do one more architectural project, which netted us $10,000. That lasted us the first year. I remember choosing to eat ramen noodles for a month so we could afford to buy epoxy for the boat. We’d use most of our cash to buy boat stuff and then use the change to buy groceries each week. It was rough. But we were so determined to get on the water and to get out of Florida.
From the start we knew that we would be filming everything, because at that point there wasn’t anything online about boat renovation. Nothing about starting in an apartment, fresh from college, to owning a bluewater boat, so we knew there was the potential for those videos to do well. We knew that the more we worked, the more videos we could make, and, theoretically, transition to earning all our income online. And we were confident we could collaborate with companies, so it’s not like we worked 10 years to save money to refit a boat, we just worked and saved along the way. Our budget has definitely grown since that first $10,000.
When we left Florida, we’d made our first $400 from our YouTube videos, so we knew we could buy groceries. We set sail for Haiti with full provisions and a 20 dollar bill that we saved. When we got to Haiti, we bought a beer and a SIM card and we were out of money. So it’s like the saying, “It doesn’t matter what your budget is, you will wind up spending what you have.”
GDB: When I bought my boat, all the Wilcox-Crittenden seacocks appeared to have never been turned or maintained. After getting a great tip from the owner of the boatyard, I used a carbide burr in a drill to cut off the flange of the through-hull from outside the hull, allowing me to just lift out the seacocks. I then took them to an auto shop so they could soak overnight in parts cleaner. The next morning, I used a wire brush on a bench grinder and shined up all the pieces. When my wife eventually saw them installed, she asked me if they were new. I said, “No, I just had them gold-plated to prevent corrosion.” Had her going… What was the most apparent problem with your boat at the start?
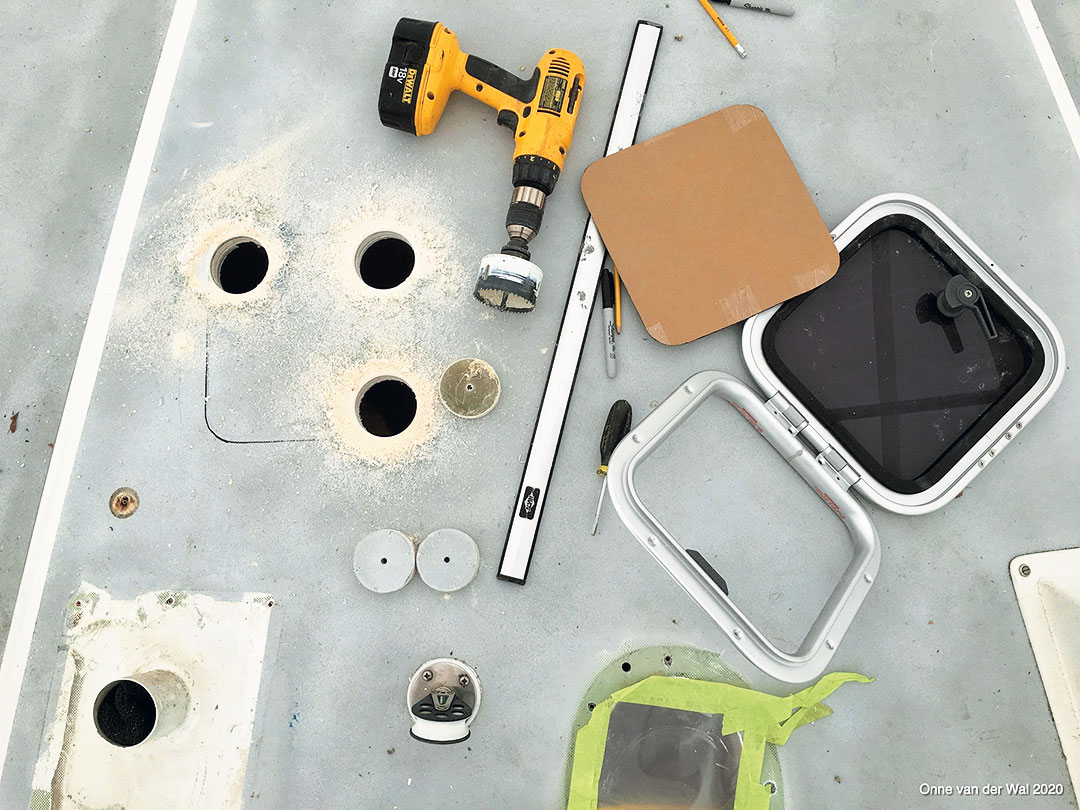
OvdW: The stench, but that’s something I can deal with. As I have said before, this was a cosmetic refit, not a structural refit. After looking at four other boats, I kept coming back to this one. I said to myself, “This boat has not been fooled with. This guy sailed the boat, but he never put any systems on it, like hot water, it was like the day it left the factory, except very old.” That said, the boat had been upgraded with a sweet 35-horsepower Yanmar; that was a huge benefit. I didn’t want to go for the Atomic Four gas engine. He had replaced the teak toerail with an aluminum Goyot, which was beautifully through-bolted to the inside of the boat. He had replaced all the hatches with Lewmar hatches. While they were old and crazed, I was able to easily replace them all with the same model Lewmar hatches. The spar was in good shape. I didn’t want any teak and he had replaced the teak grabrails on deck with stainless steel. They looked like small things, but they made a huge impression on me.
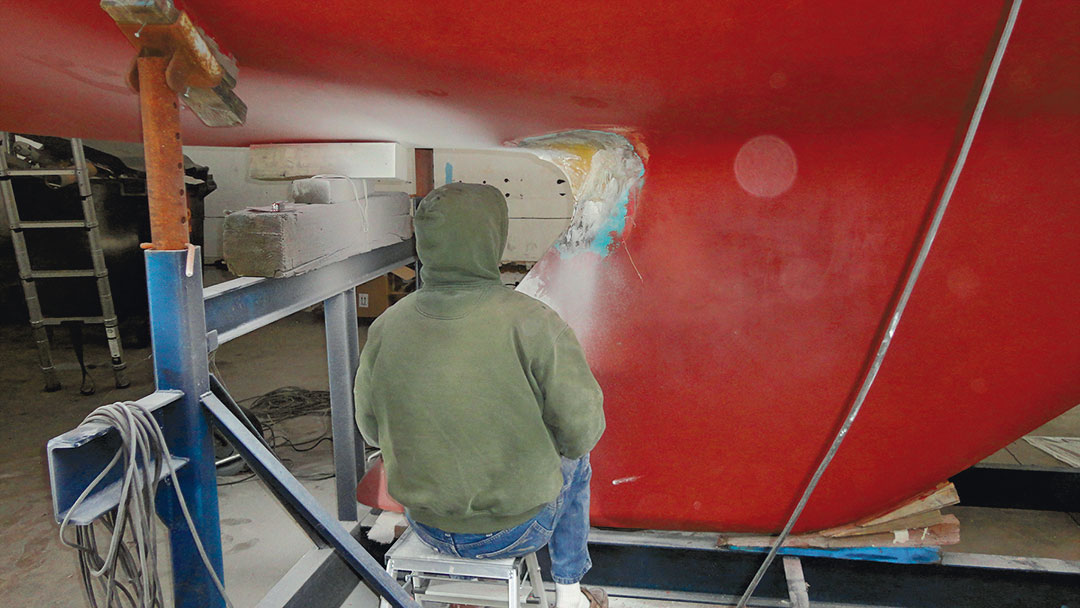
DD&KM: The keel. We knew the electrical was old, we knew the plumbing needed to be repaired, the rig had to be redone. We knew that the boat needed maintenance, but when they picked it up off the truck in Florida and the crane drove over some bumps in the road, the keel wobbled athwartship. Our stomachs fell to the floor. That was the one day we saw our boat before we flew to Haiti to work. That’s when I started chatting online with you, George, on the Pearson Owners’ Group. By the time we made it back to Florida, we had a plan. We picked up the tools and got to it. That repair went well, and the keel is really solid now. The keel is very narrow aft and made the original layup difficult. So, if you hit something in a Pearson 36, there will be a smile in the front of the keel and a crunch aft.
GDB: Going back to the “smile” you brought up, this is common to many of these Pearsons and to other boats that feature a similar keel design. When I bought Skylark, she had the smile, and I opened it a bit more and filled it with thickened West System G-Flex. Then, due to a previous owner’s repair attempt, there was a hatch cut in the cabin sole and I could easily glass in a “T” of 2-inch-thick black locust wood, which I chose for its water resistance. This weak spot at the aft end of the keel has appeared on other P36s and owners have used a variety of repair methods. What have you both done with regard to this design characteristic?
OvdW: I noticed only a little 3- to 4-inch crack on one side of the keel joint when I bought the boat.
DD&KM: We had fist-sized dents in the front of the keel caused by someone hitting stuff. Because there were no floors at the aft part of the keel, no support, the leverage from an impact at the leading edge drives the back of the keel upward, into the hull. On the aft lower section of the keel, we cut that very last little fiberglass triangle. It was literally flapping at the back of the keel for a year and then I dove down one day and, “Oh! It’s gone.” The next time we hauled out, I just ground it down and glassed it over, and we haven’t noticed an ounce of difference in performance. It was 8 inches of useless fiberglass.
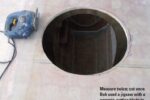
GDB: One long-term maintenance project that’s indicated is rebedding the keel. I tried to drop the keel. I cleaned old excess resin off all the tops of the keel bolts and removed the nuts. This is when I discovered that the 5/8-inch bolts were bronze, not stainless or iron. I had core saws made by a blacksmith who extended the depth of the core saw. Fixing the core saw to a series of extensions, I was able to slip the core saw over the first keel bolt, and I attempted to cut around the keel bolt down to the lead. Unfortunately, the core saw caused the resin that had been poured over the keel bolts to melt, and when the core saw stopped turning, the melted resin froze the saw in place. It was the devil to remove the core saw, and I abandoned that project. Have either of you rebedded the keel?
DD&KM: Every time we are out in the middle of the ocean, smashing into waves while lying in our bunk at night, we consider rebedding our keel. I hope the keel isn’t falling off. It’s that rattling thought, you read that one article about that one boat that lost her keel and then you read that you should rebed your keel every ten years. It’s the unknown. We know every aspect of our boat except the keel joint. I feel uneasy about this. I am under the impression that because we reglassed all the floors, and we know that the hull is fine, and the keel is solid lead, I realize the vulnerability lies in the bolts. They’re not loose and they are not showing any signs of corrosion. We ground out the filler around the keel joint, added Sikaflex, and glassed it. We’ve bumped into things and grounded half a dozen times, and the hairline crack of the smile has never grown. We tried different fairing material, finally using epoxy filled with fiberglass strands, and now the smile is nonexistent. There are no symptoms that the smile is getting worse. So for now, we’ll leave it alone.
GDB: Going back to previous owners, the guy from whom I bought my boat advertised it falsely. I don’t think it was fair to advertise the boat without disclosing the 100 screw holes that he put in the cabin sole to install carpeting! What was the biggest problem you found that was caused by a previous owner?
DD&KM: The last owner’s wife didn’t want to pay to winterize the boat and the diesel engine was seized. Mind you, we wouldn’t have gotten Uma for $3,000 had they cared for her. They took a boat that was basically fine and four months later… if we hadn’t bought the boat, they would have scrapped her; we saved Uma from the scrap heap. We call our boat the “rescue puppy.”
GDB: What was the most difficult modification you planned and accomplished?
OvdW: The biggest challenge for me was to get somebody to paint the boat. I have access to all the vendors, and I can wheel and deal with them. AkzoNobel said, “We would love to work with you on the Awlgrip.” I had the paint but didn’t want to do it myself; it’s a fairly specialized job. I went to the Providence Boat Show and approached my friend, Chuck. “I bought a boat and I am doing an article for Cruising World. I’ve got all the paint; do you want to work with me and paint my boat?”
He stuck his hand out and said, “Deal. Bring it up to the yard. We are going to need it for six weeks.”
So that was at first a huge challenge for me, and then a huge relief. You can do all the work on that boat, down below, repaint, refurbish, and make it look beautiful, but if the deck and the topsides look like shit, your boat’s still shit.
I did a lot of mechanical things. I replaced all the hardware. I went from Harken to Lewmar, so of course everything went metric. I had to strip everything off, fill all the holes, remark it and put it down again. So that was a good job. I replaced the old crazed and leaking Lewmar hatches and I put two new additional hatches in, one over the head and one over the galley.
Nothing was rocket science, they were all good, solid jobs. Sometimes I had to get some advice from the Lewmar guy on the hatches or the Raymarine guy on how to wire the instruments. Nothing was to the point where I said, “Now I am stuck.” I did get some help removing the engine to replace the mounts and the riser, but I was there with the guy pulling the motor out.
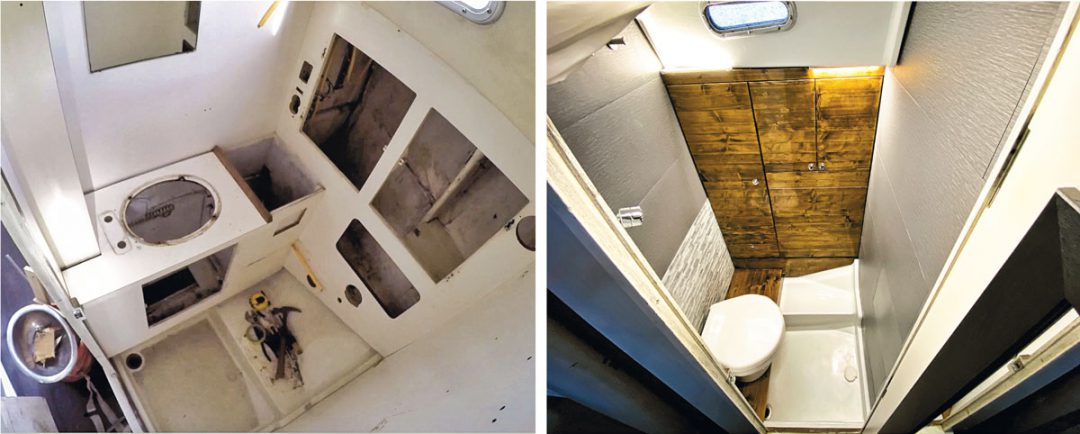
DD&KM: The keel was not that difficult once we had a plan. I think our biggest challenge was the head. It’s such a small space and we wanted to change where the toilet was and how everything was laid out, to make that tiny space more open and efficient. That took a lot of design work. The head was the most complicated challenge, everything had to fit to tolerances of about a millimeter.
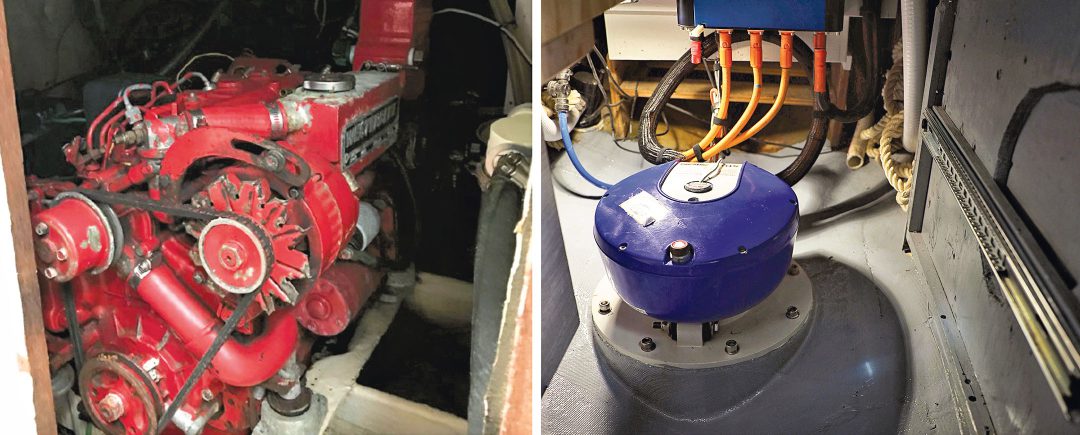
But the engine project was a challenge too. It was such an unknown. Diesels are known; we could have chosen from thousands of diesel mechanics had we decided to just replace the diesel, but we decided to go electric, and when we started, electric boat propulsion was very new and there was no information online. It took us nine months just to get our motor to spin. Two more months just to get the motor to not sound like a freight train. Ninety-nine percent of the time you don’t need a motor, but for that one percent of the time, you need it to work. The engine project took us the longest; it’s been five years and we are still not really done. The motor project has been a massive learning process, developing something that didn’t exist.
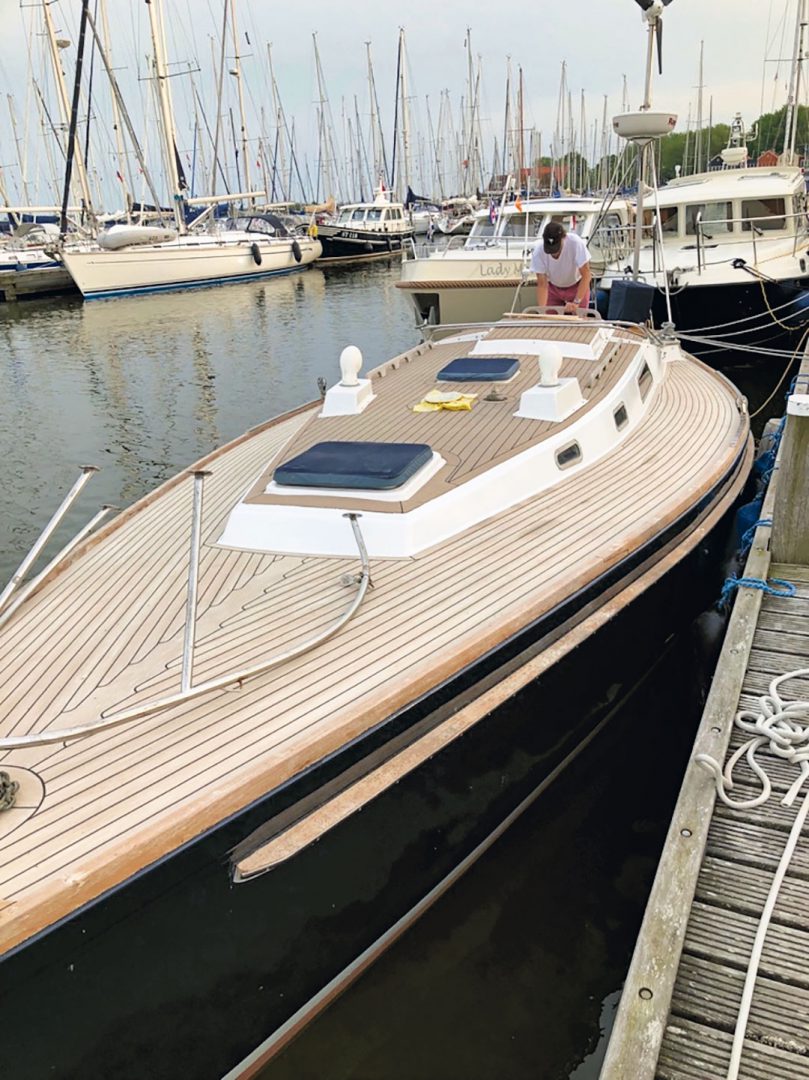
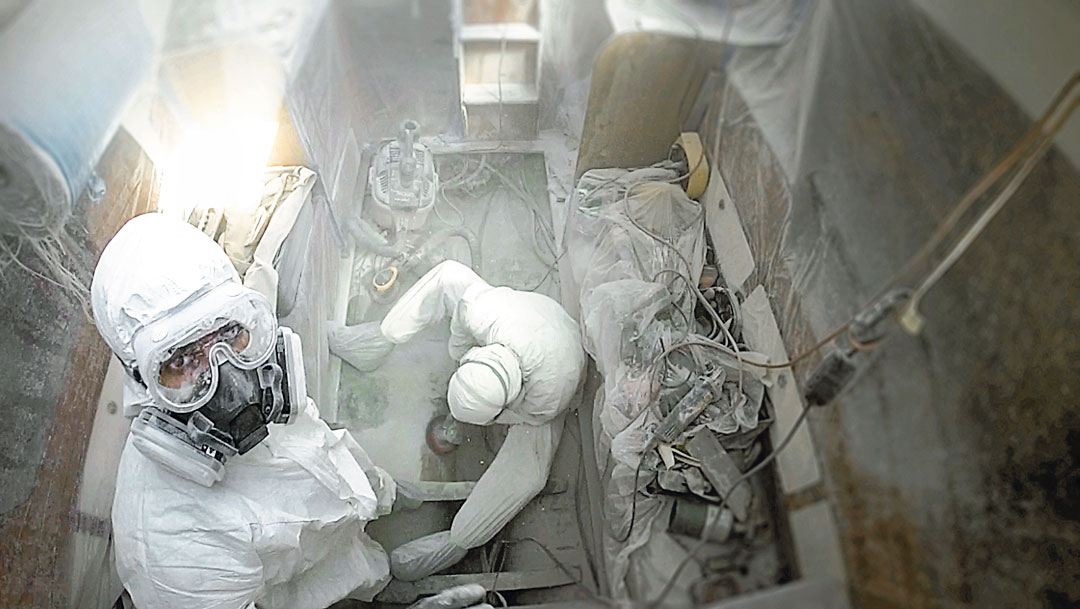
GDB: The most difficult and expensive project I tackled during my refit was removal of the ancient Treadmaster nonskid and replacement. The adhesive (epoxy?) was failing and the material was several different shades of brown. I first tried to paint it using Treadmaster’s own brand of paint, but it just power-washed away. I tried International’s Interdeck, which worked, but in the end, I removed all the Treadmaster and installed Flexiteek, which made a huge difference in the boat’s appearance. While a Flexiteek deck covering isn’t cheap, it is cheaper than real teak deck and easier to clean and maintain. What was the most expensive part of your refit?
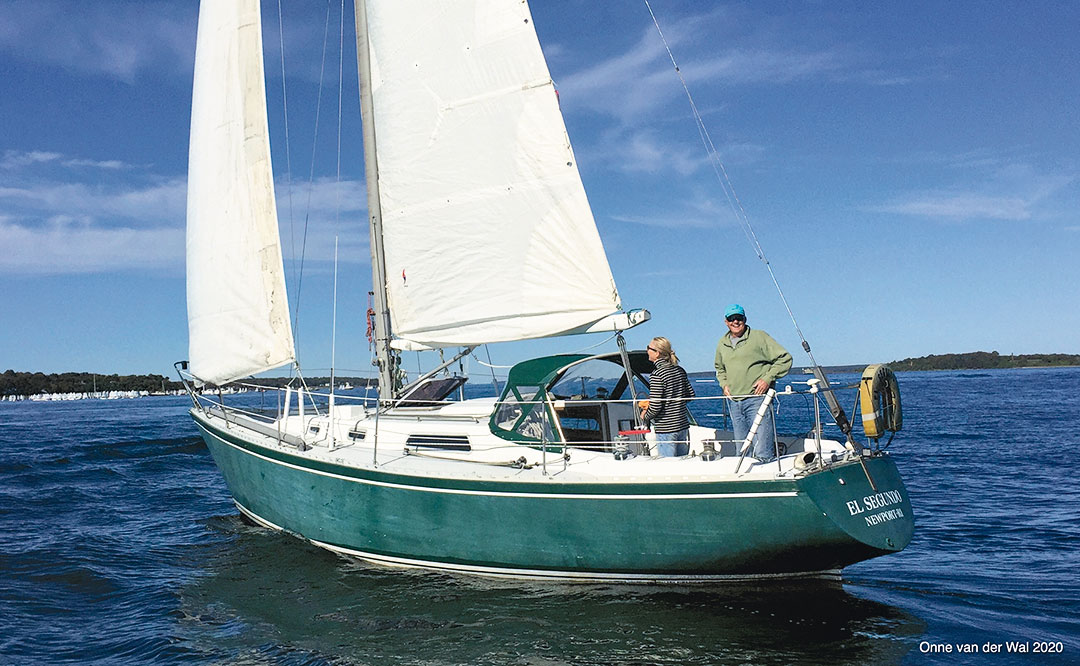
OvdW: If I consider the retail price of painting the deck and topsides, that was probably the most expensive. They prepped the topsides, filling all the hairline cracks, they opened up the soft spots under a couple of stanchions and filled them, they primed the boat. I took everything off the deck except the toerail. When they finished, it was absolutely beautiful, so beautiful that Awlgrip used photos in some of their ads. The second-most expensive thing was probably the sails. The third was all the instrumentation. All brand-new stuff from Raymarine, including two plotters, one in the cockpit and one in the nav station. I built a whole new nav station panel. I ended up removing the old Edson pedestal and replaced it with a new one but located it aft of the original. With the wheel in its original position, coming in and out of the companionway wasn’t very easy.
DD&KM: We get asked this question a lot, “How much did it cost?” It might sound pretentious, but we honestly don’t know. We purposely haven’t kept track because, for us, it’s never been about money. Since we paid cash for our boat, and don’t put anything on credit cards, we upgrade and refit Uma when we can actually afford to. We also save a huge amount of money by doing all the work on our boat ourselves. It takes more time, and a lot of research, learning and failing, but we’ve probably saved close to a million dollars.
I know, it sounds crazy, but take, for example, our recent upgrade to our electric motor. Our original DIY build from used golf cart and forklift parts cost us less than $1,000 including the solar panels and batteries. We’ve now upgraded to a used Oceanvolt saildrive we got for free from one of our followers. We still needed to buy a few new components from Oceanvolt for the installation, but we still did all the labor ourselves. Overall, it cost us around $4,000, including the haulout and time on the hard. But that was after using our original motor for almost five years. That same Oceanvolt setup new, including installation labor, can cost upwards of $100,000.
A lot of the labor-intensive projects, like fixing the hull-to-deck joint, painting the boat, and the keel work, we only paid for materials, like fiberglass and epoxy, a couple of hundred bucks here and there. In the first two years, we estimate that if we had been paying $25 an hour for labor for all the time spent on all the projects, by the time we left Florida, we would have spent close to $750,000.
Our boat is our home, and our means of transport. Because we’re not in debt for anything, as long as we have some money left in our account at the end of the month, we’re happy. But money in a savings account won’t do you much good if your boat starts sinking in the middle of the ocean.
GDB: Since buying the boat, there was a slow leak in the back of the bilge. It turned out that the leak stemmed from the very narrow aft end of the bilge where the layup wasn’t done well and there were many voids. When I decided to remedy this problem, I wound up grinding away all the broken fiberglass from the outside and opening all the voids. This created a large hole where the aft end of the keel met the hull. I could put my fist through the hole. I built up layers of fiberglass saturated in West System G-Flex. Have you uncovered any manufacturing defects? What were they? How did you remedy them?
DD&KM: We always joke around and say that our boat was built on a Friday afternoon. Everyone says, “Oh, Pearsons from the ’70s, the hulls are like 2 inches thick, bulletproof!” The thickest part of the hull we have found, in an unreinforced area, across the general expanse, is like half an inch. It’s thicker where the chainplates are, and where we cut the hole for the Oceanvolt was about 5/8-inch thick. Compared to boats built today, our boat is well-built. The core wasn’t sealed when they installed anything and some of the core was rotten. The bulkheads were either not tabbed or not tabbed adequately. I like that the hull-to-deck joint doesn’t have any core to rot. Around the chainplates and stanchions there is no core to leak.
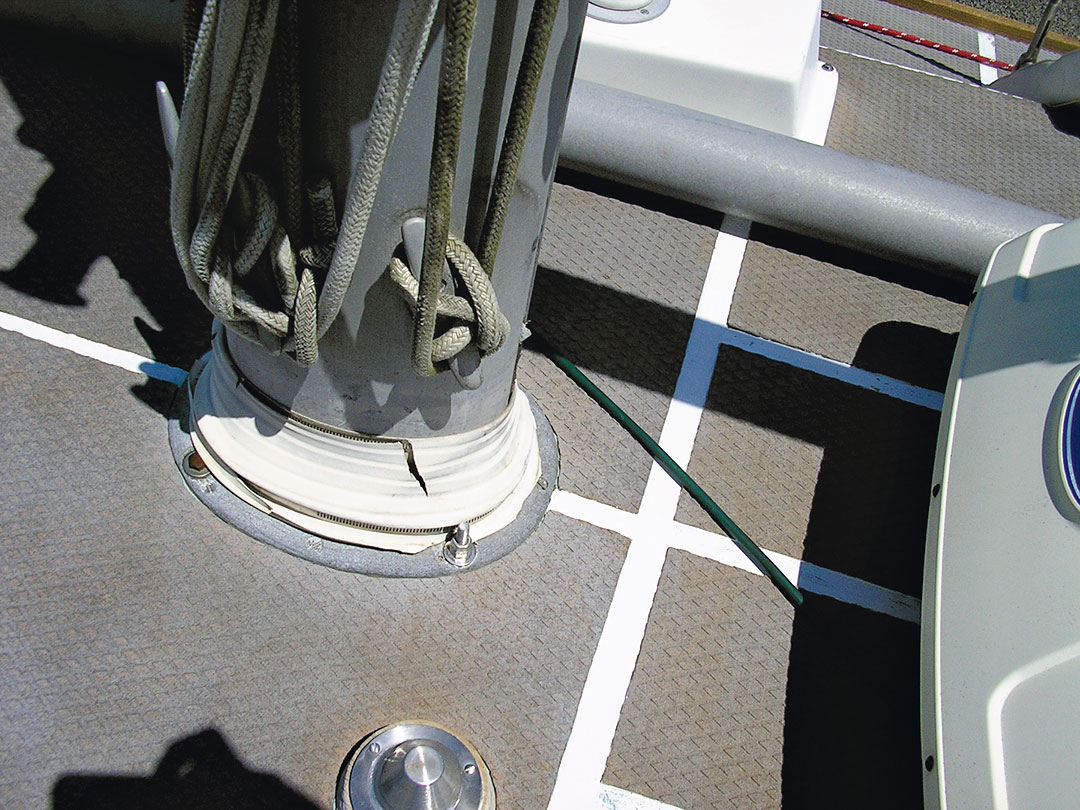
GDB: My mast step was iron and very rusty. I got a tip about how to cut off a few inches of the base of the mast and then had a Connecticut machinist fabricate a new mast step from aluminum that would raise the base of the mast to compensate for what I had cut off. In addition, I had the machinist add two vertical “ears” to the new mast step that allow me to bolt the base of the mast to the step. I had heard that this kind of reinforcement is a requirement of some racing organizations. Did you discover corrosion at the base of the mast? What did you do about it?
OvdW: I looked at finding a piece of the same section and I thought about shortening the mast and shortening the stays. In the end, I had a guy cut a piece as a spacer from fiberglass with a laser cutter, and it worked. Now I don’t have any more problems with electrolysis, the aluminum mast being separate from the stainless steel mast step.
DD&KM: Ours was already done. The mast had already been cut shorter and they built this nice beefy aluminum mast step that the mast sits on. We didn’t have that issue. We read about that issue for Pearsons before we bought the boat and when I looked, I saw that someone had already solved that for us.
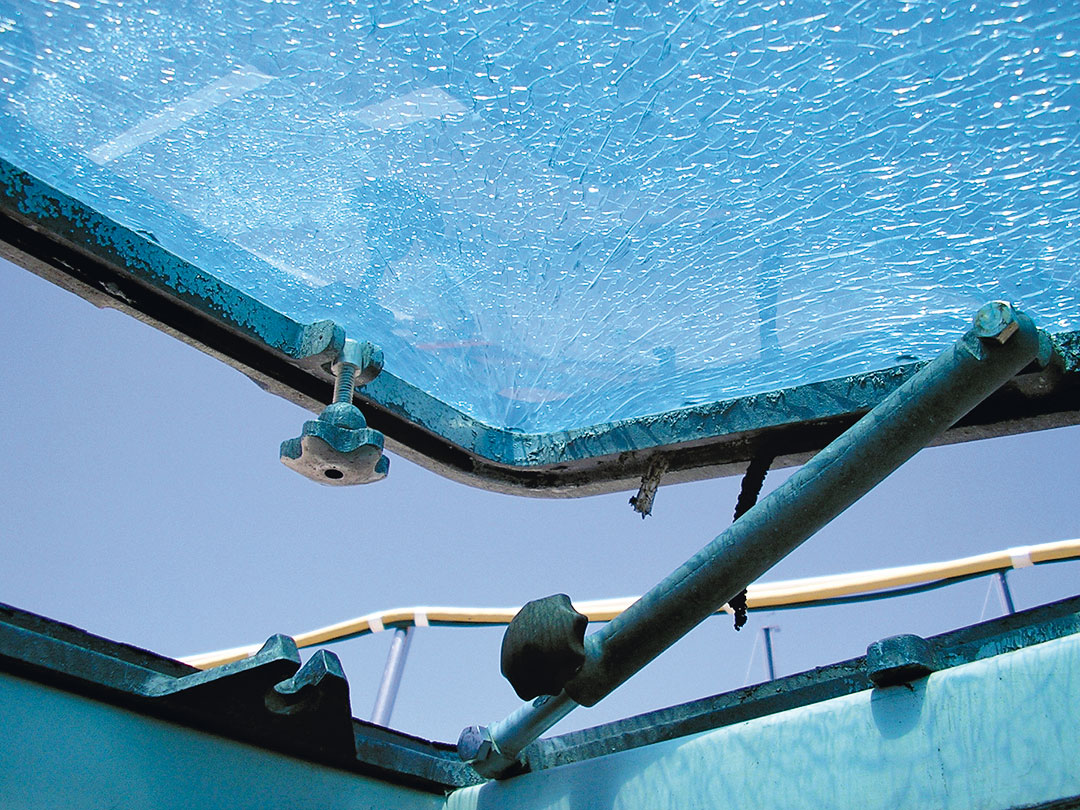
GDB: Early in our Atlantic crossing, water would pool against the leeward toerail. The teak toerail had just been screwed into the hull-to-deck joint with flathead wood screws and sealed with silicone…in 1973. Silicone has a lifespan, sometimes up to 25 years. Skylark was 36 years old. Unbeknownst to us, the pooling water was seeping through the screw holes and running behind the veneer of the hull liner. Once when we tacked, all the collected water spilled from the upper bunk to the lower bunk in the main cabin, effectively putting two now-soggy bunks out of commission. Eventually, I had new toerails made. The profile of these toerails is multisided, and thanks to a professional cabinetmaker, I was able to get long teak pieces the same shape and through-bolted the new teak to the hull-to-deck joint, sealed with Sikaflex. Did either of you have issues with the original silicone failing? In the toerail attachments, portlights, or hatches?
OvdW: When the guys installed the new aluminum toerail, they put new sealer in. I have taken all the inspection panels off and there is no moisture under the toerails. When I saw that the toerail was through-bolted to the deck, I thought that was another good indicator of the robustness of this boat’s construction. The portlight in the head was leaking badly; I re-bedded it, and now it’s perfect. I could remove those portlights and make nice Plexiglas portlights, but I want to keep sailing.
DD&KM: Yeah, old silicone. Everything leaked when we got the boat. We slept underneath a trash bag when we first moved aboard. The portlights were leaking, and given the fragility of our laptops, we had PTSD every time it rained. We put pans under to catch the drips and put the laptops away. Our boat doesn’t leak at all anymore. We removed the toerails and had 1,000 holes to fill. We glassed the hull-to-deck joint, and the boat is noticeably stiffer; she goes to windward better. Glassing that joint over was the best thing we ever did. The portlights were the hardest, we have done them at least three times. We replaced the lens in the forehatch with Lexan bonded with 3M VHB tape and sealed it with Dow Corning 795 silicone sealant around the edges, so there are no more screws holding the Lexan in the frame. We’ll see how that holds up when we get to the Mediterranean, where we expect the higher temperatures to cause the Lexan to expand.
GDB: On the safety front, I replaced all the standing rigging, I reinforced the port and starboard corners of the transom by adding 1 inch of fiberglass in those places under the deck. Then I installed 3/8-inch-thick stainless steel tangs to make strong attachment points for the Jordan Series drogue. Doing the fiberglass work in the confines of the small aft lazarette locker, getting epoxy in my hair, combined to make this the worst project of them all. To pass the Post-Construction Assessment survey in Europe, I had to make minor modifications for safety, like adding a second lifeline, installing gaskets on the cockpit lazarettes, being able to close the dorade vents, and adding a lock to the aft lazarette that didn’t have one. My bilge pump float switch was wired directly to a 12-volt buss, and EU law demands that the bilge pump have a switch to turn off the whole bilge pump circuit when one leaves the ship. What was the biggest safety improvement you made?
OvdW: Replacing all the standing rigging put my mind at ease. I also installed a massive emergency Edson pump with a 6-foot handle. It was a bit of a hassle to install that in the transom, but that thing can pump some water.
DD&KM: Our Cape Horn wind vane. Fatigue is probably the biggest danger offshore, because it’s just the two of us. If we’re tired, we’ll make mistakes. The only time I have injured myself was when I was too tired to be awake. The Cape Horn is like a third crew. While we still have watches, we don’t always have to be in the cockpit cold and wet. On our Atlantic crossing, we lived down below. We would slide the companionway hatch open, poke our heads out, look around, but we only had to go on deck to make sail changes.
GDB: Skylark has one transatlantic under her keel. She went on the Whisky Tour in Scotland, sailed around Denmark, was towed up the Rhine by a river cargo ship, and she’s made numerous trips down the European Atlantic coast to the Channel Islands and as far as La Rochelle. In 2021, we plan to start a two-year Mediterranean cruise before heading to the Caribbean. What are your sailing plans for your boat?
OvdW: Just coastal. I’ve been sailing New England the past few years and would like to go to Maine. On the back burner, maybe a Bermuda Race or maybe a Marion Bermuda Race.
DD&KM: We are planning to finish a circumnavigation with Uma. We bought her as a five-year boat to get us across the Atlantic. Now that we are across and everything is upgraded and fixed and we know she sails well and the rig is good, she’s now again our five-year boat.
GDB: Pearson 36-1s were not designed for ocean crossings. Besides carrying a Givens life raft and a Jordan Series drogue, I made a couple of modifications to Skylark that made her better prepared for ocean crossings than when new. I had a 1/4-inch-thick piece of aluminum cut that slides behind the companionway boards, and I am in the process of installing ½-inch Lexan over all the portlights. Do you consider your yacht bluewater capable?
DD&KM: Obviously; we crossed the Atlantic last year.
GDB: Any regrets?
OvdW: I regret being unable to get in touch with the guy I bought the boat from. He wasn’t well when he sold her to me. He loved the fact that I was going to fix her up, and he could see that I could sail. He said to me, “Please, show me the boat when you are finished, I’d love to see what you do with it.” I promised him I would and after all was said and done, I must have tried calling him six times, and I sent emails. That was my big disappointment, that I couldn’t show him what I did with this beautiful boat.
DD&KM: Nope! We’ve made a lot of mistakes over the years and failed many, many times, but we learn something new from each one, so we have no regrets.
George DuBose is a photographer with over 300 album covers to his credit. He sailed his Pearson 36-1 across the Atlantic and is exploring northern Europe with a five-year plan to visit the Med, Caribbean, and Canada before returning to Europe.
Thank you to Sailrite Enterprises, Inc., for providing free access to back issues of Good Old Boat through intellectual property rights. Sailrite.com