Nobody likes a leaky hatch. Here’s how to re-bed one.
Issue 140: Sept/Oct 2021
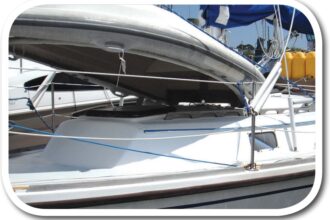
My husband, Robin, and I met fellow cruiser Adva Reshef in a boatyard, and we became fast friends making repairs to our respective vintage Dufours. When she was troubleshooting a leaky hatch on Waterhoen, a Dufour 31 owned by another sailor, we lent a hand, having been down this road ourselves a few times.
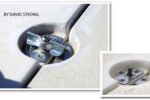
Most owners of good old boats will likely have to do the same at some point. Hatches, perhaps because of their relatively large surface area and their designed purpose to open, seem to be one of the worst offenders when it comes to sources for below-decks water leaks. Fortunately, re-bedding a hatch is a fairly quick and easy job if you know how to go about it.
First, make sure it’s necessary. Leaks can be deceiving, and the water you see dripping from under the hatch may have entered elsewhere and traveled along the underside of the cabintop or above a headliner, only to reveal itself at the hatch. After you confirm that the hatch is the source, check to be sure the leak is occurring where the hatch frame meets the deck, and not the seal between the opening part of the hatch and the frame.
Once you’re convinced it’s time to re-bed a hatch, first select a bedding compound. Consider the materials you’re bedding (plastic, metal, or fiberglass) and what adhesive or sealant properties are needed and desired. Choose carefully. Of course, you’re going to want the sealant to prevent water intrusion, but if you’re bedding a hatch with an adhesive sealant as determined as 5200, for example, trying to remove that hatch frame later may well be destructive, if not impossible. Butyl rubber, polysulfide, silicone, or even a mixture of compounds are typical solutions, but when in doubt, a good source is Don Casey’s indispensable chart of sealants from his book This Old Boat.
For this project, we used Sikaflex 291, a polyurethane sealant that, like most polyurethanes, is also a formidable adhesive. It comes in white, bonds tenaciously to gelcoat and metal, and is paintable.
Following are the steps we take to re-bed a leaky hatch:
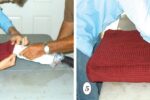
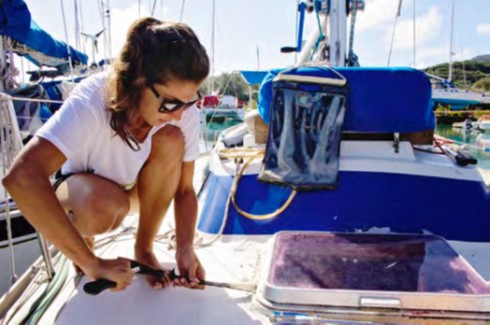
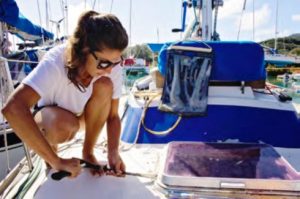
1. Remove the screws securing the frame to the deck. Hatch screws are often difficult to budge. If corrosion stops you in your tracks, see the sidebar “How to Remove a Rusty Screw.”
2. Use a pry bar between the deck and the hatch frame and gently pry. If you can’t wedge the pry bar under the hatch, gently tap the right-angled side of the pry bar with a hammer to drive it in. To avoid bending a hatch frame, don’t apply too much prying pressure at any one place. Rather, slowly work your way around the hatch to break the frame free from any old sealant. If the hatch frame is particularly difficult to unseat from the deck, and if clearances allow, close and secure the hatch to the frame before applying additional pressure. Closing and securing the hatch will give the frame a bit of added rigidity.
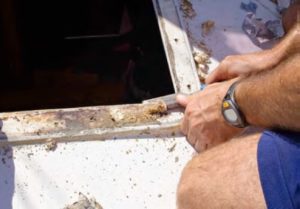
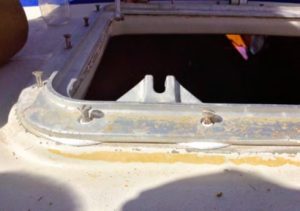
3. Once the hatch frame is removed, the fun begins. Scrape away all sealant using whatever tool is most effective. We’ve found chisels and paint scrapers usually do the trick.
4. Use acetone to thoroughly clean all deck and frame surfaces that will come in contact with the bedding compound.
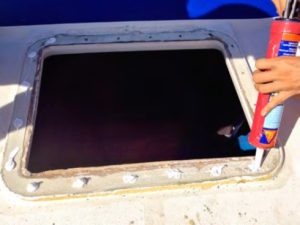
5. Fill the screw holes in the deck with new bedding compound, and then run a line of bedding compound around the area where you’ll seat the hatch frame to the deck. Don’t be shy with the bedding compound. When done correctly, it should squish evenly out the sides when you screw down the hatch frame. If you use too little bedding compound, you’ll risk leaving a small gap through which water will eventually find a way.
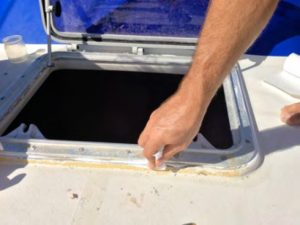
6. Replace one screw, tightening it only about halfway. Replace a second screw, as close to opposite as possible from the screw you started with, also tightening only about halfway. Continue until all the screws are in, alternating between screws placed far apart from each other. The point is to tighten the fixture against the deck evenly. Next, begin tightening the screws, nearly all of the way, in the same kind of sequence. Finally, bear down on each to completely tighten.
7. Clean up excess bedding compound that squeezed out.
Good Old Boat Contributing Editor Fiona McGlynn cruised from Canada to Australia on a 35-foot boat with her husband, Robin Urquhart. Fiona lives north of 59 degrees and runs WaterborneMag.com, a site dedicated to millennial sailing culture.
Thank you to Sailrite Enterprises, Inc., for providing free access to back issues of Good Old Boat through intellectual property rights. Sailrite.com