Giving an old galley a fresh face
Issue 153: Nov/Dec 2023
“We’ll just have to try and squeeze it in,” I said pleadingly, trying to convince my wife to pack one more thing into our already overpacked car.
Exasperated, Heidi, who also happened to be in charge of packing the car for our drive south from Washington to Mexico, said, “It won’t be a squeeze. It will need to ride on top of everything that’s already in the back of the car — including the cat.”
The subject of our discussion was a 3-foot x 4-foot piece of Formica laminate that could not be found in our area of Baja, Mexico, but was needed for an upcoming project. It would have to ride inside our small SUV to protect it from 2,000 miles of road travel.
“She’ll have fun. It will give her a new hidey-hole for the long trip,” I suggested, trying to lighten the mood.
In reality, Rosie the cat didn’t have fun. The sliding piece of cardboard-encased Formica bonked her sleeping body more than once on the weeklong road trip, eliciting nasty looks from both my wife and the cat.
Over the last couple of years, I have watched, or rather heard, the slow debonding of the galley countertop in our 1980 Fantasia 35, Cetus. It started as a small 6-inch diameter spot that had a rather hollow sound when a dropped spoon or knife would hit the area. And with 95-degree summers in the Sea of Cortez, coupled with high humidity, the old laminate was begging to be replaced.
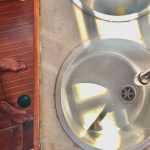
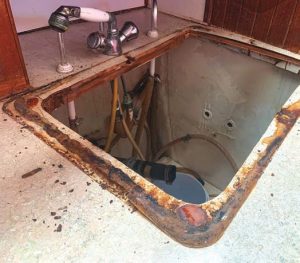
Sure enough, when we arrived back to Cetus, we found that more than half of the old countertop had come loose and decided it was time to replace it. First, we pulled the old caulking and trim pieces from the edges of the counter, then removed the sink and plumbing. (Note to self: Water pressure should be turned off at this point. Lesson learned — again.). With the double sink out of the way, the largest section of old laminate came up in one piece, with just the slightest bit of persuasion.
Once the plywood was exposed, it was easy to see where water had intruded under the lip of the sink and eventually, under the laminate. That had likely sped up the debonding. Armed with a ream of sandpaper, I figured a good sanding was all that would be necessary to prepare the surface for a strong bond for the new contact cement. Not so fast! The years-old cement was extremely hard and rough, and my 80grit sandpaper was no match for it. After just a few minutes of hand sanding, it was clear I would need to try something different, something more aggressive.
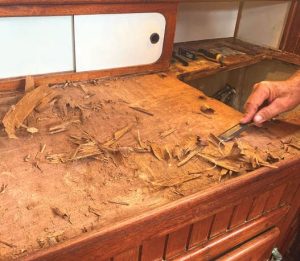
Thinking back to the recent reconstruction of Cetus’ cabin sole (“Saving a Sole,” Good Old Boat May/June 2022), I knew the mahogany plywood would be many layers thick. Using a sharp chisel, I peeled off the top layer of wood, revealing a surface that would need little more than a light sanding and thorough cleaning.
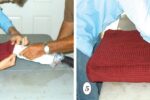
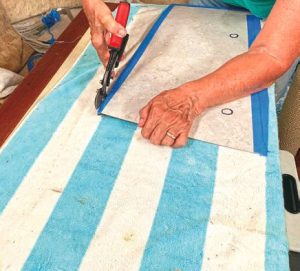
Meanwhile, Heidi laid out the new Formica and used the old piece as the perfect pattern. Not having to create a new pattern from scratch was a real timesaver. After carefully tracing the lines onto the new Formica with a black Sharpie, Heidi applied blue 1-inch painter’s tape, centering it on the cut line. The dark mark was clearly visible through the blue tape, which reduced chipping while the cut was being made. She had tried cutting the laminate with several different devices we had available, including a laminate scribe and laminate shears. But in the end, simple tin snips turned out to be the easiest, most effective, and least damaging way to cut the material.
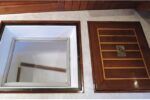
This is where a new challenge reared its ugly head. There are large 2inch rails attached on two sides of the counter; a bulkhead and cabinet complete the rough rectangle. Apparently, the boat builders in Taiwan used some serious glue, possibly of alien manufacture, to attach the rails. There was just no delicate way to remove them, so the new laminate pieces would have to fit in place right the first time, on all four sides. There was literally no room for adjustment.

After cutting the laminate, we dry-fitted the piece about two dozen times. We avoided making large adjustments by using 100grit sandpaper along the edges. The closer the fit, the better the caulking would hide any overcuts or chips. Even with all the fine adjustments, we still had to pop a corner in. That would be our starting place.
Spreading the contact cement on the exposed wood and the back of the Formica was the next step — though due to the vapors, we don’t remember much about that part of the process. After the fumes had dissipated and we could go back inside the galley, we were faced with the toughest part of the whole project.
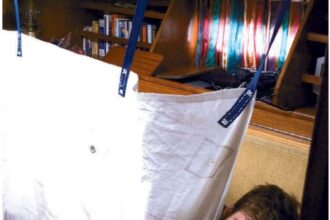
Contact cement is unforgiving, and if the two pieces aren’t positioned just right the first time, there’s no second chance. The bond is instantaneous and inseparable. Interestingly, nothing will stick to just one side of the dried glue, so we used a combination of newspaper and wooden dowels to suspend the Formica over the potential catastrophe. We placed the dowels on the countertop about 6 inches apart, then put newspaper on top as double protection from accidental touching.
Starting at the corner, we moved the paper and the first dowel away and slowly lowered the piece down. The initial placement looked perfect, and as we removed the remaining dowels and let the Formica fall into place, we breathed a huge sigh of relief.
With the largest piece of laminate glued down, we turned our attention to the two other pieces needing to be installed. They were small and easy to work with, but best of all, the sink would cover all of those seams. As we laid each piece down, I rolled the freshly glued Formica relentlessly with a 3inch rubber roller until my arms ceased to work, and the bond was ensured.
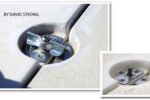
As usual, replacing the sink was harder than removing it. It started out easy enough, as the screw holes for holding the sink in place had bee n transferred from the pattern and were already marked on the new laminate.
Silicone was previously used to seal the sink but had apparently failed to keep water from intruding, which caused the debonding. We both agreed that using silicone again could create an ugly mess. Setting the double sink properly in its cutout would require twisting, turning, and then lowering it down in just the right sequence. We could picture the cleanup that would ensue if we accidentally spread silicone everywhere in the process. Instead, we opted to use butyl tape, placing it under the lip of the sink to keep water from migrating underneath and causing a future project.
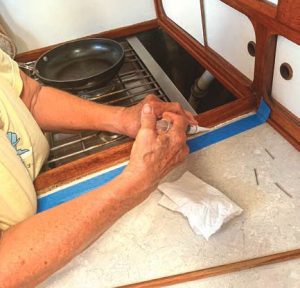
Before the project was complete, we had a 4-inch stretch of countertop that needed to be caulked. Heidi and I are no strangers to caulking or its associated mess, but when I pulled out the tube of silicone, a look of dread crossed her face. Over the last 30 years on Cetus, each of us has caulked with about equal luck on different projects, and neither of us is a fan of silicone caulk. We use it sparingly, but I made the decision to give it a try. I confidently grabbed the caulking gun and began to lay the bead of white silicone. Before I had gone a foot, I realized I was in trouble, and by 2 feet, my wife was pleading with me to stop. The bead had become a surging, stop-and-go mess.

Working together, we sacrificed a roll of paper towels to clean up the white goo. On take number two, we switched to a small syringe for the application. It was Heidi’s turn to apply the silicone, and she displayed a steady hand laying down a nice, even bead. Then she sprayed the caulk with soapy water and wiped the excess with her finger, leaving a very clean line. With a look of triumph, she set the syringe down — only to discover a nice white silicone smear up her arm.
“That’s it! I swear I will not be a part of any more silicone nonsense on this boat!” she said, cleaning off her arm and looking for more goo. It was a week before I pointed out the small white blotch that was still on her elbow.
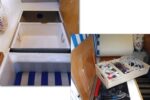
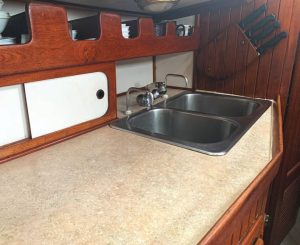
Having lived aboard Cetus for nearly 30 years, there have been plenty of DIY projects, both big and small. Although not a huge visual change, the new countertop definitely brightens up the galley area. And best of all, when I drop a utensil on the counter, the nice, solid kerplunk is music to my ears.
Terry Kotas and his wife, Heidi, began sailing in 1978. After building their first boat from a bare hull, the family set sail for the South Pacific. They are currently enjoying the Sea of Cortez aboard Cetus with their cat, Rosie, while planning their next adventure. Terry has written three humorous sailing adventure novels, and the latest, Adventures Off the Beaten Path, is now available at all major booksellers.
Thank you to Sailrite Enterprises, Inc., for providing free access to back issues of Good Old Boat through intellectual property rights. Sailrite.com