Restoring a nearly 50-year-old Pearson included repowering with electric.
Issue 143: March/April 2022
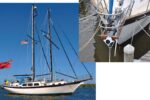
I purchased my 1972 Pearson 30, hull #220, in March 2015 sight unseen by way of eBay. I was the only bidder and won the “prize” for the minimum bid.
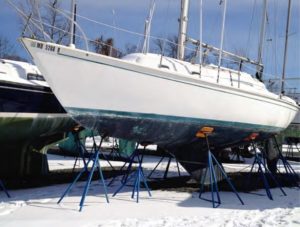
When I finally first set eyes on her in Annapolis, Maryland, I was sad to see this beautiful sailboat suffering such neglect. The bottom was spalling in several areas, the interior was a disaster, and all the running rigging was tattered and worn. The standing rigging seemed OK, but the haphazardly stored sails were moldy, and the mainsail looked as if it had been dragged along the bottom of the Chesapeake Bay.
Was I regretting my decision? Not for a minute. I saw the beauty beneath the overwhelming neglect. I shipped the poor girl back to my home in Barnegat, New Jersey, so I could spend time breathing life back into this sleeping beauty. And I certainly did spend time, starting with trashing everything not secured to the boat. I stripped out the holding tanks, freshwater tanks, electrical system, and every bit of running rigging. The Atomic 4 was beyond repair, so that went to the dumpster too.
Three months after I purchased her, I renamed her Kenzie Too in memory of our loving 17-year-old yellow Lab, Kenzie, who had left us the year before. And with a clean slate, I commenced a full restoration plan fit for a queen.
First Steps
I started with the obvious and the more-or-less easy part: the hull. Although I knew it would be quite some time before splashing, I repaired the bottom with epoxy, faired and smoothed it, and then coated it with bottom paint.
I cleaned and waxed the topsides to a shiny finish. Having taken down the mast for transport, I re-stepped it and replaced all the running rigging. Now my Pearson 30 no longer looked like an abandoned scow.
I replaced the old piped-in toilet and holding tank system with a Dometic 975 MSD, opting for the 5-gallon self-contained holding tank and pump-out fitting. I also relocated the freshwater tank behind the portside, outboard bulkhead inside the head compartment.
This afforded new storage below the V-berth and eliminated the stench of a saltwater overboard discharge and holding tank system. For the short-range sailing I would undertake in these refined years of my life, the modified freshwater system and sanitary system would be functional and efficient.
A good deal of master planning and multitasking now had to happen to accomplish the remaining elements for the restoration and refit. Fortunately, my engineering background, experience in boat restoration, my own woodworking and canvas workshops, and the will to see things through enabled me to work this in while still running my personal life and business.
Going Electric
Along with the Atomic 4, I jettisoned the associated exhaust, controls, and fuel tank. I considered repowering with diesel, but being a “non-techno wizard” who is willing to try new, cleaner, and greener options, I researched electric propulsion.
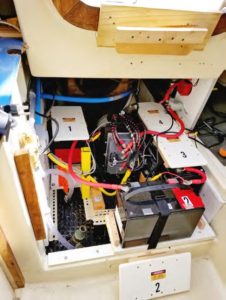
Electric Yacht was the answer, and I decided to go with the 10-kW QuietTorque (QT10) electric motor system. Electric Yacht’s team was extremely helpful when it came to planning, and we worked out answers to questions, among them, would the electric motor and needed batteries fit in the original engine compartment?
I set up the motor and battery configuration as a full-scale template drawing. This confirmed that the motor and four 100 amp-hour 12-volt AGM batteries would fit. However, I was 100 amp-hours short of what I needed to sustain a four-hour run. I sacrificed the port quarter berth to store a second battery bank identical to the first, and that did the trick—48 volts DC and 200 amps of clean, quiet propulsion.
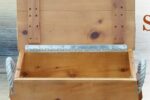
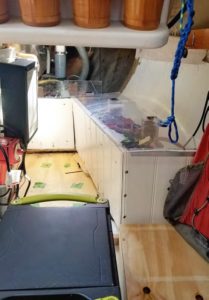
I fabricated a new electrical panel and located it on the bulkhead between the saloon and the head. This minimized wire run lengths and offered a place to store two deep-cycle house batteries below the electric panel. To do this, I built a sliding, locking battery tray within the forward cubbie area of the starboard berth in the saloon. The remainder of the berth works very nicely for seating and is quite comfortable. This battery tray is behind a louver that provides ventilation.
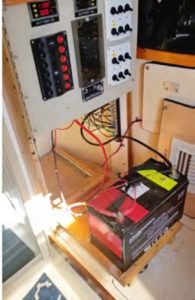
I installed all new wiring and switching for the DC system and new wiring for AC shore power. I charge the motor’s batteries with shore power, which is enough for my limited needs. However, just in case, I keep an 1800-watt, low-decibel generator on board that can charge the propulsion batteries. If I need AC power for small appliances like a coffee pot or phone charger, I use a self-contained Goal Zero Yeti 1500x Portable Power Station that provides safe, clean 120-volt power.
For the running gear, I wanted to swap the existing feathering propeller for a more reliable fixed-blade prop. On eBay, I scored a “vintage” three-blade, 12-inch, 10-degreepitch propeller and had it reconditioned. eBay provided a new shaft seal as well. I bought a new shaft bearing from Defender and attached everything to the boat’s 7/8-inch shaft.
Changes on Deck
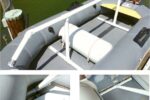
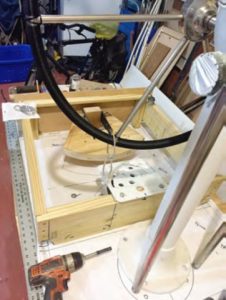
My Pearson came with a tiller, and I wanted to convert it to wheel steering. Like the propulsion, this conversion required detailed planning. I designed several actual-size templates and painstakingly fabricated a raised platform from plywood and fiberglass to house the cable-drive quadrant. I mounted a “vintage” Edson pedestal (eBay again!) to this platform. The cable-drive quadrant beneath the pedestal attaches directly to the tiller fitting on top of the rudder post. I cut down the tiller and stored it in the lazarette to be used as an emergency tiller.
Another big cockpit modification was moving the mainsheet traveler from the cockpit to a location over the companionway, as far forward as possible without stressing the boom. (I had done my research and knew how to make this conversion safely.) I mounted the traveler track with raised supports that I built of AZEK, through-bolting them with stainless steel bolts and backing plates. For aesthetics, I covered the backing plates with compact wooden boxes that contain lights, but I can still easily access the fasteners for inspection and any needed tightening.
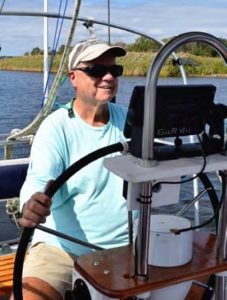
Now, I can control the mainsheet via a fairlead back to the port winch by the helm.
When it came to the sails themselves, I replaced the old main with a new fully battened mainsail. It’s a little shorter than the original to accommodate the slightly higher boom, which I raised to gain headroom in the cockpit and clear a newly installed sectional bimini. (I fabricated the bimini in my workshop and added light-diffusing, see-through center panels that let me see the mainsail while maintaining shade in the cockpit.)
Lazy-jacks make the mainsail easy to lower and stow, and other than going to the gooseneck to reef, there’s really no need to leave the cockpit to tend it. Likewise, the headsail; I’m a fan of hank-on headsails, and most of the time I use a 125-percent working jib. I installed a downhaul that’s attached to the headsail halyard and leads aft so I can easily lower the headsail from the cockpit. Lifeline netting prevents it from falling overboard.
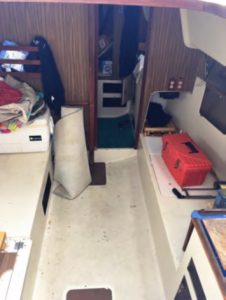
Comforts Below
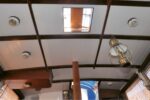
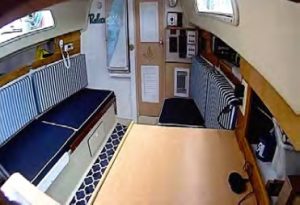
When it was time to turn my attention belowdecks, I gutted the interior and refinished it with laminate PVC board and PVC beadboard to provide a bright, cheery environment instead of the customary dark, wood-rich panels. I dressed up the cabin sole with removable carpet runners stabilized with nonslip backing. And, I reupholstered everything with Sunbrella. Finally, I replaced all the lighting with dry-cell-powered LED that’s not dependent upon the house battery for power (only navigation, communication, and safety devices use the house batteries).
In August 2018, three years and about $12,000 later, Kenzie Too splashed for the first time. Since then, she’s been a joy to sail. Of course, she’s an ongoing work in progress, but I know of very few boats that aren’t. It’s all part of owning a very good old boat—all it takes is time, attention to detail, and patience.
Jess Hall knew at a young age that he wanted to go to sea; he ended up on a Merchant Marine training ship at age 16 and then joined the Navy. In 2010, he founded a boat repair and restoration business, mainly working with wooden boats, and since has spent much of his time involved with boating in one form or another.
Thank you to Sailrite Enterprises, Inc., for providing free access to back issues of Good Old Boat through intellectual property rights. Sailrite.com