Installing GFCI outlets is an easy way to
make your shorepower system safer.
Issue 145: July/Aug 2022
Ah, shorepower. Love it or hate it, it’s important, especially if you are a liveaboard. In a cold or wet climate, it lets you run dehumidifiers or heaters to keep the onboard climate pleasant. However, due to the high voltage (120 in most of North America, 240 in Europe), it has the potential to be more dangerous than the 12-volt DC system.
Luckily there are a number of simple steps you can take to make it safe. Probably one of the easiest and most effective of these is to install GFCI outlets.

GFCIs (or ground-fault circuit interrupters) are amazing things. They are roughly the same size and shape as a normal outlet and fit in the same receptacle, yet they’re able to monitor the amount of electricity flowing in both sides of the circuit. If a discrepancy is found, the GFCI breaks the circuit in as little as one tenth of a second.
This is useful, because any such discrepancy is likely due to some kind of ground fault, and that “missing” electricity is now going through your body on its way back to ground, which tends to be extremely bad for your health.
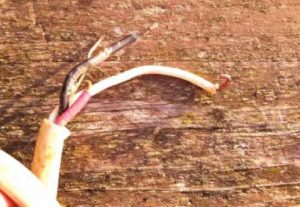
After sensing a change and breaking the circuit fast enough to avoid any possibly fatal injuries (although there is still the possibility of a burn), the GFCI needs to be reset, by pushing a small button on the device, before it will conduct electricity again. If it refuses to stay activated and keeps popping, you have a problem. Disconnect the shorepower plug and investigate the circuit to make sure you have no chafed wires or something similar.
You can buy a standard GFCI for less than $20, and you only need one per circuit. If you install a GFCI as the first outlet in each circuit, any normal outlets installed after the GFCI in the circuit will still benefit from the protection. They are standard in newer boats and in houses anywhere there may be water, such as bathrooms and kitchens, but good old boats tend to not have them.
Installing a GFCI
First and foremost, if you are at all unsure about how to change your outlets, hire an electrician. One-hundred-twenty volts can and will give you a nasty, possibly fatal shock.
Assuming you do know your way around electrical outlets onboard, here’s how to install a GFCI. First, turn off your shorepower breaker, then unplug your shorepower lead from the dock end first; this ensures that the boat end isn’t a live end hanging around, just ready to be dropped in the water. Then unplug the boat end of the cable as well for good measure in case Bob, your overly helpful neighbor, plugs in the dock end while you are elbow deep in the guts of the AC system.
If your boat has an inverter, make sure that it doesn’t automatically turn on when the boat is unplugged (some do). The safest practice is to use a voltmeter set to AC volts and check the outlet you are replacing to make sure it is not powered before you do anything else. If you don’t know how to use a voltmeter, then you should hire an electrician to do this job.
Next, get your tools ready, and then go recheck that the shorepower cable is unplugged. Yes, really.
Now for the fun part. Installing a GFCI is as simple as removing the old outlet, removing the wires from it and then attaching the new GCFI outlet.
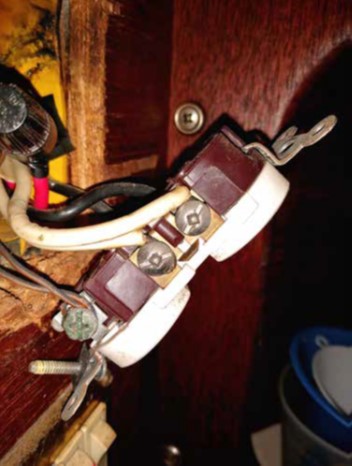
A couple of things to check while you have the old outlet out: First, check that the wire colors actually match up to the correct location on the outlet and that the neutral, live, and green wires are the colors you expect. Check that the wire is stranded wire, not solid, and check for any signs of overheating such as scorch marks or melted areas.
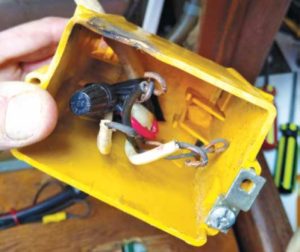
A lot of old electrical outlets in older boats are attached by simply tightening the stripped wire under a screw. This is poor practice.
Instead, add a heat shrink ring connector onto the end of each wire and use those to attach to the GFCI. Double check you are attaching the correct wire to the correct place. They are usually marked, and the screws are color coded, but still—check! Attach the wire for downstream outlets the same way, using heat shrink ring connectors instead of any bare wire.
Then it’s just a matter of screwing the GFCI outlet into place in the wall (they usually screw into the electrical box), putting the faceplate on, and testing.
One thing that confused me originally is that many GFCI outlets come already “tripped”—you have to press the reset button on them to get them to work. Once done, you can test by either using a cheap household receptacle tester (less than $20) or plugging in a lamp. If it refuses to reset and keeps instantly tripping, then you have a problem. Disconnect all the power and call an electrician.
If it all tests out OK, then you are done. Repeat for the first outlet in each circuit, and then celebrate having a safer boat by using your favorite 120-volt household appliance (I’d suggest a margarita blender!).
Matt Parsons has been living aboard and cruising sailboats for 10 years. He currently lives on Sooner, a Rafiki 37, in Victoria, British Columbia, and keeps a blog at saildivefish.ca.
Thank you to Sailrite Enterprises, Inc., for providing free access to back issues of Good Old Boat through intellectual property rights. Sailrite.com