A lack of insulation leads to a fridge overhaul and new stylish countertops
Issue 153: Nov/Dec 2023
When my husband, Chris, and I were first looking at boats in 2018, we were young college students in search of a future home afloat. Chris grew up on the San Francisco Bay sailing aboard his family’s Mason 43, laying the foundation for his love of sailing. We went into the boatbuying market armed with knowledge and did our best to remain realistic with our budget, wants, and needs. Never did we think we would ever end up with a boat like our 1979 Cheoy Lee 41, Avocet.
The first time we stepped aboard Avocet, it was not love at first sight. Although her size and teak interior brought a sense of familiarity, I couldn’t immediately overlook her unique design that was different from anything I had ever seen. Chris, a master of seeing the bigger picture, urged me to try and “imagine” with him. After spending an hour going through all of Avocet’s nooks and crannies, I finally began to see her potential, but what really sealed the deal for me was her galley.
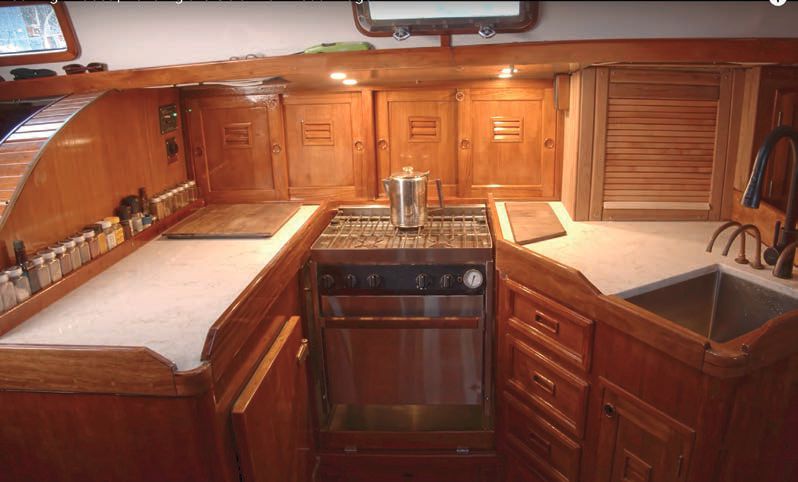
The galley is to port and set at midship, with spacious countertops and the biggest fridge we have ever seen on a 41foot sailboat. After signing the papers and moving aboard, we made use of that galley every day, cooking all our meals on board and enjoying the massive amount of space and storage. Despite our admiration for our sweet galley, it had its downfalls and was in dire need of an update that eventually led to our full galley remodel.
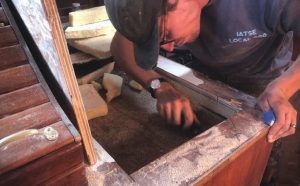
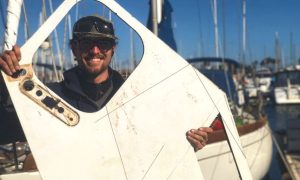
This project, like many do, started with one goal in mind but quickly grew into multiple ones. Our fridge insulation, or lack thereof, was causing our compressor to run constantly, which was extremely inefficient and put an unnecessary strain on our recently upgraded lithium batteries. When we ripped the stained, oncewhite Formica off and cracked open the lid to reveal what was in the “walls,” we laughed at the discovery. We found extremely wet insulation that didn’t surround the entire fridge, but rather, started at the top, shrunk toward the bottom, and was nowhere to be seen on the back or front walls of the fridge. At most, we saw 3 inches of insulation, but in most areas it was only about an inch.
With the fridge cavity gutted, it was a large and empty shell full of opportunities. After researching our options, we decided to insulate the space using four layers of 1inch, 4 x 8inch sheets, which can be purchased from nearly any hardware store — unless you reside in California like we do. The insulation is not available in the state, so we had to take a quick road trip to our neighbor state of Nevada to stock up on “boatlegged” products.
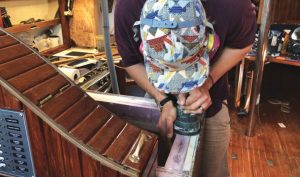
In the original plans, Chris was going to build the fridge on top of the fiberglass reinforced plastic (FRP) liner that was in the old fridge layout. The fridge had a flat floor, and recreating that seemed to be the path of least resistance. However, after seeing how much space was wasted in the original footprint, we decided to cut the entire liner out and start from scratch. After removing the panels, we discovered that the two main galley bulkheads weren’t actually tabbed to the hull on the inside of the fridge well. After some serious time with a grinder, Chris was able to tab two layers of 1708 biaxial fiberglass connecting the bulkheads to the hull, reinforcing the structural integrity and giving us peace of mind.
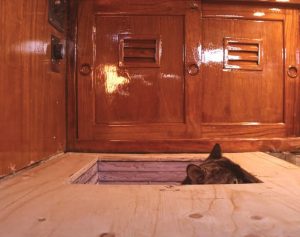
With a blank canvas and the curvature of the hull exposed, the space lost from the liner was reclaimed and we were able to put a full 4 inches of foam against the hull and still have more room inside than before. After reading a plethora of marine fridgebuilding articles, we decided it would be best to get our fridge walls, floor, and ceiling to an insulation rating of at least R20, since anything lower loses a significant amount of energy. To achieve our desired rating, we used 1inch thick insulation panels with an R5 rating and played around with different configurations and layers inside the fridge cavity, ultimately deciding on 3 inches of insula tion on all walls, with 8 inches between the floor and engine compartment. With this design, we gained a cool “secret” hiding place under the floor of the fridge, concealed by a teak grate, under which is a well that can hold up to 30 beer (or soda) cans perfectly!
After the dry fit, we sealed the insulation layers together with expanding foam, thickened epoxy, and Sikaflex291 LOT, morphing the once singular panels into proper pieces of our refrigeration puzzle and crossing a major part of the project off our list. The next step was to cover the delicate foam with something durable, easy to clean, and waterproof that we would see when opening the fridge. Between Chris, his brother, Jon, and me, many ideas were thrown around about what material to use.
After much debate, we finally settled on using a FRP board attached with thickening epoxy rather than fiberglassing, because it was more costeffective as well as timeefficient. Fully glassing in the fridge would have taken approximately 2 gallons of resin, a good amount of cloth, and around a gallon of paint, plus many hours of sanding and fairing between dry times. The FRP board was $60 for two 4 x 8foot sheets and only required half a gallon of resin — and the best part about this decision was no sanding required!
With the FRP board in place, Chris mixed some more thickened epoxy with a white pigment and ran the fillets on all the hard corners of the fridge where the edges of the board came together. Two weeks of work later, Avocet finally had a very watertight and airtight fridge, and it was time to quite literally top it all off.

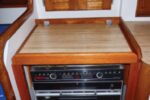
When we removed the aged Formica countertops, we knew we wanted to replace them with a material that could stand the test of time — something scratchproof, heat resistant, good for baking, and not too heavy. After searching high and low for the perfect fit, we met with a local shop that shared with us their incredible inventory and were excited to work with us and our oddshaped templates. After hours of perusing the options, we decided on quartz because it met our criteria, with the exception that it was heat tolerant, not heat proof. Other boat owners might be concerned about weight, but since our galley is mostly centerline, it wasn’t that big of a deal, especial ly since it leveled out the boat’s previous slight list to starboard. Altogether, the countertops weighed around 120 pounds.
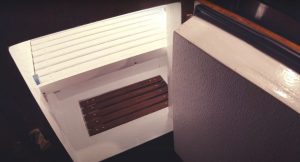
While the fridge is a front (or side) access, our freezer is accessed from the top. Instead of replacing it with quartz like the rest of the countertops, we created a new lid out of butcher block that was much lighter and added a beautiful contrast, complementing the other wood and pops of white in Avocet’s interior. With the fridge and freezer interior ready to be filled, Chris repurposed the old shelves to account for the new design, then added a divider between the fridge and freezer, making sure it can be removed for cleaning and for access to the cold plate when it needs to be replaced.
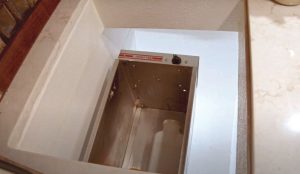
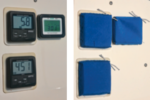
Our Sea Frost cold plate was installed by the previous owner, and although the unit is not new, it has a lot of life left and was made by a company that still is in business and can offer support and spare parts if needed. When the fridge was finished, I did the honors of turning it on for the first time in weeks, putting our work to the test. The new ½inch rubber seals and new bronze latch and hinges on the fridge door kept the cold air in and all else out, ensuring our food would stay fresh longer. To satisfy our obsession with our work and make sure the fridge’s contents were properly refrigerated, we installed a Bluetooth temperature recorder so we could access instant data from our phones, allowing us to follow the fridge cycles and our use of the doors, making us more efficient in our everyday use.
With the fridge primed and cold, we went on a proper shopping trip, filling the space to the brim with fresh produce, frozen goods, and other items for a family excursion to Santa Cruz Island to celebrate a job well done. We had enough food to keep our extended family of eight fed for a month, and even after our return from the island, the remaining produce stayed fresh for an additional three weeks, proving that we had solved a major issue aboard, and ensuring we would not go hungry if food was stored correctly.

As we continue to whittle down our project list and reflect on how far we have come, this remains one of our favorite projects. It made life aboard more comfortable and has inspired us to carry on and escape the breakwater, sailing into the sunset with the promise of icecold drinks wherever the anchor drops next.
Marissa and her husband, Chris, have lived aboard their 1979 Cheoy Lee 41, Avocet, since 2018, preparing to sail the world. They recently cast off their docklines and have been cruising the Pacific coast since 2022. You can follow their adventures on www.svavocet.com and on their YouTube channel, Sailing Avocet.
Thank you to Sailrite Enterprises, Inc., for providing free access to back issues of Good Old Boat through intellectual property rights. Sailrite.com