How 3D printing can help create new or replacement parts aboard
Issue 154: Jan/Feb 2024
As an engineer, I’ve been intently watching 3D printing technology develop over the last decade. At its inception, I viewed it as a toy, making trinkets and a few useful things, but I’ve changed my tune in the last few years as this technology has developed.
There are a couple of reasons for this change of heart, the big one being that the cost and quality of 3D printers have improved dramatically in the past few years, and 3D printers are now much more common and accessible. Also, the software needed for drawing the desired parts has improved, and free versions are available that will suffice for simple parts.
A 3D printed part is a component that is made in an additive manner — a basic 3D printer dispenses melted plastic, building up from a base plate to make whatever shape is programmed. It is essentially a layer cake of many layers. There are more complicated variations if complex shapes or higher strength are needed. There are high-tech 3D printers using carbon fiber-infused materials, and printers that print metal; these prints can be heated to fuse the metal together, creating parts that rival the strength of machined parts. High-tech printers are being used in Navy ships, allowing the Navy to print spare parts, thereby reducing the quantity of parts required onboard and downtime.
Realistically, we aren’t quite at that stage where many sailboat owners are going to have a 3D printer on their boats. I won’t be printing a replacement part onboard anytime soon, but there are absolutely parts that can be printed for a good old boat.
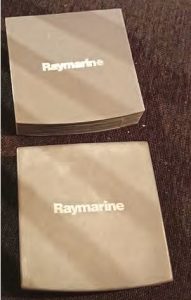
The first step is to get or make a software file of what you want printed; that will typically be in STL format, as most 3D printing software will use this type of file to generate the print path needed to print the part. To make the file, you will need to draw the part with computer-aided design (CAD) software. Alternatively, if it is a part that someone else might have needed, you can try searching the internet for a file. One of the larger online repositories of 3D part files is Thingiverse, where designs that other folks have created are available to download. Need a new sun cover for a Raymarine display? A spacer to put under a cam cleat? These are things for which others have already created digital design files.
Next, you will need to print the file. There are several options for this. Check your local area for a makerspace, a communal workshop where tools and equipment are typically available for use; in my hometown, the local library has a makerspace lab that has a couple of 3D printers. If that’s not an option, ask around and see if you know anyone with a 3D printer. They are more common than you might think, and people who own them tend to be enthusiastic about them, so it may not be hard to convince them to print you some parts. If local options are not available or if you are looking for a higher-strength part, you can look at online printing services. These are services that print on demand, use high-end machines, and offer exotic materials.
Material selection is important. How strong does it need to be? How will it be loaded (compression or tension)? Will it be exposed to UV light? Can and will it be painted? These questions influence both the materials and how a part is designed. The printing orientation will influence strength in the same way as wood grain influences the strength of a piece of wood — in a 3D-printed part, the join between layers is the weak axis, similar to grain in wood.
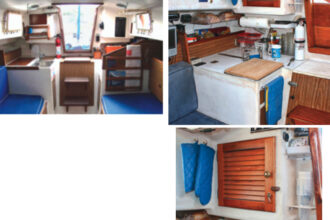
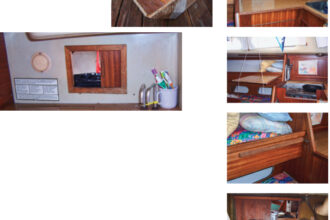
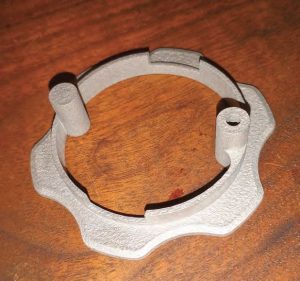
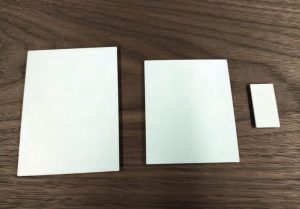
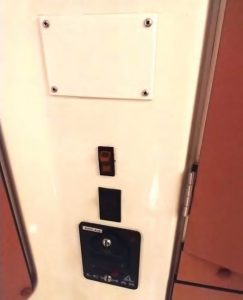
My first example is a very practical application for a good old boat — cover plates. Most boats have had things installed that no longer work or have been replaced with something better, leaving a hole to be filled. On our CS-36, Plan B, there were a couple of these in the head; there was a holding tank treatment system that was long defunct, and for some odd reason, the breaker for the windlass was in the head. After removing the associated wiring, I was left with three holes in the bulkhead. Pre-3D printer, I would likely have cut some aluminum plate and screwed it in place. But 3D printing is now another option.
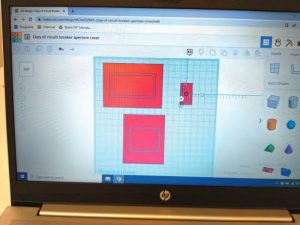
I started by drawing up the cover plates, using the free online software Tinkercad with the cheerful assistance of Luke at the library. I drew thin plates with raised sections that would fit into the holes in the boat and keep things located well. Once these were drawn as STL format files, I then converted the files and printed them in our library makerspace. I gave the resulting pieces a light sanding, spray-painted them to match the color of the wall, and glued them into place. The repair looks great.
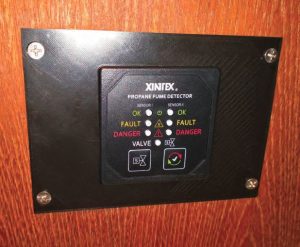
Shortly after I installed the cover plates, the propane sniffer on our boat stopped working. As with most electronic things, a new one is a different size — in this case, much smaller. I could have cut and painted an aluminum adapter plate, but instead, I drew an adapter plate and printed it. It’s light, won’t corrode, and inexpensive — all good characteristics for a boat!
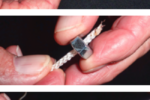
A more advanced example is within a pair of Lewmar 3-speed winches on Plan B, one of which wasn’t working properly. Upon disassembly, I discovered that a plastic piece that locks out the high-speed pawls so the lowest speed will engage in the winch had broken. I drew the piece up in higher-grade CAD software, as the geometry is much more complicated. I had the local library print the part, and I installed it; but while the fit was accurate, the part did not survive in use. So I went to the other extreme and had it 3D printed in stainless steel, laser-fused, by an online company.
Having the part printed was fairly easy; the challenge was creating the CAD file for an unusual shape. Drawing unusual parts with CAD may not be as accessible a skill for the average individual, but if you know a mechanical engineer, you may find that a six-pack of beer goes a long way toward getting parts copied.
For myself, 3D printing has become another tool in the toolbox. It has strengths and limitations — as do all the tools in my toolbox. It makes it possible to create things that would otherwise be very difficult or very costly, or are simply obsolete and unavailable. So I’m sure I will use this tool again.
What’s next? I’ve got some halyard cleats to install. A friend has printed up some stanchion-mounted blocks for his furling lines that look interesting. And one of the jib tracks on Plan B has a cracked end piece. There’s always something on a good old boat!
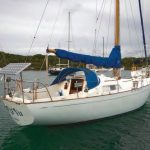
Graham Collins is a mechanical engineer who builds anti-submarine detection equipment by day, runs a craft distillery after hours, and finds time here and there to work on Plan B, a CS-36T, and sail her in the waters of Nova Scotia.
Thank you to Sailrite Enterprises, Inc., for providing free access to back issues of Good Old Boat through intellectual property rights. Sailrite.com