A repower in rural Alaska required precise planning and helpful hands.
Issue 130: Jan/Feb 2020
Wide awake in my bunk, I stared at the ceiling without really seeing it. It was nearing 3 a.m., and my mind was racing, jumping from lists of jobs and parts to technical details about proper system setups, from whether the engine mounts would work to what details I may have overlooked. Anxiety, excitement, and a bit of trepidation swirled at the prospect of the impending repower of our 1984 Grand Soleil 39 Yahtzee, a project I was taking on mostly on my own as winter approached in Seward, Alaska.
I know now that sleepless nights are part and parcel of the process. When my wife, Jill, and I decided to install a new engine, saildrive, and transmission in Yahtzee, we obviously had a lot to think about and plan for—in some ways, more than we ever imagined.
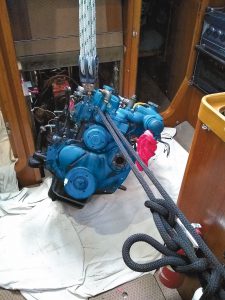
Our old Bukh saildrive was slipping badly and either needed to be removed and rebuilt or replaced. Several mechanics recommended that we pull the old 50-horsepower Perkins and rebuild it at the same time. Doing the math put us well into the ballpark of replacing everything and made the decision to repower quite easy. But with what?
I’d been researching an engine repower for several years and had whittled it down to Beta, Yanmar, and Volvo. All three would fit our engine mounts, the saildrives were compatible, and cost was similar. What I really wanted in an engine, though, was the ability to do most of the work myself. With long-distance cruising in mind, my overall goal was to learn as much about the new engine and its systems as possible, which would allow me to better troubleshoot and work on it in remote areas of the world.
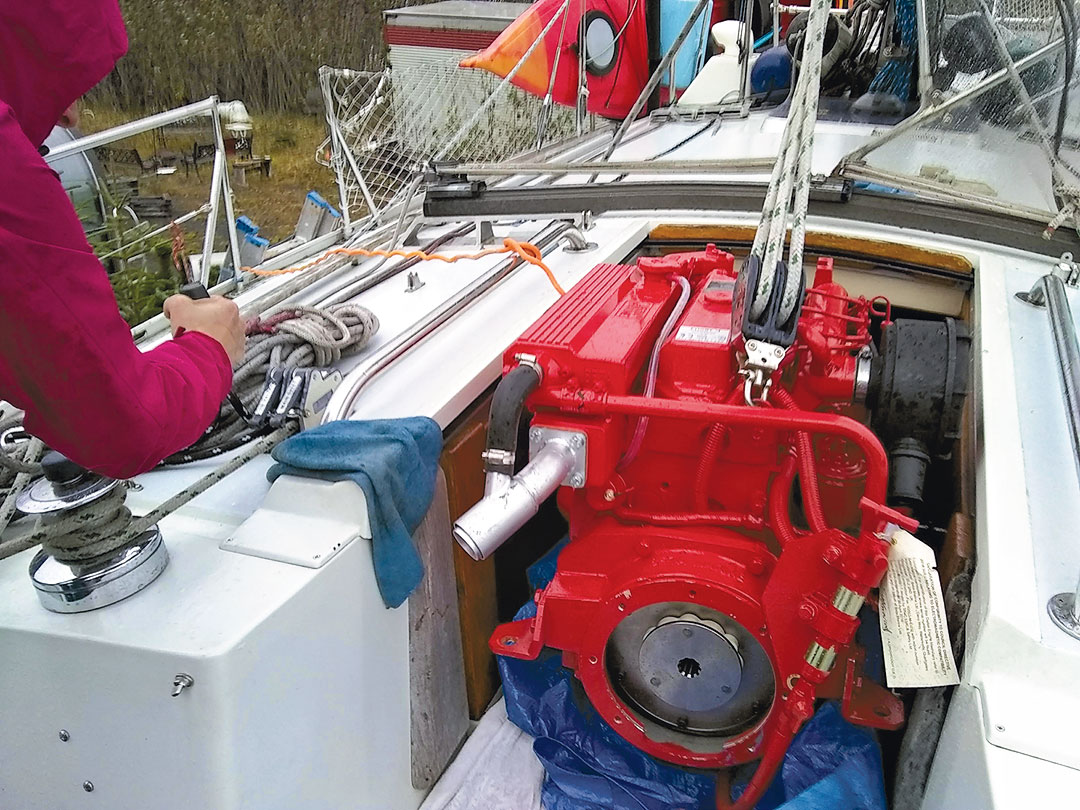
For this, I browsed sailing forums, called company representatives to talk about the labor involved, and consulted with experienced friends who had installed each brand. One had installed a Beta earlier in the year, and another had completed an engine repower with a different brand, wasn’t happy with it, and had switched to Beta. A shiny red Beta 50 saildrive became our clear choice.
With that decision made, more questions arose. Where to put the boat to do the work? Should a mechanic do most of it? Can I do an engine repower myself? Do I take the old engine out and have a mechanic put the new one in? Do I have a mechanic check my work and lend a hand as needed? In the end, I did most of the work myself but relied on friends, family, and a seriously excellent mechanic for advice and guidance.
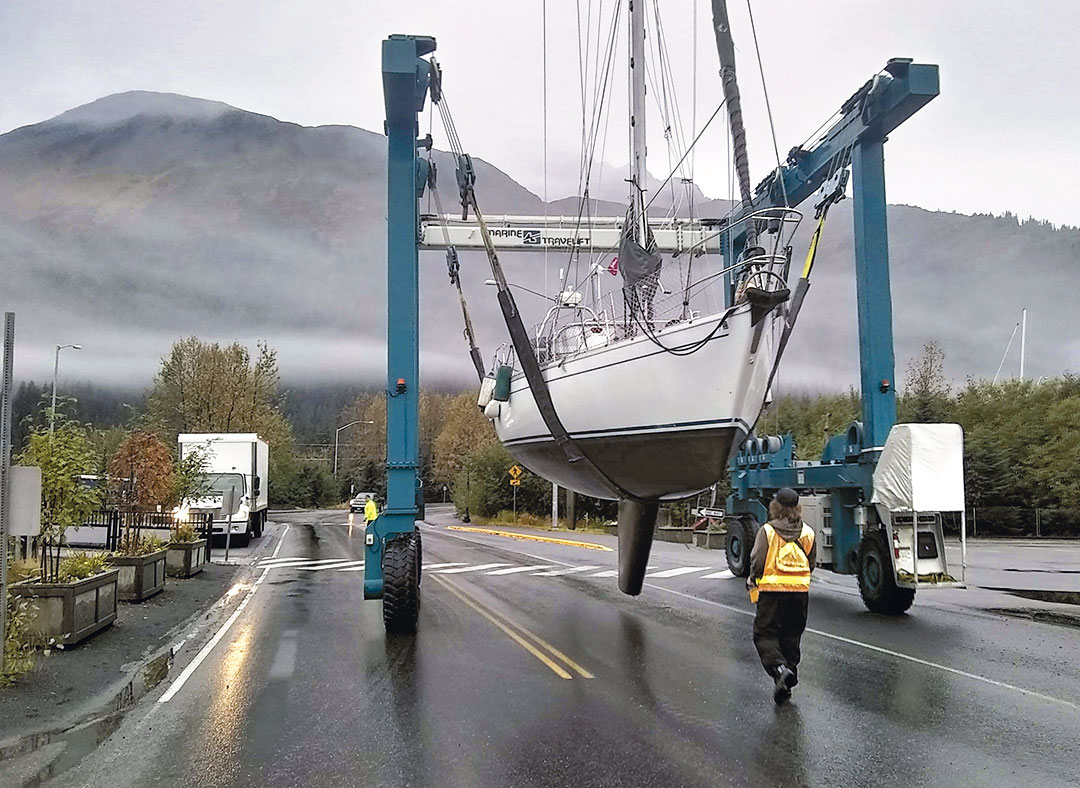
We were fortunate enough to live one block away from Yahtzee on a friend’s boat in the marina during the repower. The project (not including the research and prep time) took me six weekends working full-time and some part-time work on weekdays. I spent $1,600 in labor versus the estimated $7,000 if I’d hired the job out. Along the way I learned a lot. Following are some key takeaways.
Mission Creep
I thought I was ready for parts and projects galore. But, I was astonished by the sheer quantity of boat parts and the associated projects that needed to be organized before and throughout the repower. What helped me keep everything relatively orderly and efficient was to think about each system of the new engine and map out what it would need to be fully complete: wiring, throttle and gear cables, cockpit control panel and gear shifter, raw water and exhaust, lubricants, fuel lines and filters, and much more. Each system needed specific parts, some of which could be repurposed from the old engine and others that came with the new engine. And yet, some of the parts I got and were confident would fit, well, didn’t.
Beta engines come with a new control panel and the associated wiring harness to hook the panel to the engine. Our new Beta’s harness arrived in a tidy coil, and after stretching it out and measuring, I was sure it would be long enough. But when I reassembled the aft cabin—through which it had to run—and hooked everything up, the cable was literally an inch short because of two tight bends it had to make en route. I sourced a new one from Beta relatively quickly, but it was a part I hadn’t worried about because I thought it would fit.
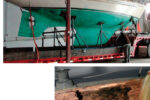
Also, with the boat on the hard, there were a host of other projects to complete as well. During the first week or so out of the water I didn’t even touch the engine. In unseasonably gorgeous weather, I waxed the hull, prepped and painted the bottom, and worked on several other miscellaneous projects that could only be done on jack stands.
Homework and Time Management
This was by far the largest project I’d completed on a sailboat, and while I had some serious nerves before and during the work, it ended up being mostly in line with my expectations. Three things helped immensely: doing my homework, managing my time, and having a mechanic from whom to seek guidance and, in some cases, reassurance that I wasn’t messing it up.
Engines come with a manual detailing the installation process, listing parts, and providing do’s and don’ts. When seeking guidance on purchasing our new engine, numerous people told me that Beta’s installation instructions were well organized and easy to follow. With that in mind, I read the manual cover-to-cover several times and made lists along the way of parts and jobs that would need to be completed. This led directly into estimating time and mapping out projects.
Time is something that we always seem to underestimate on any boat project, so I framed a rough schedule. I started by estimating how much time I could devote to the entire repower from start to finish—knowing that delays could and would set me back. Then I cut it into step-by-step chunks, figuring what parts would be needed and how long I thought each would take.
My time estimates for each job were based on my years of experience working on boats, coupled with knowing that I had six full weekends with no other commitments. I planned larger jobs for the weekends and used my time during the week to complete smaller jobs or get organized for the weekend.
For example, getting the old engine out took two days. Refurbishing the engine compartment took 10. Installing exhaust, fuel, and electrical systems took five. And the final engine and saildrive install took another five. Granted, these weren’t all full eight-hour workdays, but it took time to chip away at everything going on.
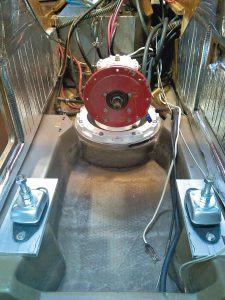
At 10 days, refurbishing the engine compartment took the biggest chunk of time. This estimate was a slight guess, but I also consulted with a good friend who had installed a Beta a year before. It took him a week to get the compartment ready for the engine, so I stretched my estimate to 10 days—in part because I knew we had to replace the compartment’s decades-old insulation, which had degraded and was no longer very effective. It was peeling off in several places and smelled like musty diesel. Once we ripped it out, the old adhesive was tough to remove, and it took many hours of hand- and power-sanding to clean the surface. Then, the task of cutting and installing the new insulation was like fitting together a tight puzzle in an oddly shaped box. Only when we finished the new insulation could we install and prep the fuel system, exhaust system, electrical and steering cables.
Also, I built in spare days for incidentals like acquiring parts. Given our location in rural Alaska, I knew this was going to present a challenge, and I was proven correct when the only engine shop in town had one control cable of the correct size and length and said it would take 14 days to get a second. I then had to figure out the next time I or someone I knew could drive four hours round-trip to Anchorage over multiple mountain passes at the end of October to get one. It took a few days, but I was glad I didn’t have to hurry.
Another factor in my time equations was that my consulting mechanic was a very busy guy— aren’t all good mechanics? I had to work his availability into my schedule, which made moments with him crucial. In the end, from the initial engine and transmission diagnosis and decision to repower to completion of the project, I used 16 hours of his help at $100 per hour.
Many Hands, Light Work
Going into this major project I knew I would be working by myself most of the time. Jill would be working her day job or hanging out with our two boys, well-intentioned friends who had promised help would suddenly be busy, and my mechanic had little time to give. So in addition to watching the boys, Jill’s assistance was critical. She helped clean the engine compartment, take apart the old transmission, get the new engine down below, and drop it into place, among many other things.
Along with Jill, my dad swooped in from Michigan for a week to take over the engine compartment refurbish, a nasty job. Scraping, sanding, and installing new sound insulation was a huge undertaking and it turned out beautifully. It was great to work alongside him. We made a good team, and he took an enormous amount of work off my plate so I could concentrate on other things. I truly couldn’t have done it without either of them.
Good Housekeeping
Repowering was a mess of colossal proportions, so it was critical to stay clean and well organized to minimize the chaos. A dusty boatyard and rain brought dirt and grime on deck and down below. The old engine and transmission were tremendously greasy, and all of their associated parts were covered in some amount of oil, coolant, seawater, rust, and filth.
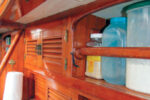
To keep our working environment as clean as we could, I kept a Shop-Vac at the ready to suck up particulate from fiberglass, wood, and old insulation that at one time or another would swirl around the cabin and try to find their way to nearby electronics and new engine parts. Gloves, rags, and towels with degreaser, acetone, and mineral spirits stood by to wipe down surfaces and tools. We learned this the hard way when coolant unknowingly seeped from the old engine during removal and then got tracked around inside and outside the boat—not a fun cleanup.
The repower was also an ongoing explosion of boat bits and tools, which made it vital to organize each project and its associated parts. What worked for me was to have each system or series of parts and tools set aside in boxes or stored neatly. I could then focus on a specific task and move forward step-by-step working through each job. I used a combination of Tupperware tubs and Ziploc bags to organize and contain the nuts, bolts, bits, and bobs that seemed to spawn exponentially, plus cardboard boxes for larger items. I also had several heavy-duty clear plastic bags that became a catch-all for random pieces. Labeling was key, which meant a Sharpie lived in my pocket.
Yet, even with all my best organization, things had a way of disappearing, which would lead to lost minutes and even hours searching through the rubble. During the engine removal, I needed a specific, long, needle-nose Vise-Grips to reach a particular nut and hold it fast while I turned the other end. I looked everywhere for this tool inside the boat, through every tool kit, bag, and parts bin that I could find. Of course, I found the Vise-Grips underneath the boat when I was leaving for the day.
By far the biggest mess was refurbishing the engine compartment, mostly because it was an extremely awkward space to physically work in and it had seen a lifetime of abuse. My father spent hours lying upside down and contorted, sanding fiberglass and wood while the air around him turned into a cloud of dust. He could only hold the position for so long before needing to readjust, climb out, and take a break. Despite the level of difficulty, it was important not to rush this job. The compartment had to be impeccable when we dropped the shiny new power plant in, so it required a significant amount of cleaning time, followed by getting the engine mounts square and the insulation, hoses, wires, and filters cleanly installed.
Expect the Unexpected
I certainly came into the repower knowing some unexpected things were likely to crop up along the way. How could they not? The trouble is, it was hard to know in advance what they’d be, and once we discovered them, we had to roll with the issues and figure them out quickly without getting frustrated. Easier said than done.
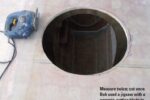
Our biggest of many “unexpecteds” was when the mounting collar on the new saildrive didn’t match the collar from the old drive. The bolt holes didn’t line up, and the fiberglass housing wasn’t a perfect fit. With guidance from our mechanic and help from Catalyst Marine Engineering in Seward, we had a 1⁄2-inch-thick aluminum spacer fabricated that we drilled, tapped, and mounted so that it would fit the old and new. But the unexpected didn’t stop there.
When the new spacer and saildrive were fully installed, we lined up the engine and launched Yahtzee. There was a small leak at the aft edge between the aluminum spacer and the fiberglass mount. Back on the jack stands, we took everything apart and found that a section of 5200 hadn’t fully set up, which left a small void for water to find a way in.
Our spotless engine compartment again turned into a work zone. We moved the engine forward, took out the saildrive, and scraped away the sealant. With everything apart, we realized that the 5200 had been too cold when first applied and didn’t fully harden. For round two, I built a tent under the saildrive, shot heat up into the bottom of the collar for 24 hours, and put an electric space heater above. This worked famously, and when the 5200 was rock solid, we dropped the boat back in the water. No leaks!
Through all the anxiety, sleepless nights, frustration, and sometimes elation, repowering Yahtzee was well worth the effort. She’s literally a different boat under power and ready to carry our family far and wide—which was the goal of the entire project from the beginning.
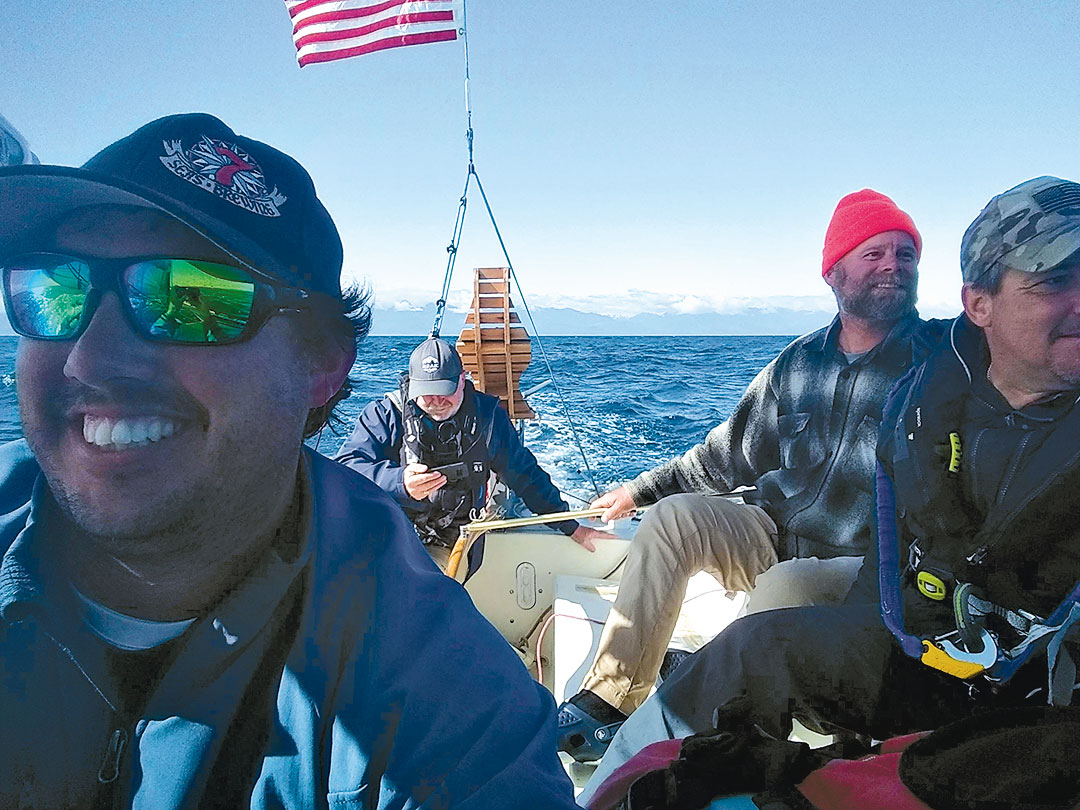
Since repowering Yahtzee, Andy Cross and his family spent the summer exploring the wild coasts of Central and Southeast Alaska. From there they sailed south to California and then Mexico, which is a bit warmer than Seward in the winter. Follow their adventures at SailingYahtzee.com.
Thank you to Sailrite Enterprises, Inc., for providing free access to back issues of Good Old Boat through intellectual property rights. Sailrite.com