An old, leaky hatch gets a makeover to stop the drips and add some special teak.
Issue 146: Sept/Oct 2022
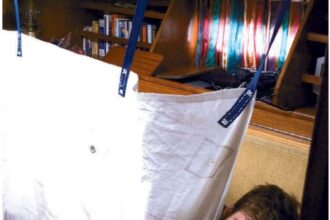
The original forward hatch on Calypso, the 1976 Bristol Channel Cutter that my husband, Jeremy, and I have owned since 1992, was a behemoth. Rising a full 4 inches above the fiberglass cabintop, it was so heavy it required two hands to lift. It also leaked badly. Rather than show off the varnish, we instead covered it with a lawn-and-leaf garbage bag topped with a canvas cover— hardly the look we wanted for a boat we prize in part for her aesthetics.
The hatch had leaked for a long time. The first repair, done about 10 years ago, involved encasing the whole top of the hatch in fiberglass cloth and epoxy. It looked terrible—milky epoxy and visible fiberglass texture—and worked as hoped only for about a month before it started leaking again. We were getting the boat ready to go to the Bahamas for a year with the kids and didn’t have any more time to deal with the problem, so out came the garbage bag. (That’s a pretty good stopgap, in case you were wondering.)
As part of our latest total overhaul and refit, the hatch got a complete makeover, including streamlining height and weight and building a structure that complements the boat’s aesthetics while keeping us dry.
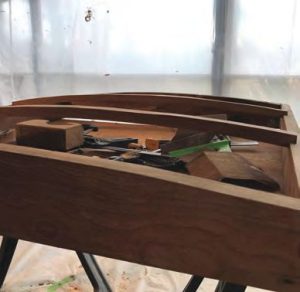
Bristol Channel Cutters are known for their workmanship, and though Calypso, hull #6, was built before the yard was doing anything other than hull and deck, her finish lives up to that reputation. The hatch is made of teak. Teak sides, teak strips. The latter run longitudinally on the top, while four horizontal teak bows, or ribs, on the underside hold it all together. Using as much of the original hatch as we could seemed to make a lot of sense from all kinds of angles (have you priced teak lately?).
We knew we wanted to make the new hatch a little lower, but we also wanted to maintain some of its elegant curve, while keeping both sides the same height using the original teak. We knew we didn’t want a flat hatch. Like so many things on a boat, finding this sweet spot was a combination of repeated measurements coupled with eyeballing the curve before getting out the jigsaw.
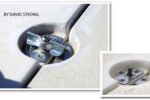
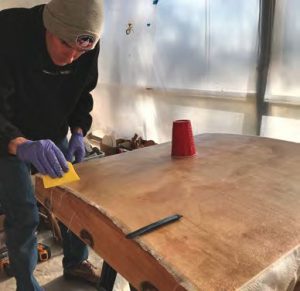
The original hatch top consisted of 1/2-inch teak strips running fore-and-aft and glued with 3M 5200. Over time, as the sealant cracked and separated, nothing held the strips together, nothing kept the water out. No wonder it leaked. The strips themselves were a mess of epoxy, 5200, and fiberglass; we knew we weren’t going to reuse them.
Still, the traditional look of the boat almost demanded some kind of wooden strip top. How to balance the aesthetic requirements with the need for the hatch to be leak-proof? Clearly, one-piece underlayment was the answer.
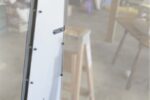
Rather than using expensive and somewhat scarce marine plywood, we experimented with MDO plywood, the kind used for exterior signs. We immersed a piece of it in a cup of water for two weeks to see if it would delaminate. It didn’t. We went with it. Using a single 1/4-inch piece laid over the teak ribs beneath, Jeremy formed the base for the hatch top, which he then coated with epoxy and covered with 1/2-ounce fiberglass finishing cloth.
Leak-proofing accomplished.
The teak strips for the finishing layer have their own story to tell. You see, Jeremy’s dad, Alun, is the one who taught him how to sail, on a kit boat thrown into a moving container when they were assigned to a post in Algeria. Alun long dreamed of going cruising. He bought a Beneteau First 42 for racing while he gathered his tools and pieces of gear, including a handful of long teak battens, for the cruising boat he’d eventually buy. Alun died just months before his cruising dream could come true; much of his tools and gear, including that teak, has come to us.
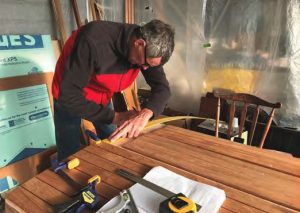
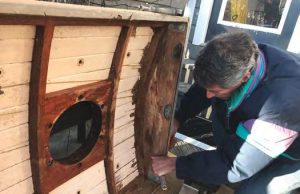
Jeremy measured carefully, figuring out the spacing between the teak strips so he wouldn’t need to source additional wood. After sanding the fiberglass smooth, he drew lines on the hatch top to indicate where each strip would go. This made it easy to place the strips correctly. Working three strips at a time, he painted each strip with epoxy, then glued it in place with thickened epoxy. Why three strips? He had clamps and weights for three strips, no more.
To finish the hatch off, the construction plans call for a brow all the way around that stands 1 inch proud of the hatch frame, which just felt insanely large to us. Instead, we used some 3/8-inch teak stock we already had on hand.
Finally, we applied SIS 440 Teak Deck Caulking from Teakdecking Systems (TDS) to seal all the seams and give it a nice traditional look.
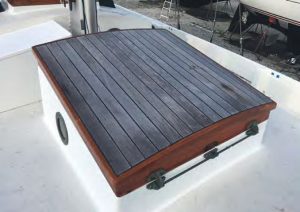
Now, the hatch mirrors more closely the curve of the deck. I can lift it with one hand from inside the forepeak. And, wonder of wonders, we can leave the canvas cover off even if it’s raining—no black garbage bag required.
Nica Waters and her husband, Jeremy, sail their Bristol Channel Cutter, Calypso, when they’re not refitting her. Now that they’ve added a second BCC to the fleet, the ratio of work to sailing time has increased, but they still hope to be heading for the Caribbean on Calypso in autumn 2022. You can listen to more of her on the Boat Galley podcast at theboatgalley.com
Thank you to Sailrite Enterprises, Inc., for providing free access to back issues of Good Old Boat through intellectual property rights. Sailrite.com